V2
Full FrameAuth Set Up From Start To Finish
A step-by-step guide to setting up FrameAuth from start to finish, covering authentication, payments, gated content, and going live.

Full set up
TUTORIAL
1
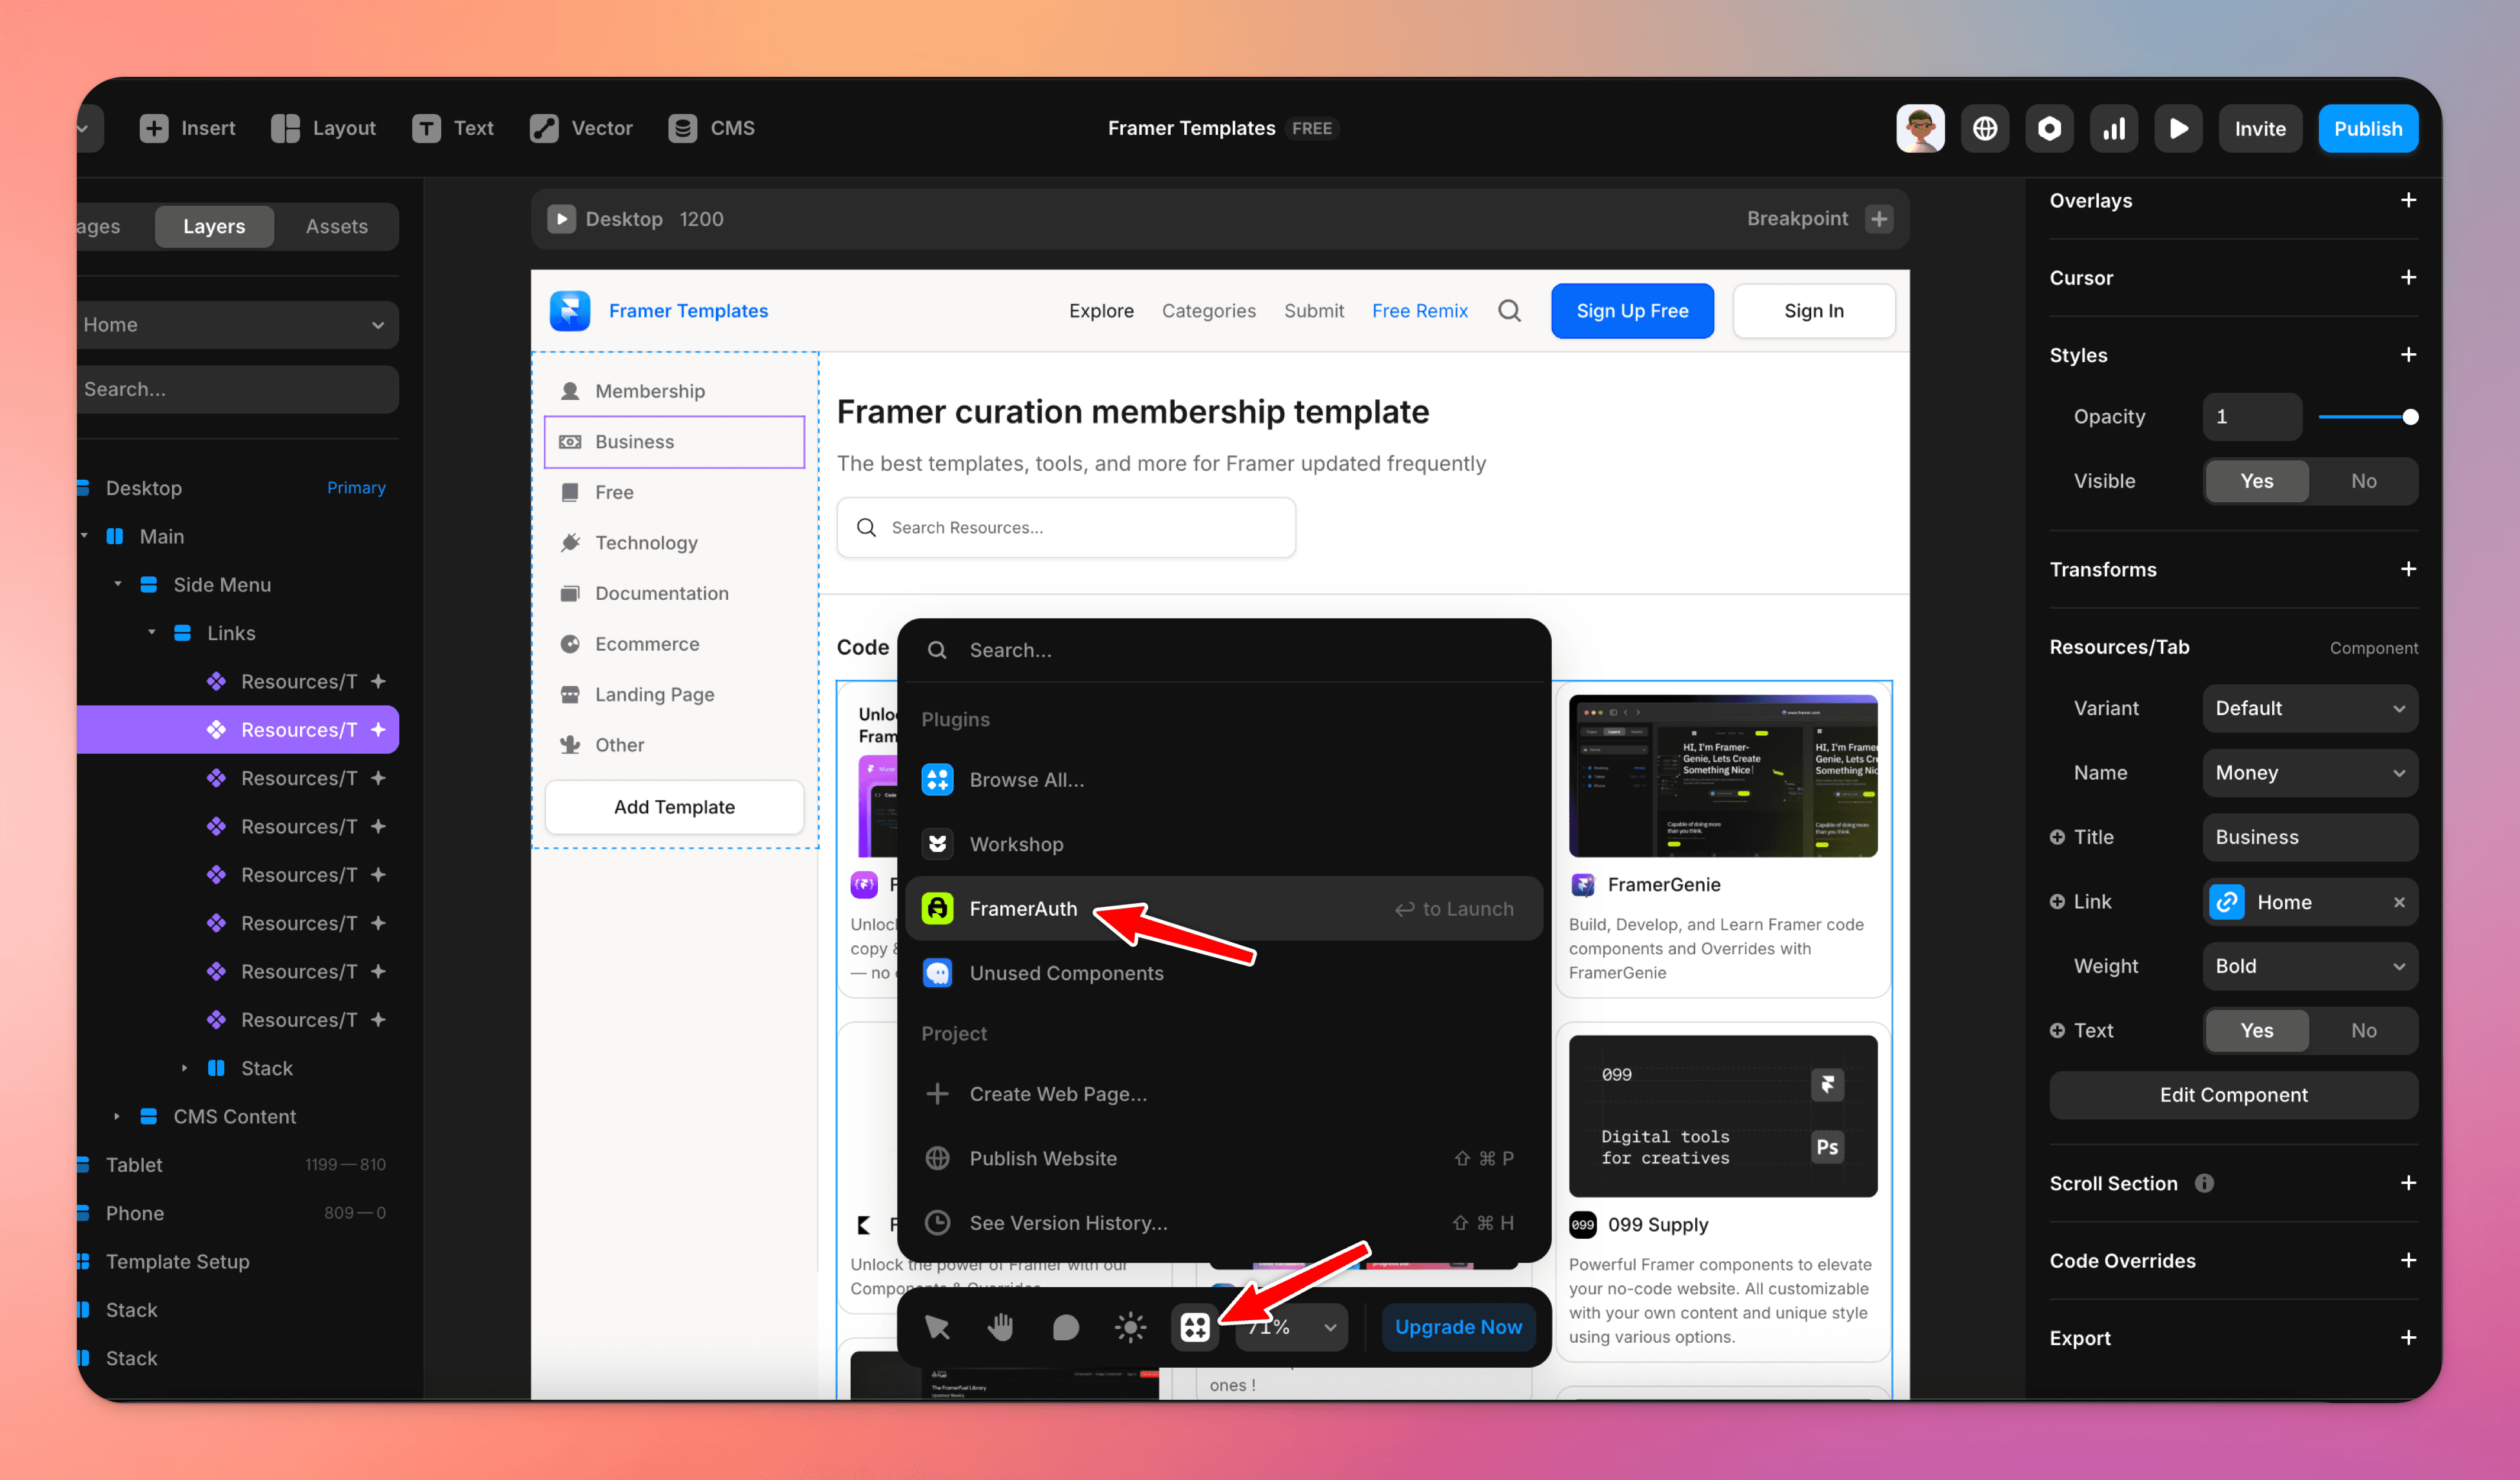
Open the FrameAuth plugin in Framer and sign in
Launch our free Framer authentication plugin and sign up or sign in to gain access to FrameAuth features.
2
Select the project to sync with the current Framer project

3
Connect the projects
Connecting the Framer and FrameAuth project will:
Sync your Framer website URL with the FrameAuth project settings.
Add the FrameAuth snippet to the start of <body> tag.
Add the FrameAuthV2.tsx override file to your Framer project.

4
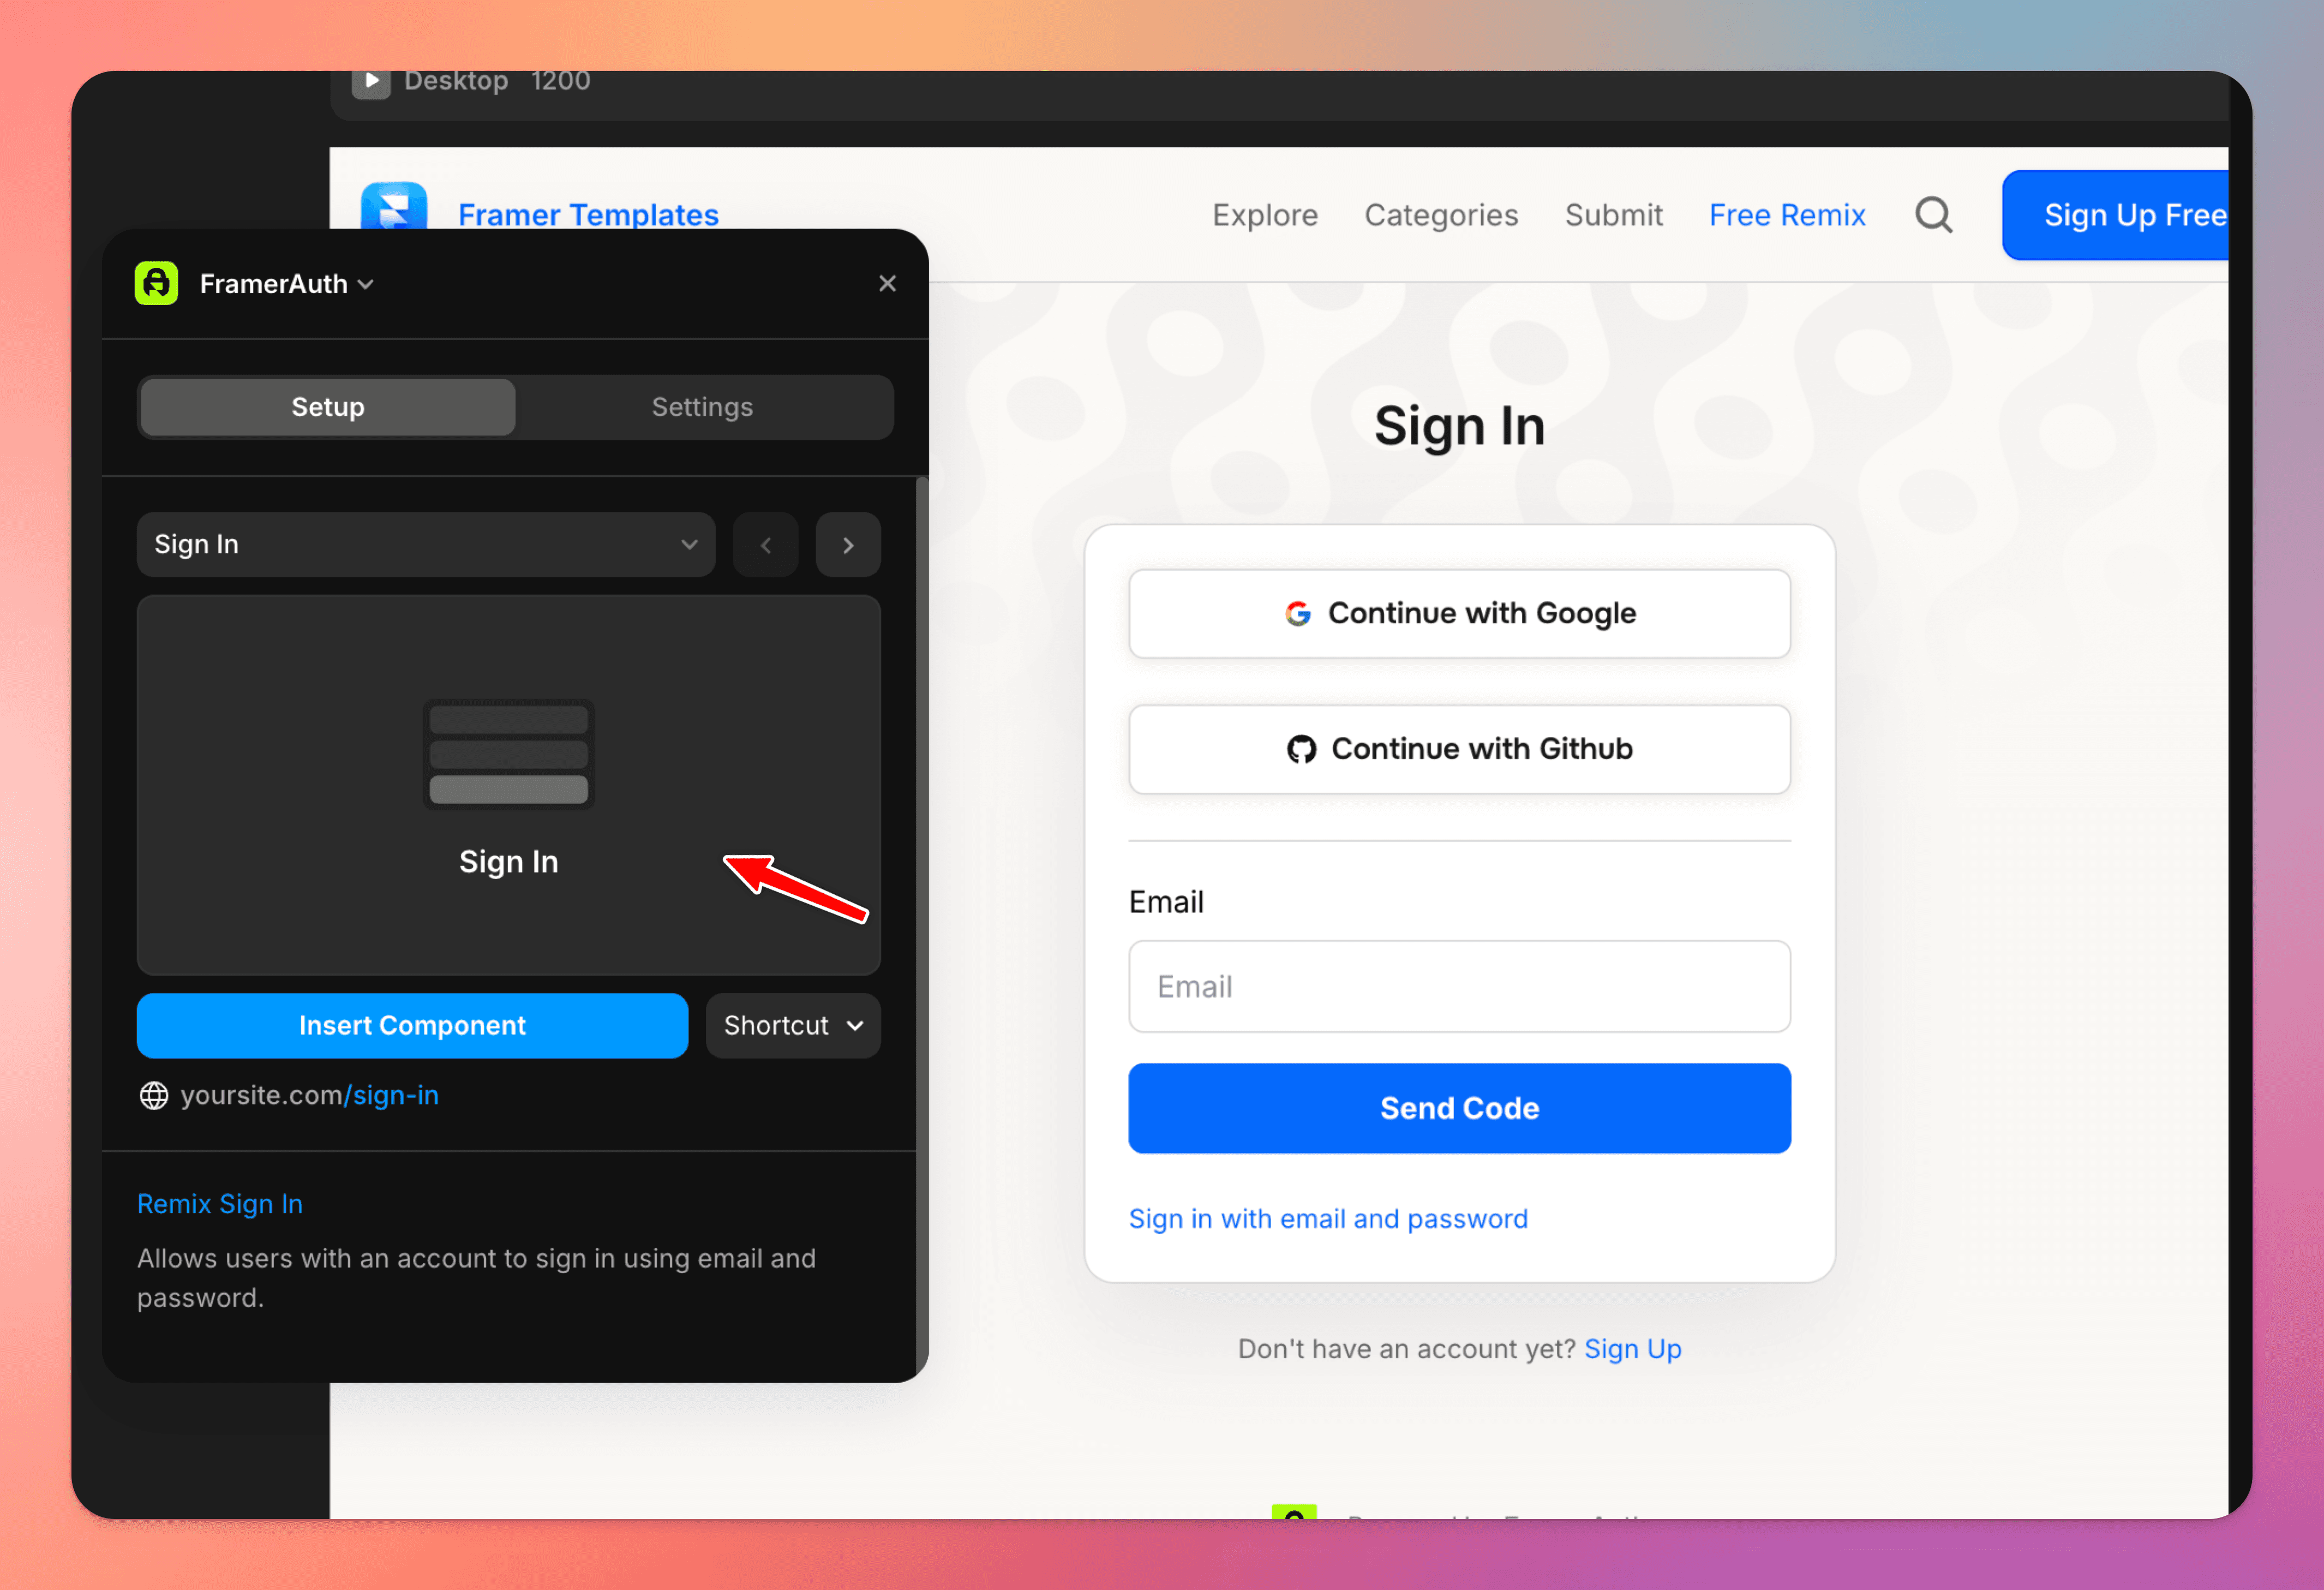
Create a sign in page
Remix Blocks, a free collection of sign in and sign up experiences to choose from.
This page should include:
Sign in form
Send OTP form
Action Button components to enable OAuth (Google, Github, etc.)
Link to /forgot-password page unless you're using OTP sign in only.
5
Create a sign up page
Remix Blocks, a free collection of sign in and sign up experiences to choose from.
This page should include:
Sign up form
Action Button components to enable OAuth (Google, Github, etc.)
Sign up allows visitors to freely sign up for an account on your site. Without the sign up page, your visitors will be required to complete a purchase or be invite manually to create an account on your website.

6
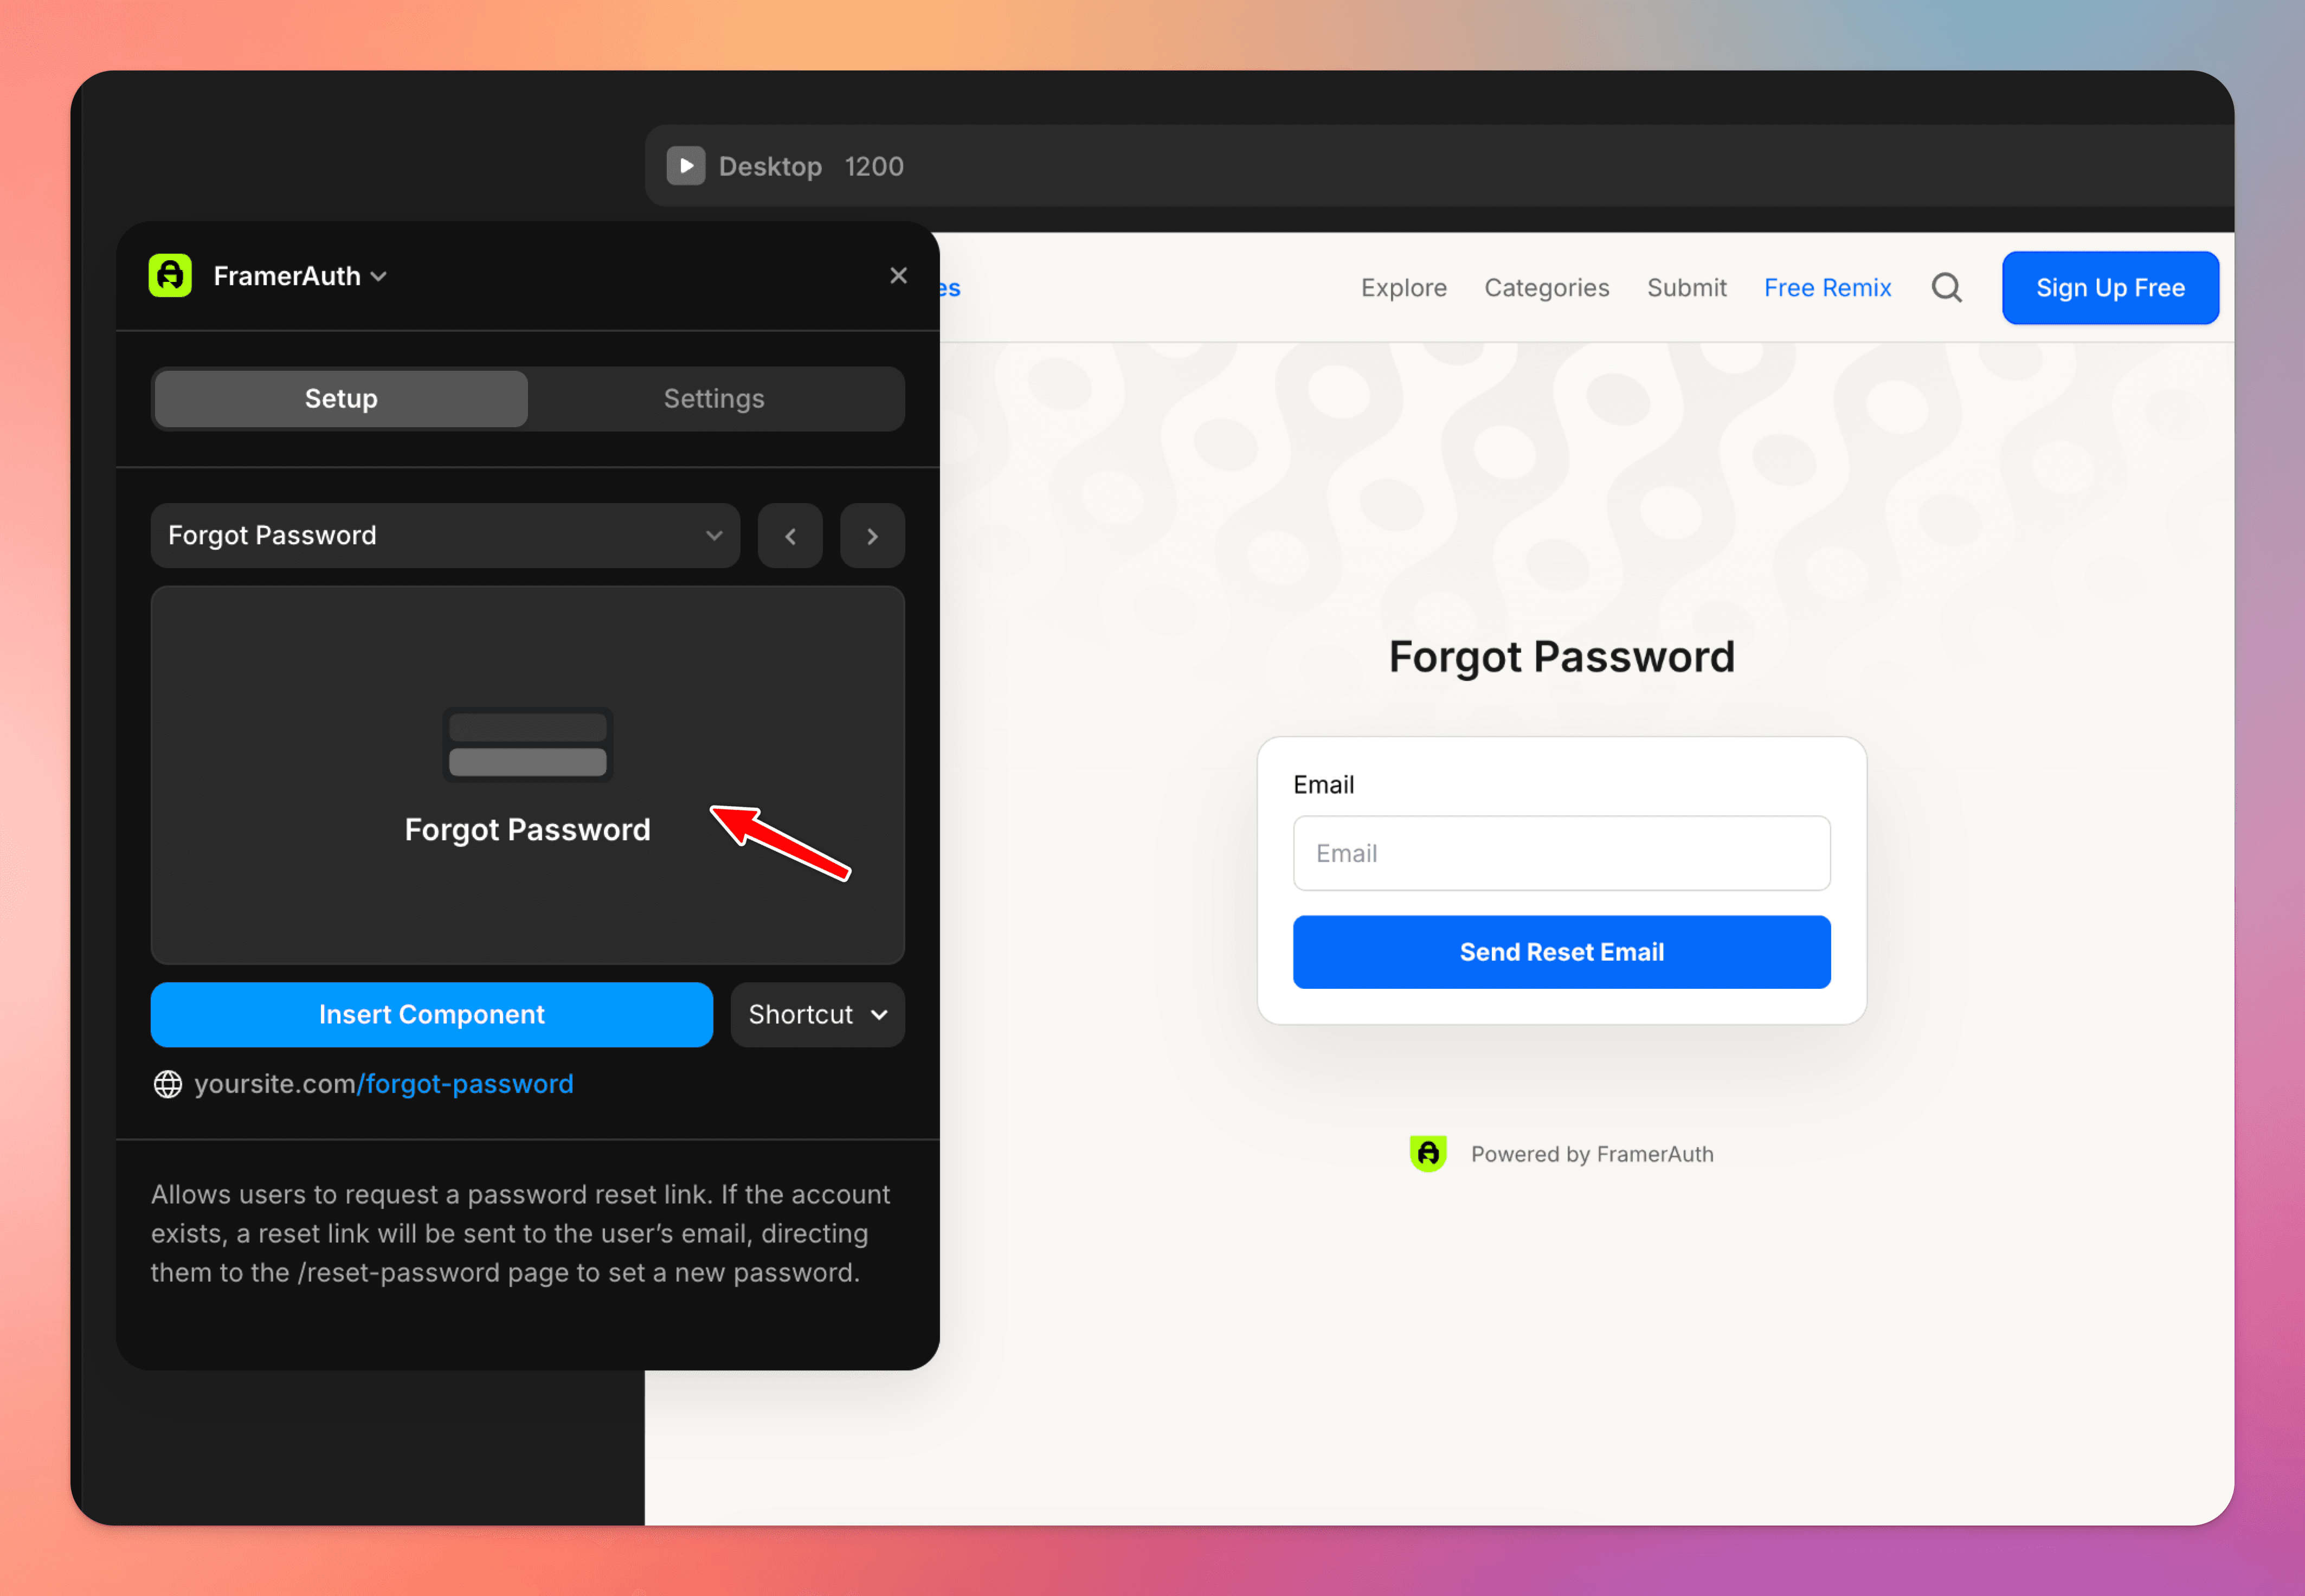
Create a forgot password page
Allows users to request a password reset link. If the account exists, a reset link will be sent to the user’s email, directing them to the /reset-password page to set a new password.
7
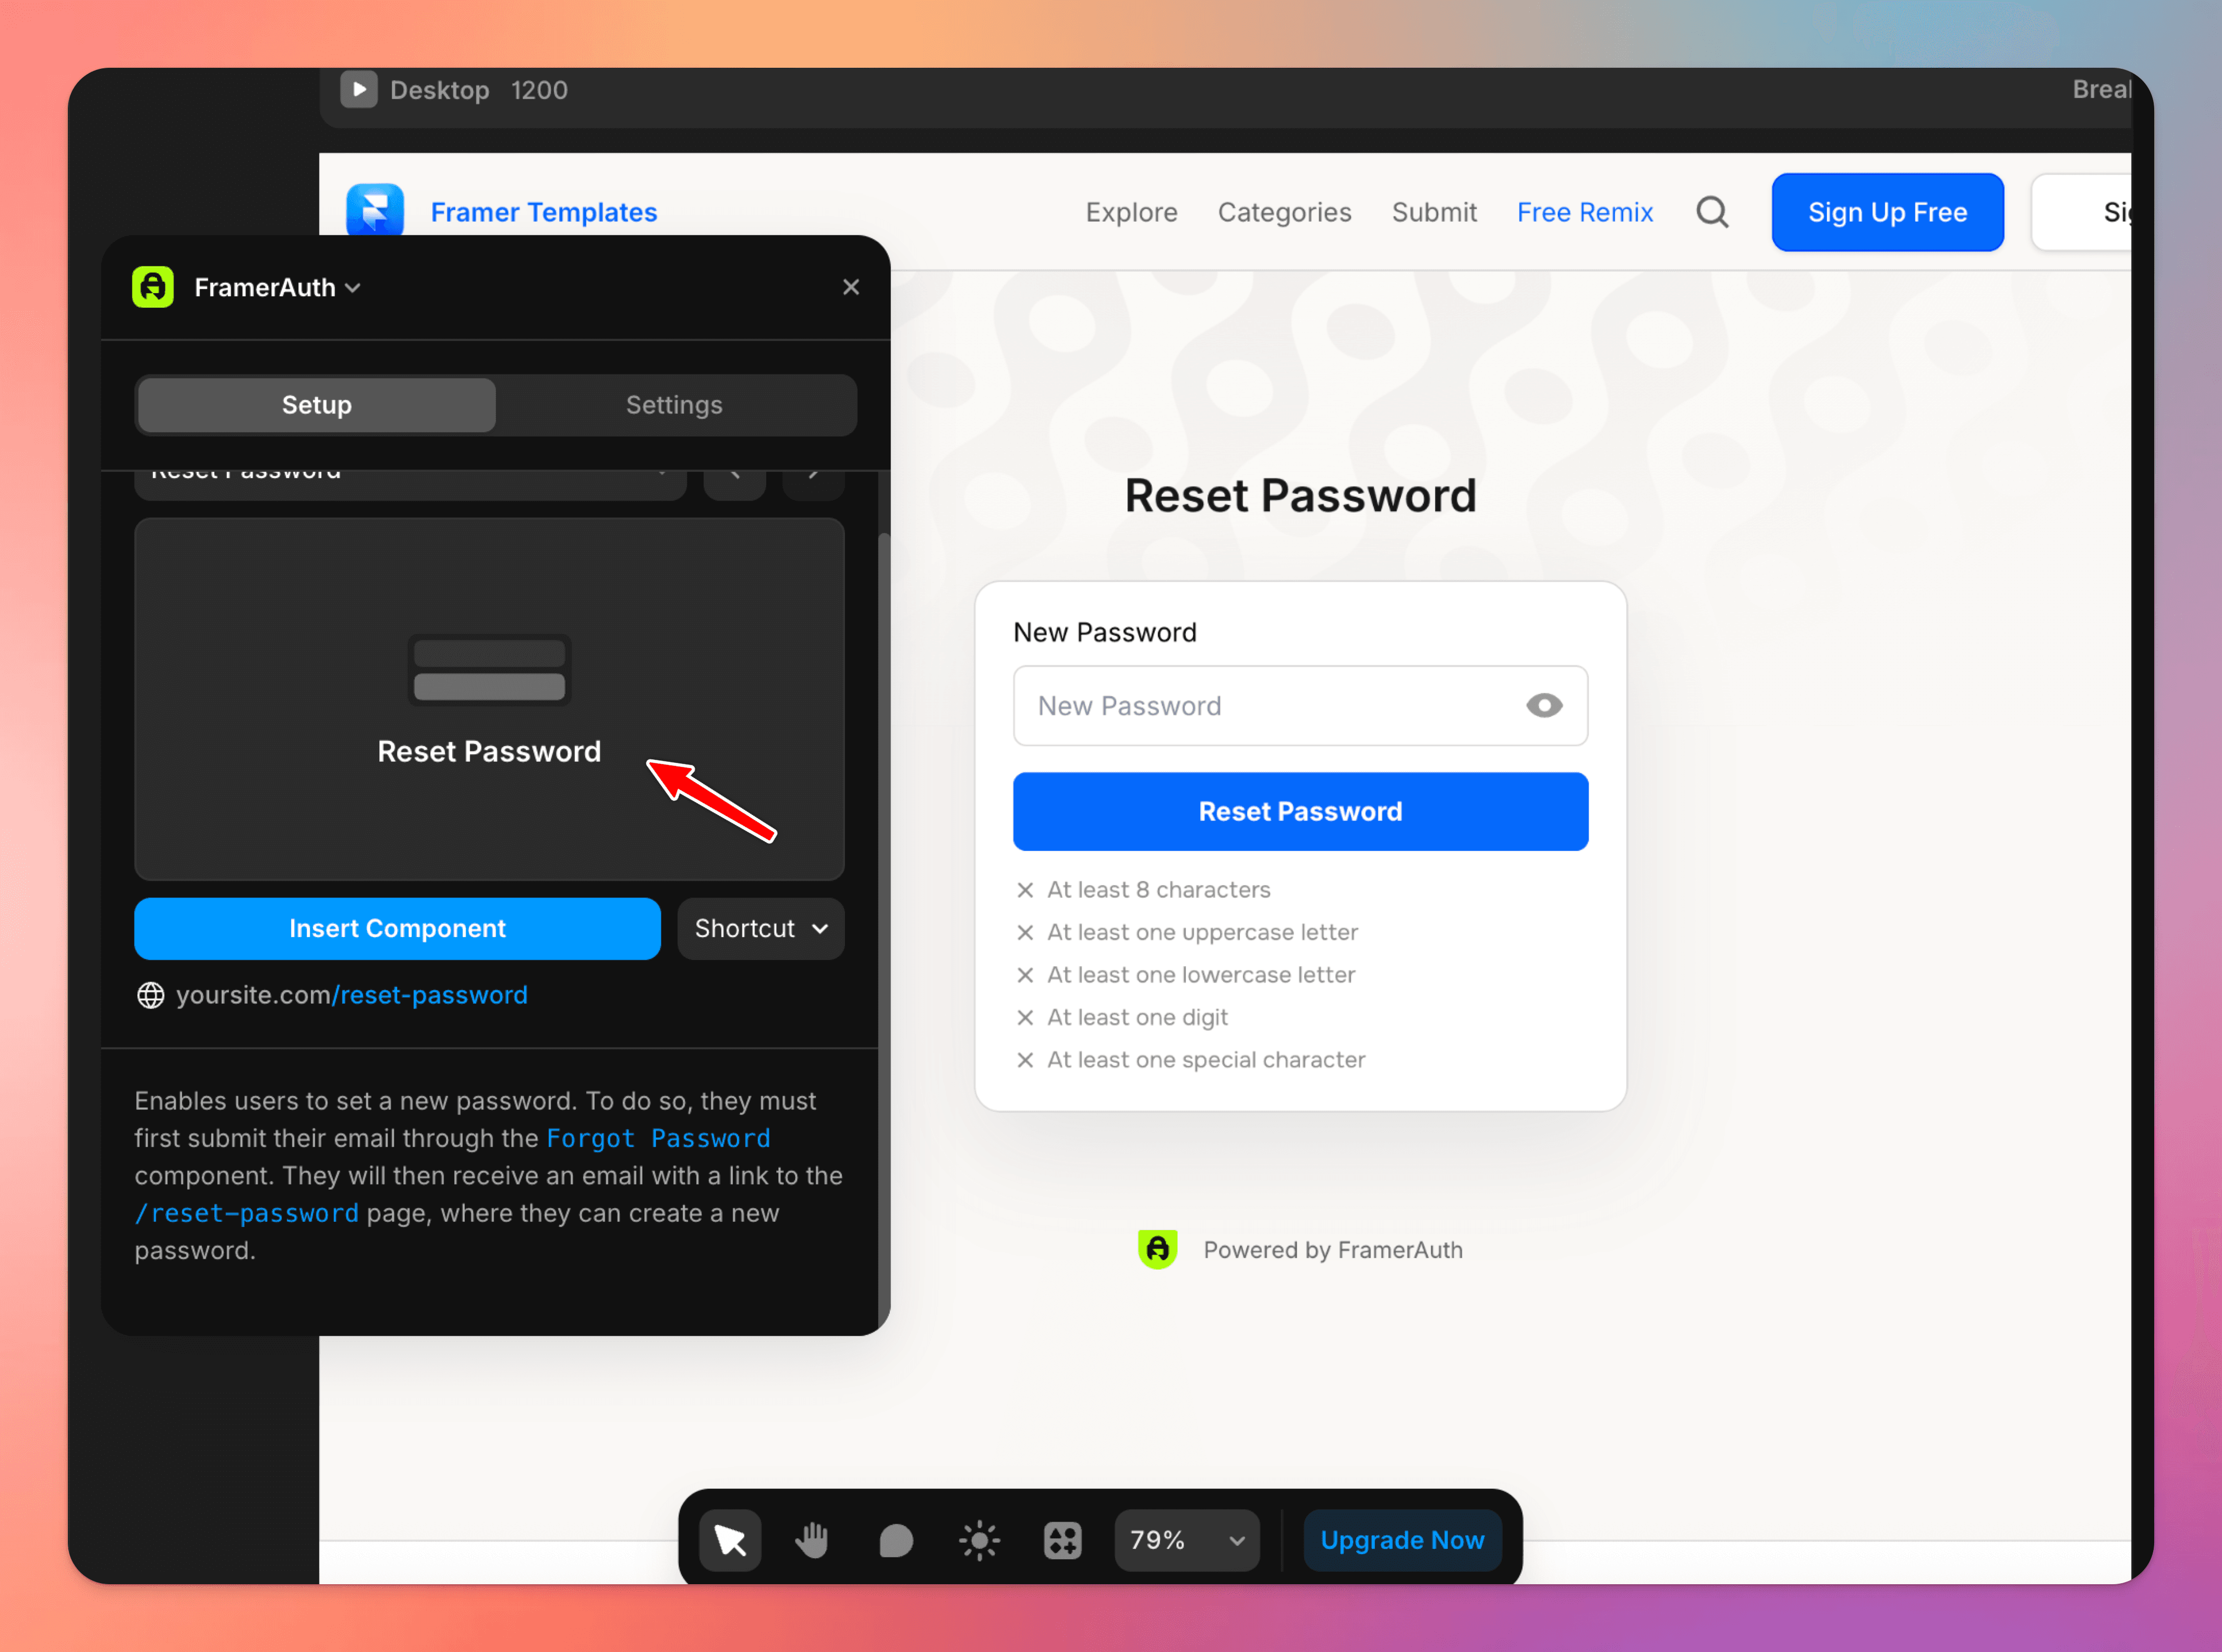
Create a reset password page
Enables users to set a new password. To do so, they must first submit their email through the Forgot Password component. They will then receive an email with a link to the /reset-password page, where they can create a new password.
8
Create an account page (optional)
This is an optional page that allows users to update profile information like name, email address, and custom fields.

9
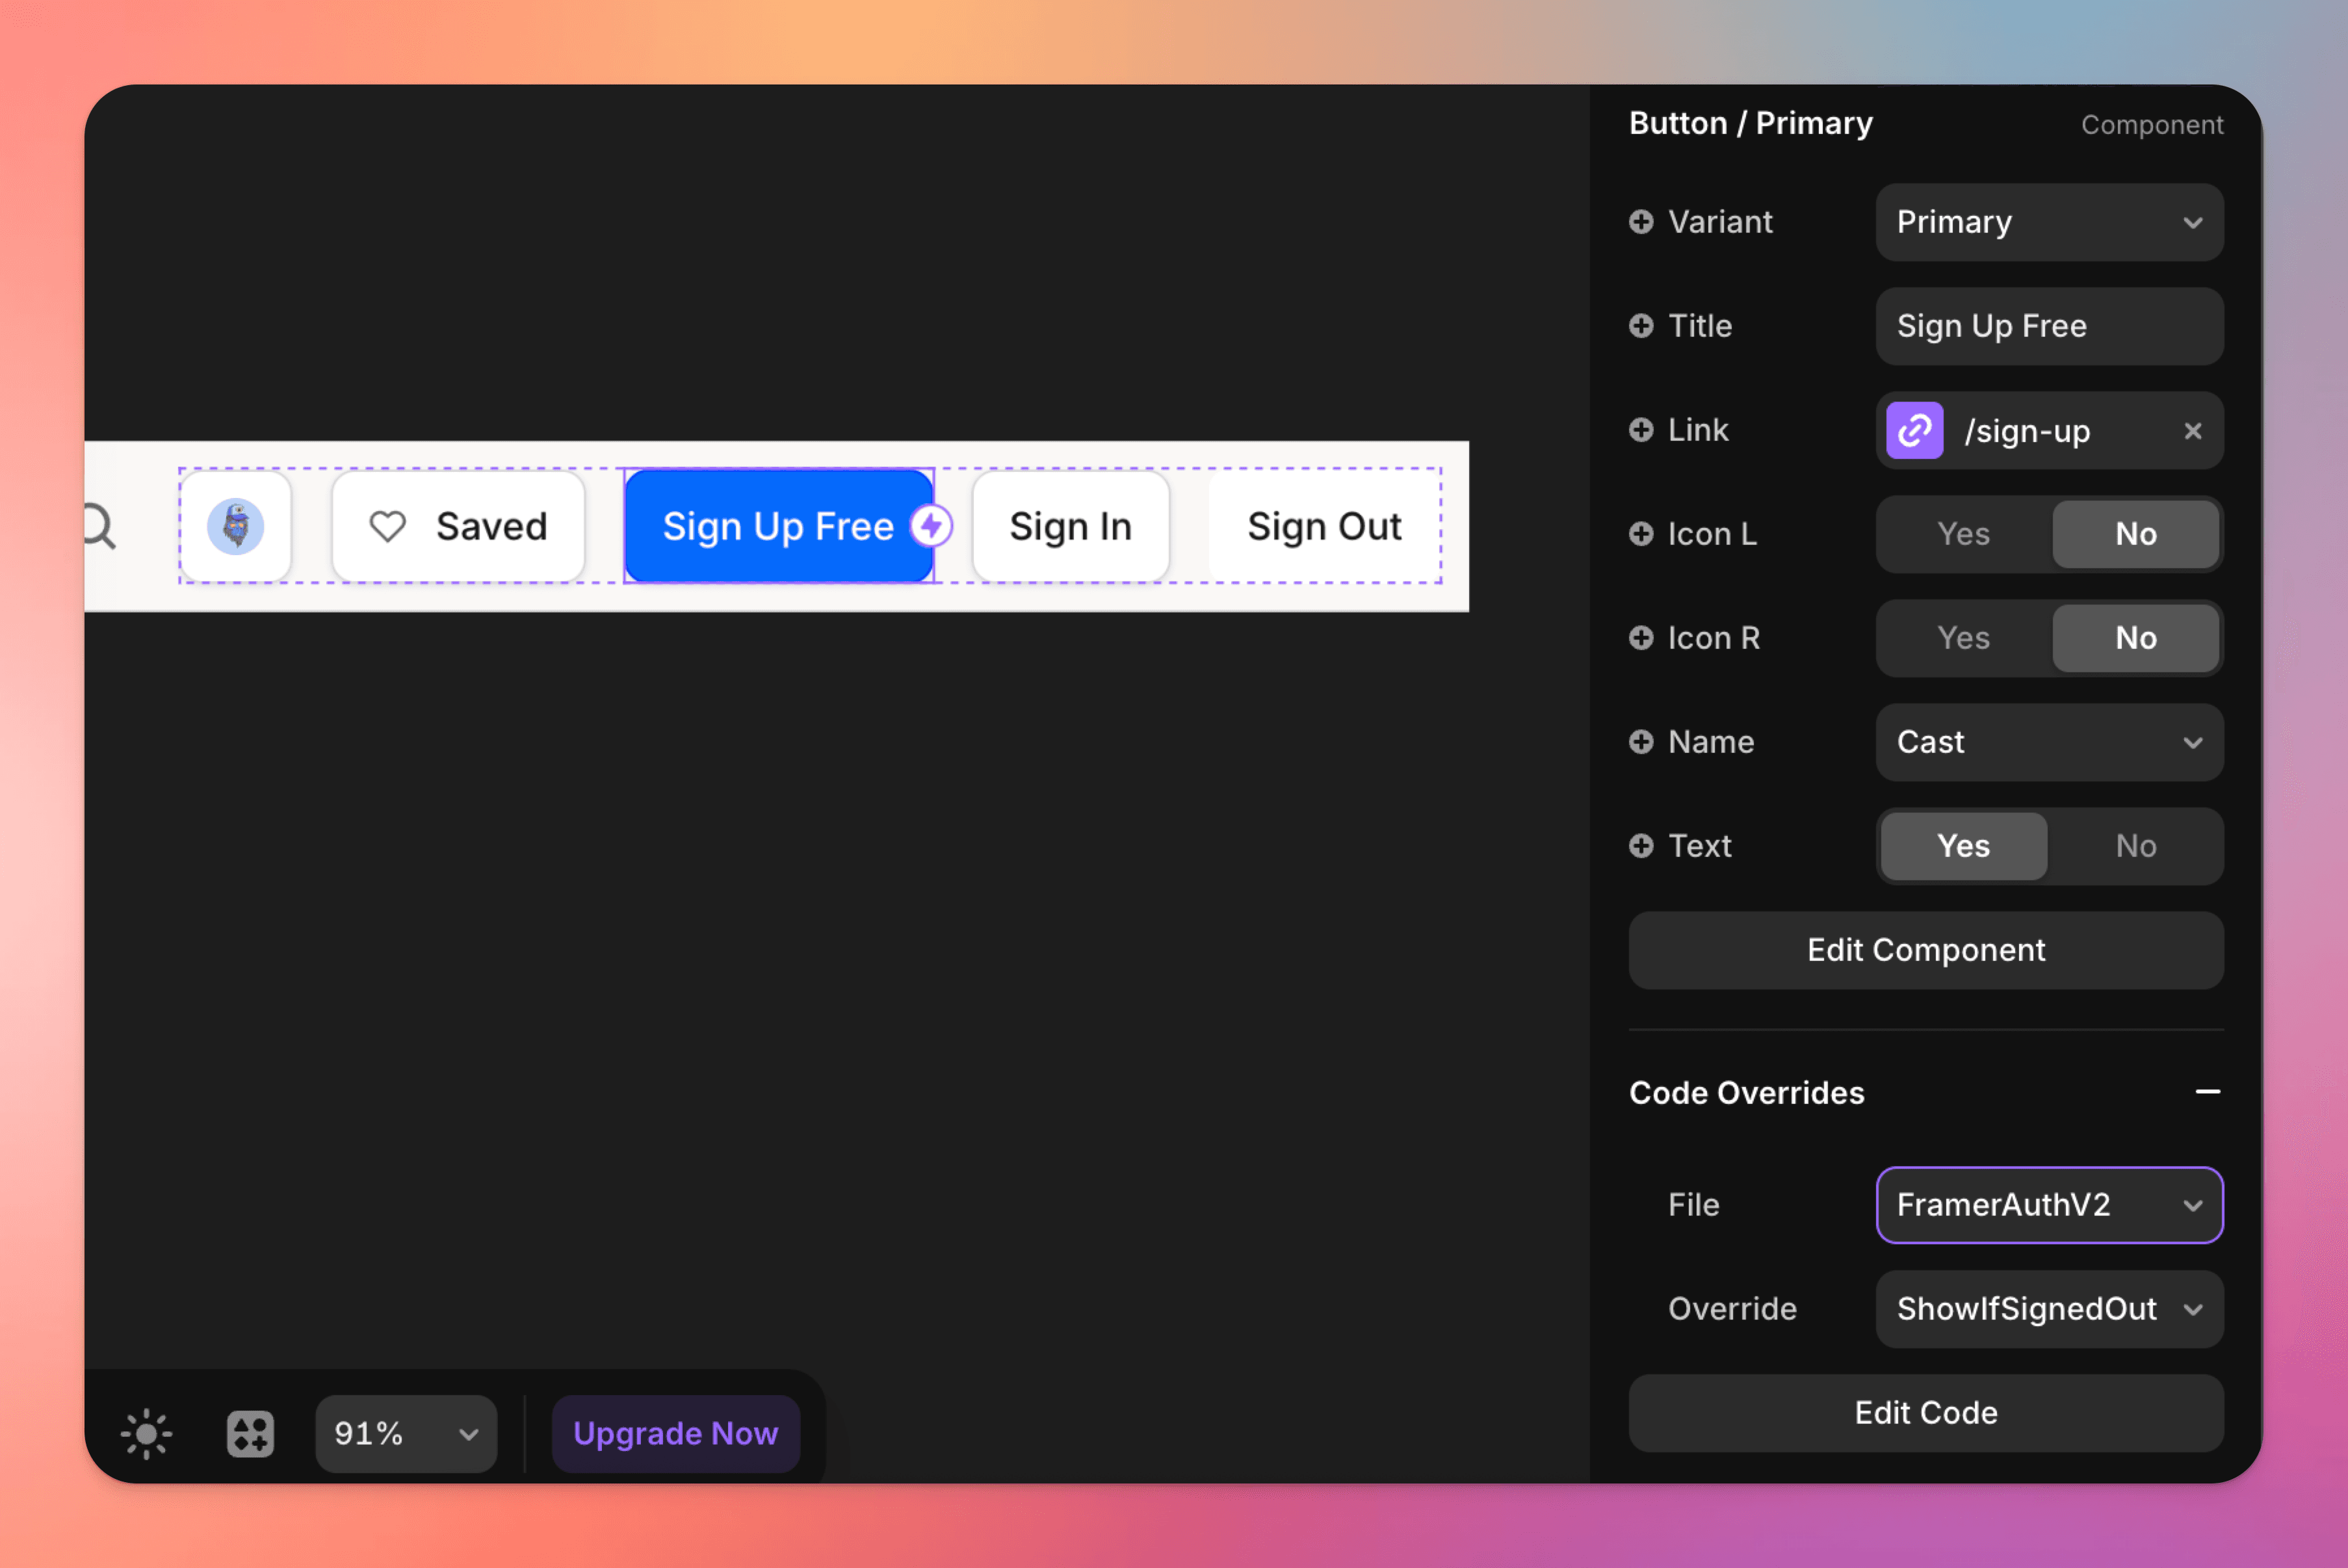
Add sign in, sign up, sign out buttons
Add three buttons to your navigation for sign in, sign up, sign out
To your sign in & sign up, apply the override
ShowIfSignedOut.To your sign out button apply the override
SignOut. Set this button to have no redirect — your user will be redirected to home when signing out. You can also use theAction Buttoncomponent to perform a sign out.
10
Configure plugins for FrameAuth
Stripe Sandbox: Enables testing the Stripe integration for development purposes. No real payments are processed.
Stripe: Accept live payments securely online with support for cards and over 135 currencies worldwide.
Lemon Squeezy Sandbox: Enables testing the Lemon Squeezy integration for development purposes. No real payments are processed.
Google OAuth: Streamline user registration and login with trusted Google authentication for instant access.
Github OAuth: Enable secure one-click sign-in for developers using their existing GitHub accounts.
11
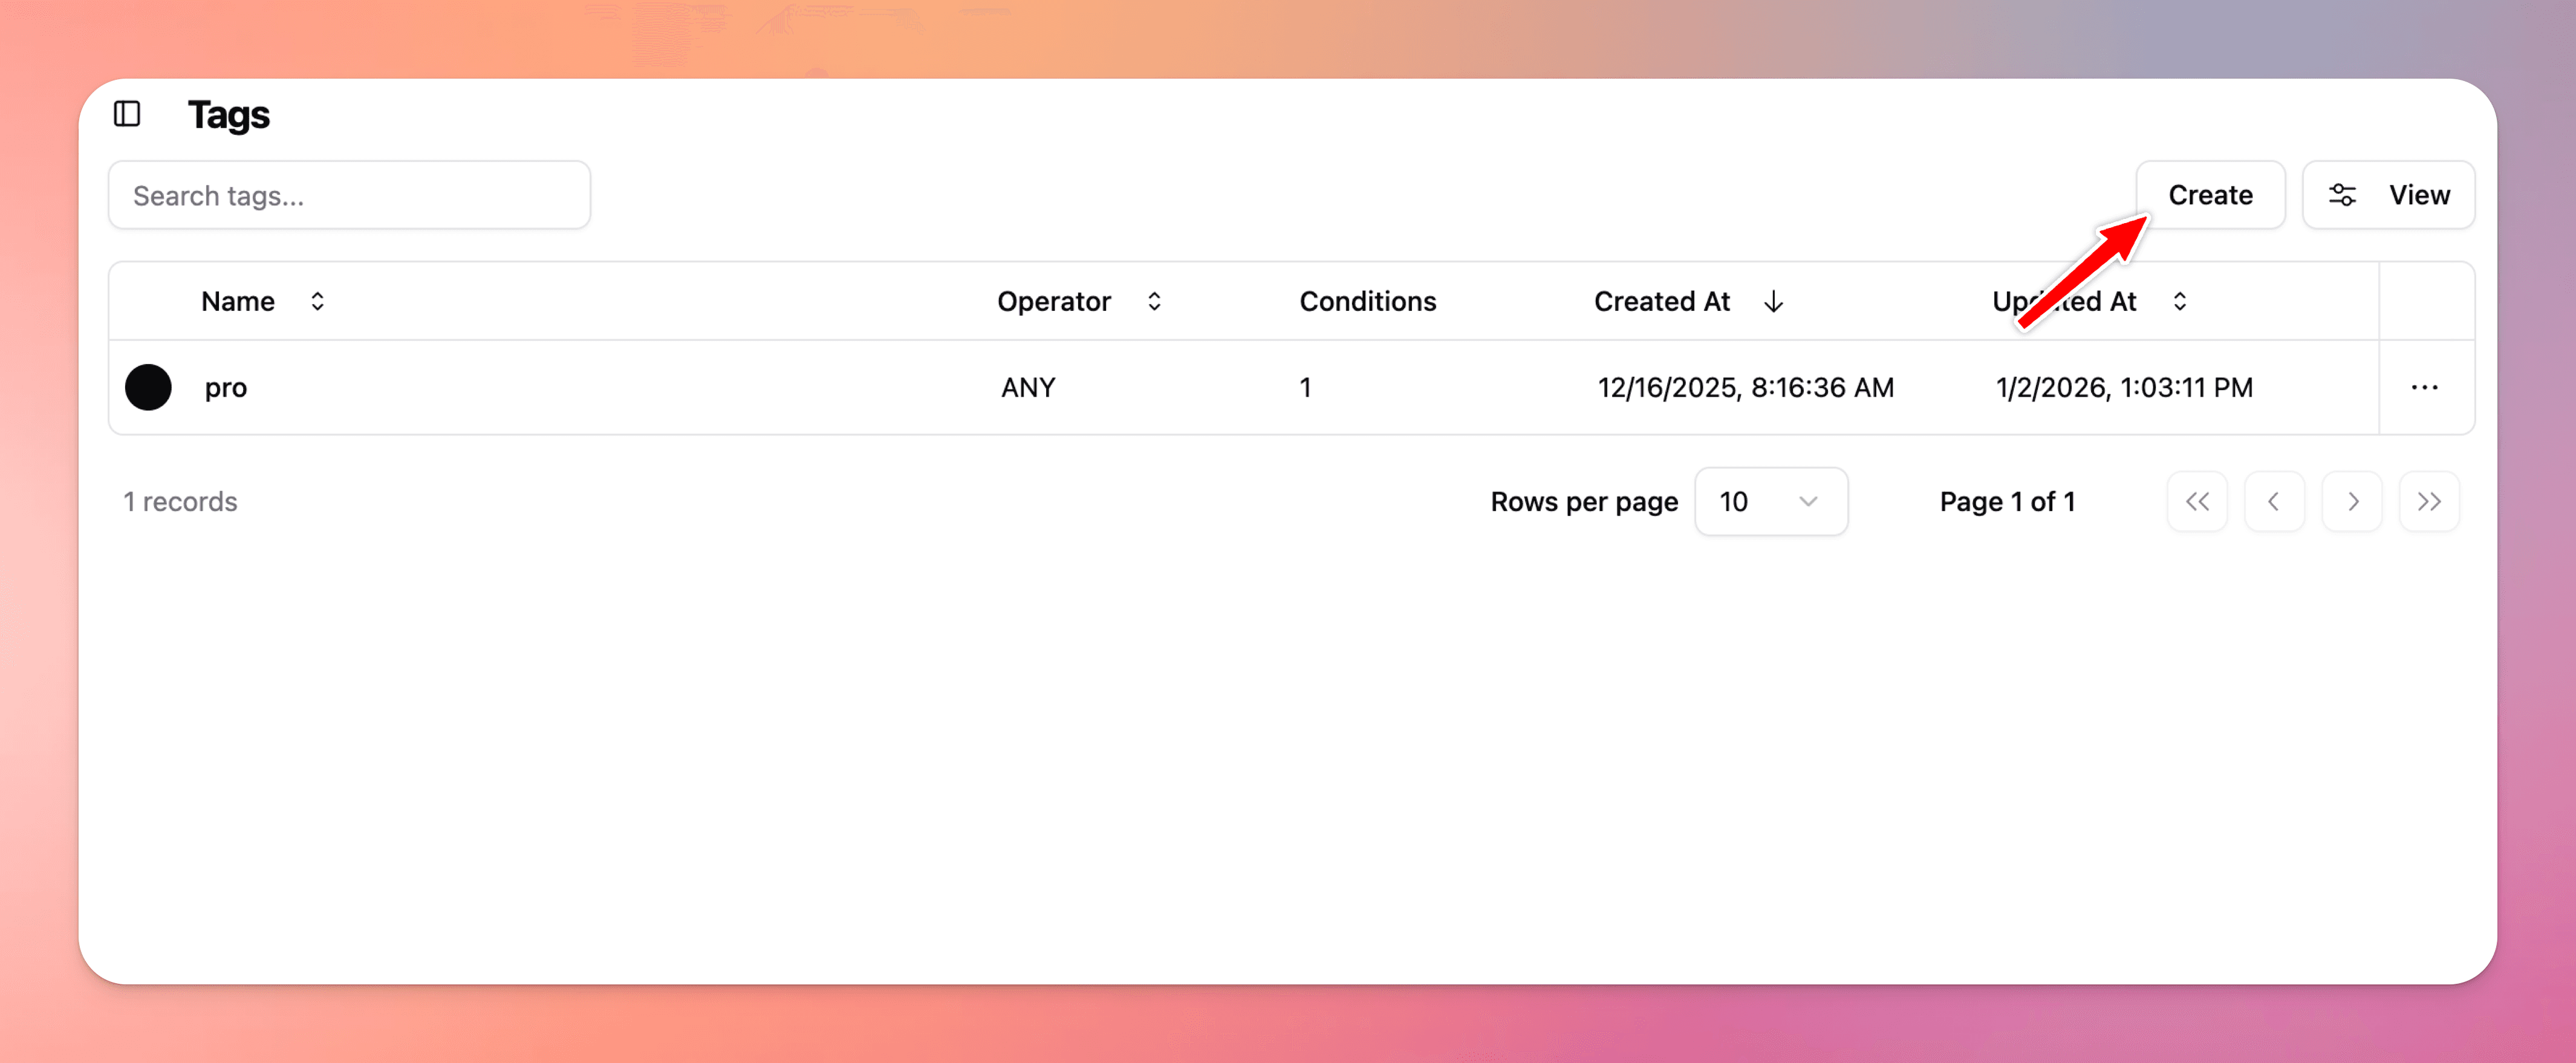
Create tags for products
Tags are used to grant access to locked content.
Tags allow us to grant access to our users when conditions are met. When your user purchases specified products, tags will be assigned based on conditions that are set.
12
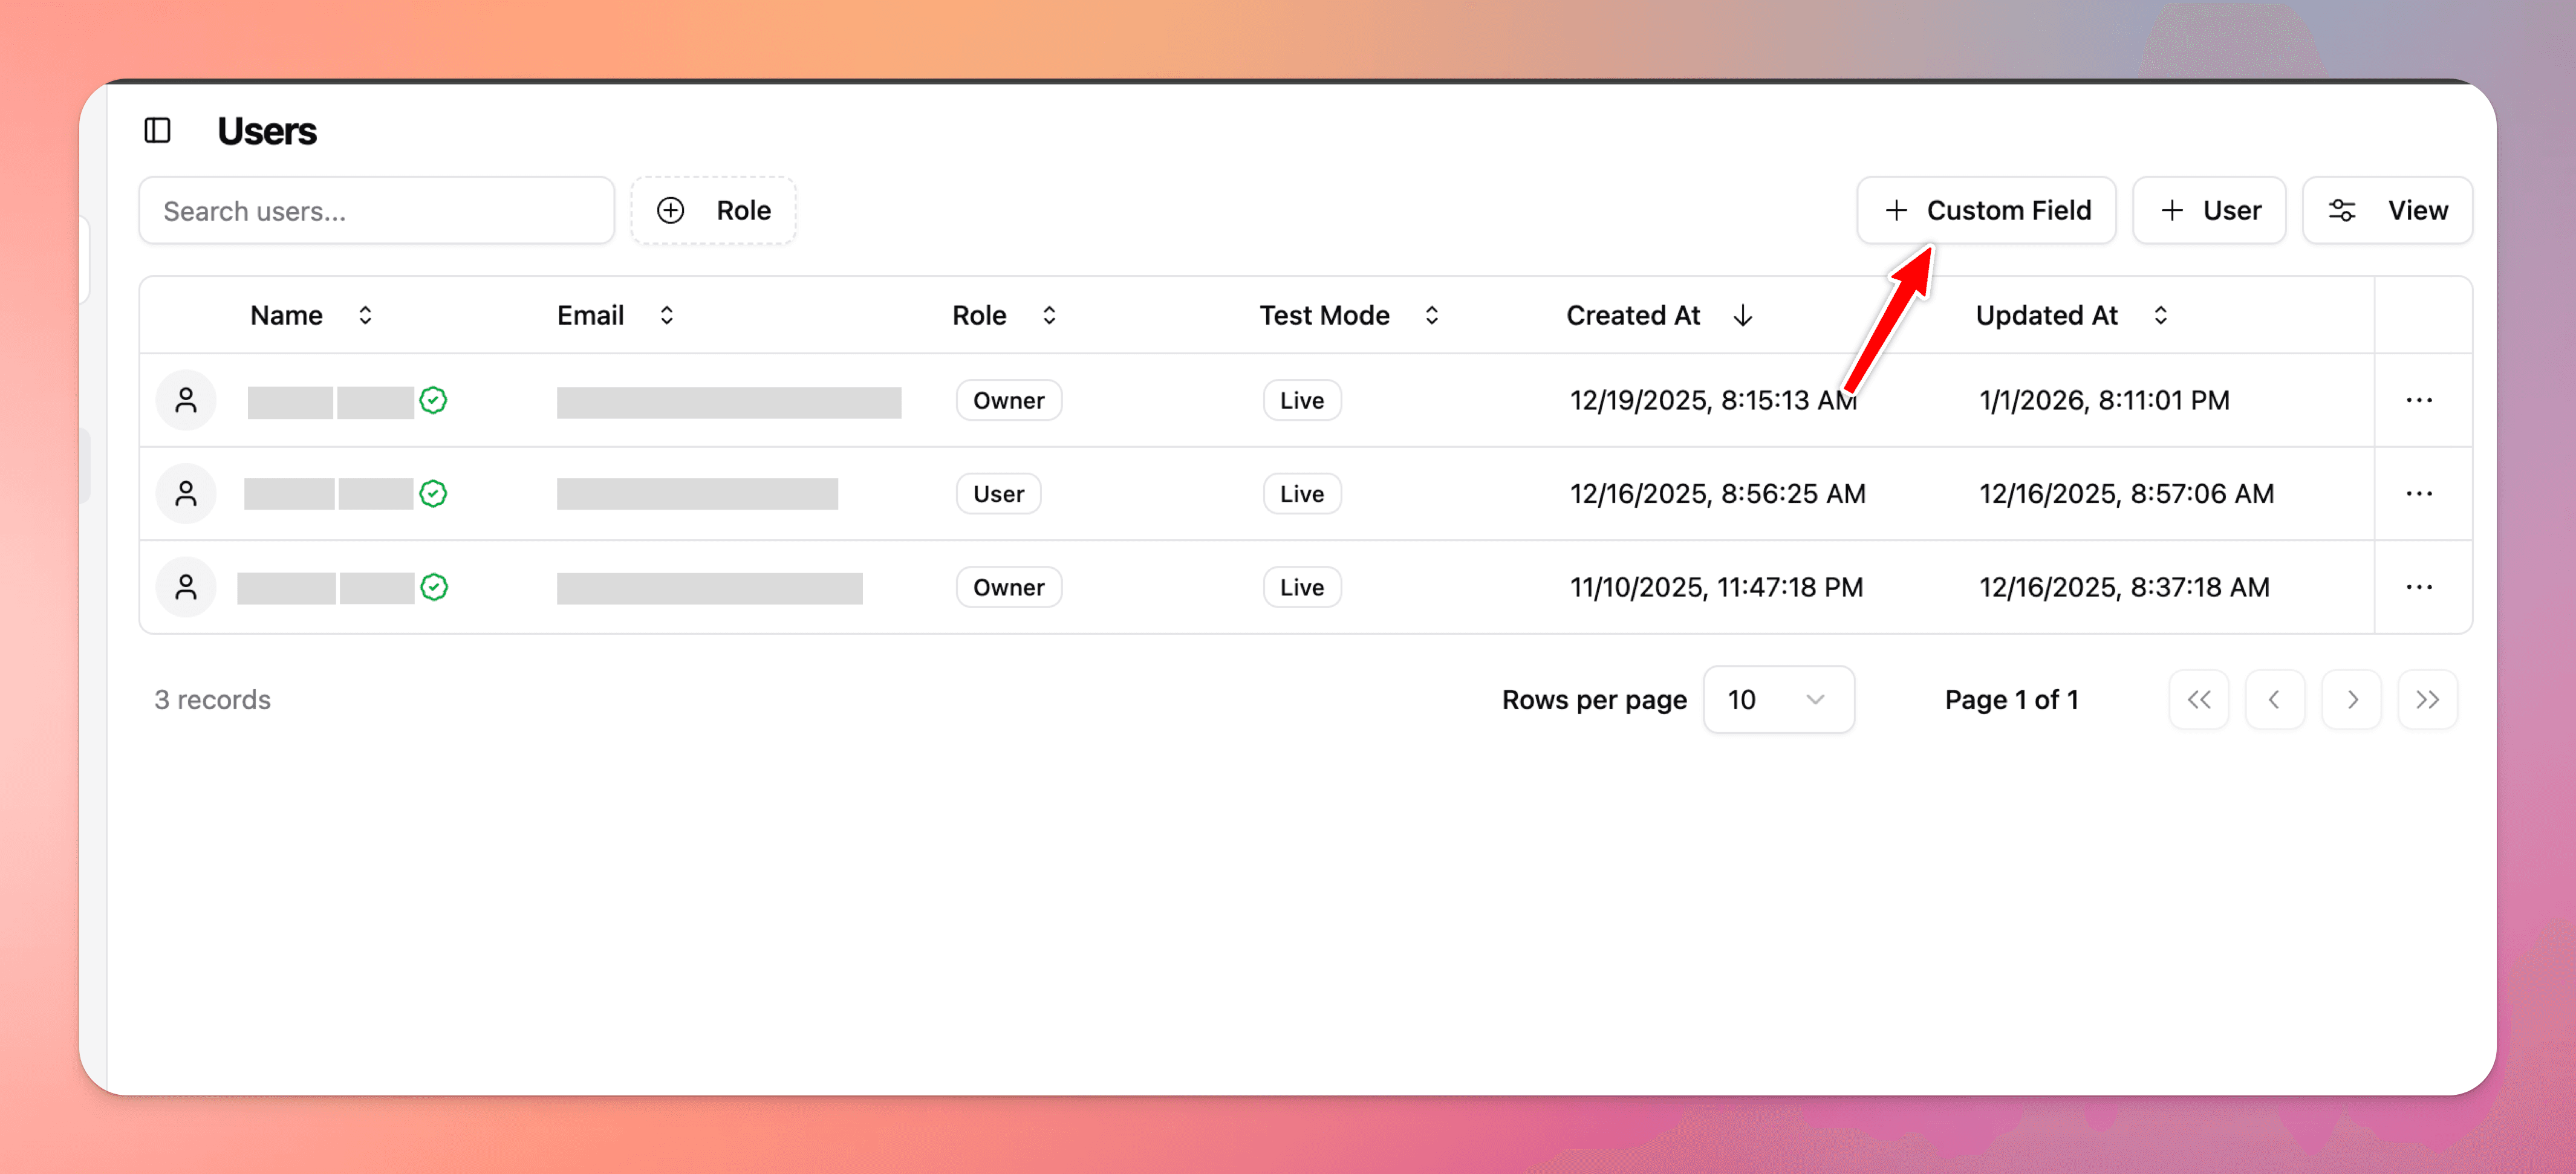
Create custom fields (optional)
To collect additional information about your users, you can add a custom field on the users page. This new field will be shown on the Sign Up and Profile form.
13
Lock pages in the dashboard

14
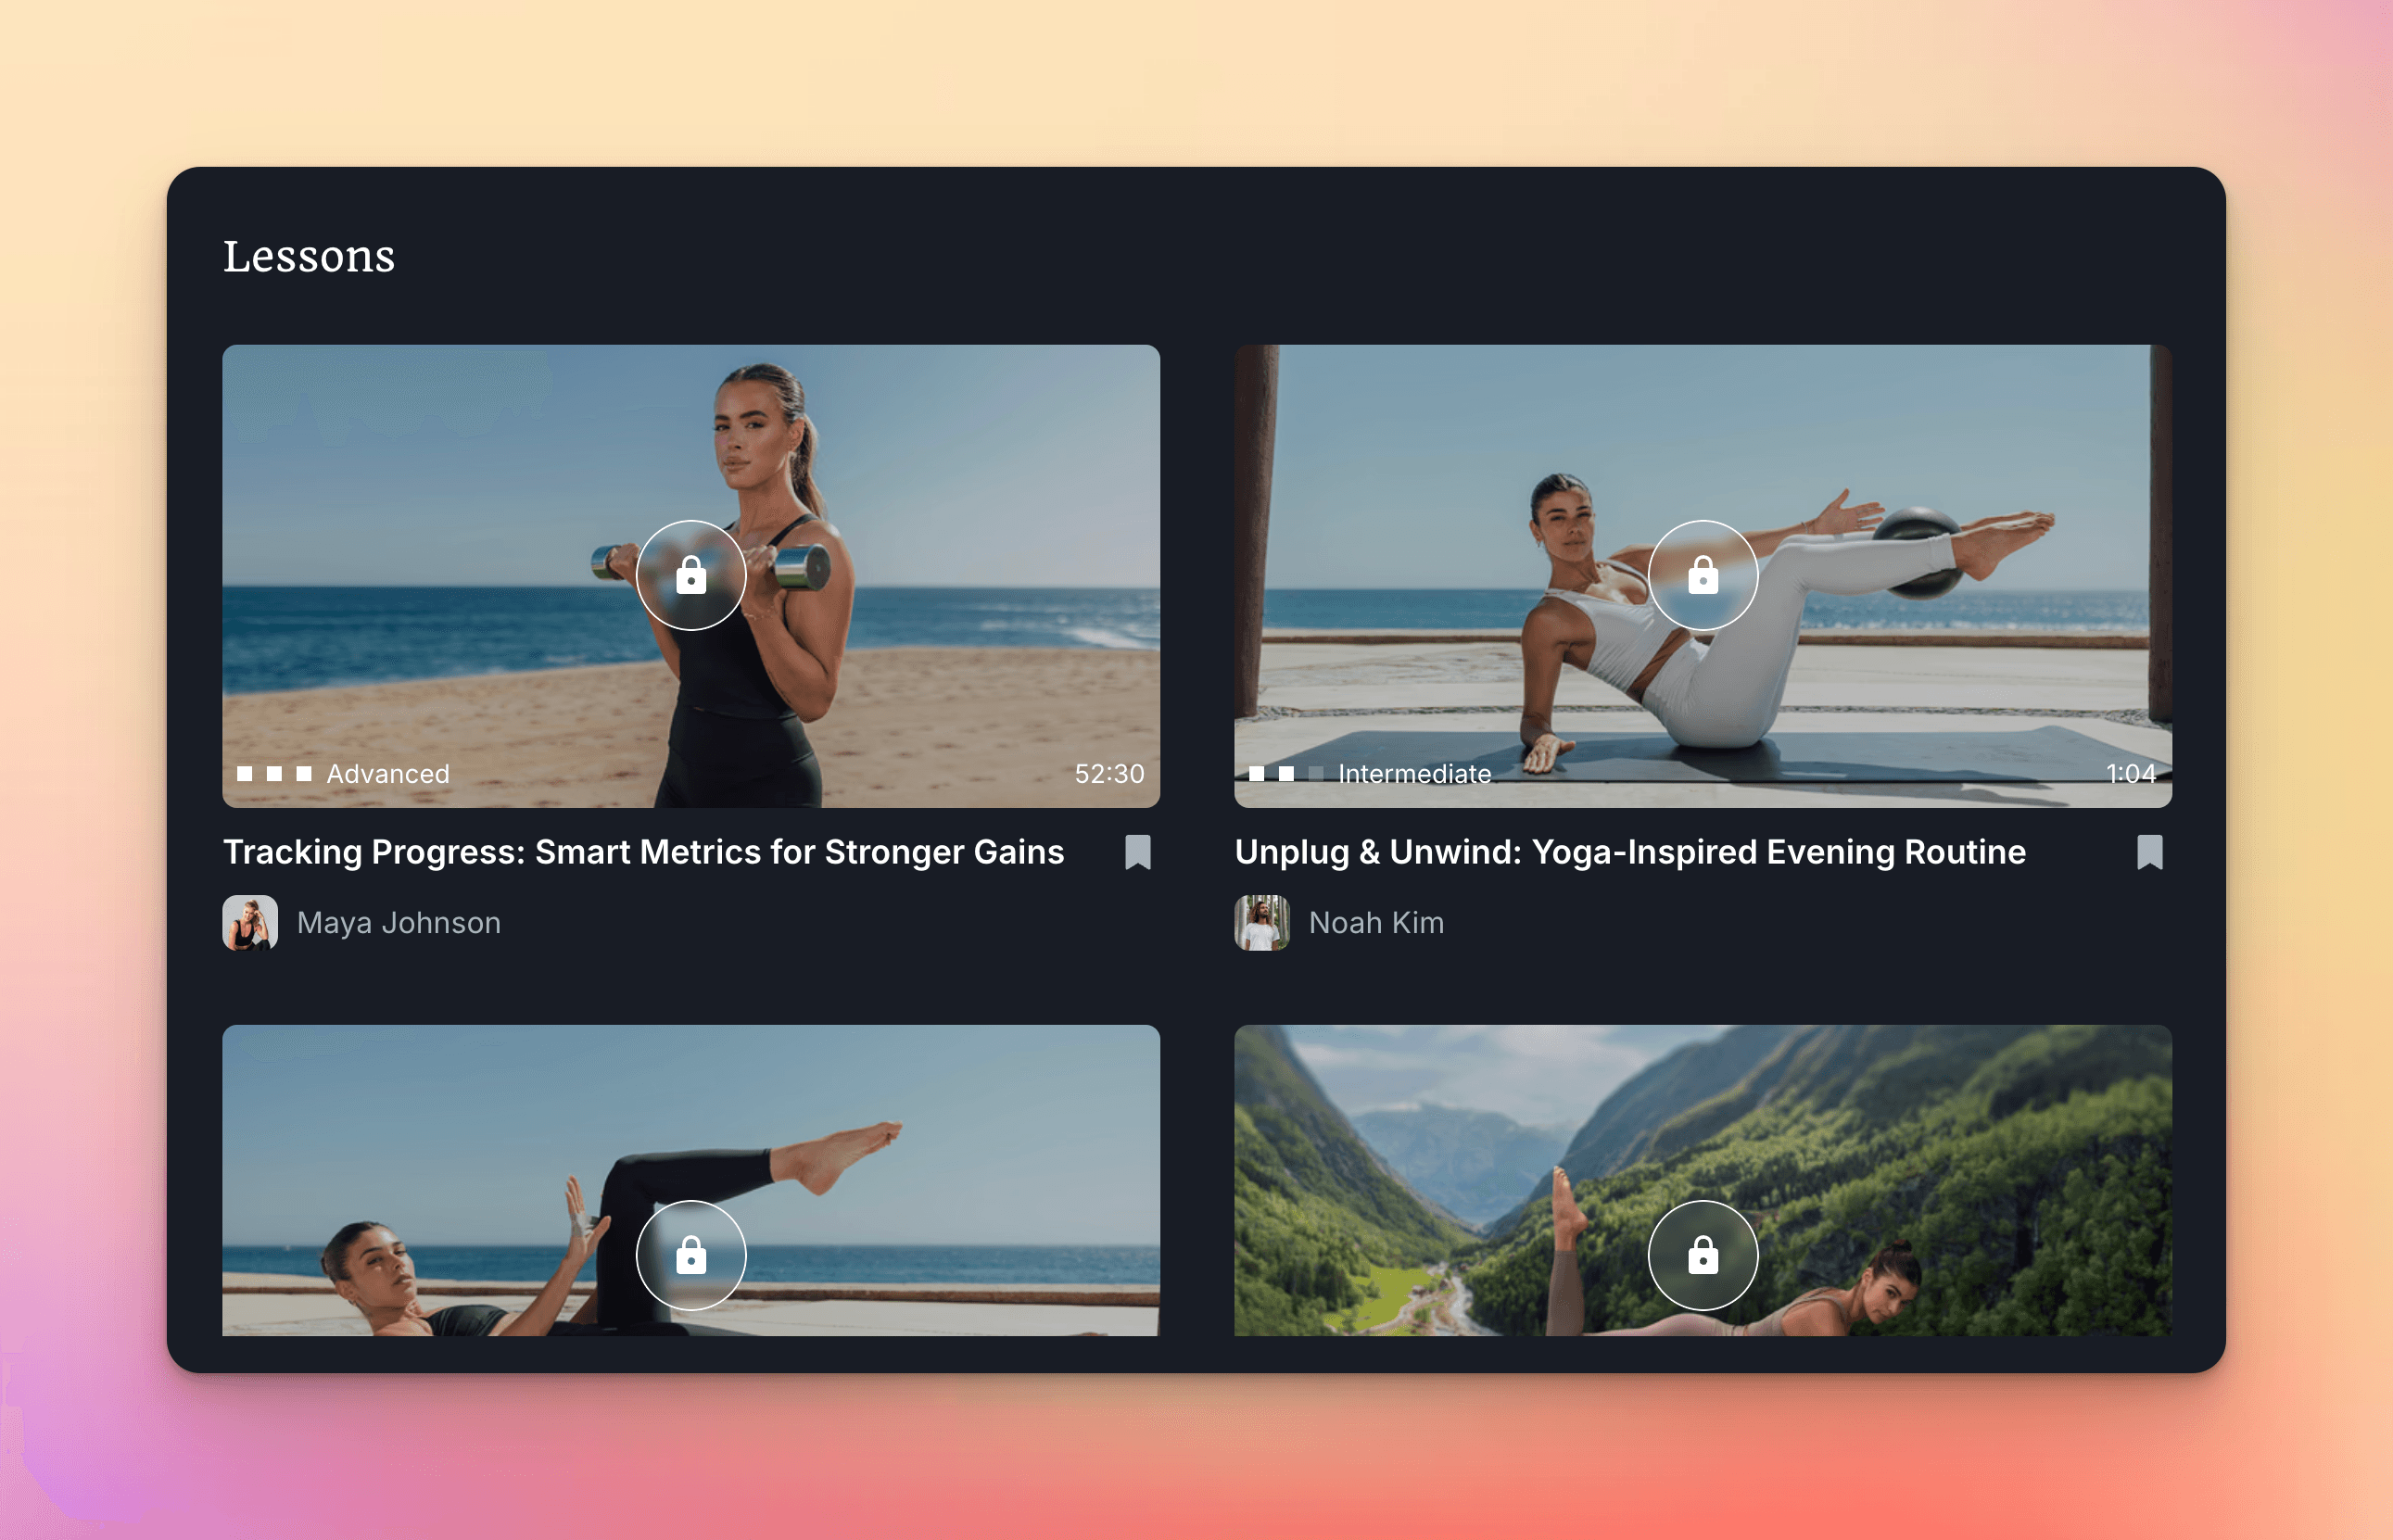
Lock on-page content using overrides
If you're building a Framer site with member-only content, premium downloads, or exclusive pages, you might want to show a locked version of an element until certain conditions are met like a user being logged in or after a specific purchase.
Follow our guides to conditionally display a locked variant using Framer's built-in tools and logic, so you can create a seamless user experience while protecting your content.
15
Test your website
Before going live, thoroughly test all functionality in test mode.
Confirm the following work as expected:
Sign in
Sign up
Resetting Password
Locked content
Purchases
Social sign on
Sign in with OTP
16
Connect subdomain and go live
Live mode ensures that all users who sign up will be set as 'live' users on the users page in the dashboard. Only live users can complete live Stripe purchases.
Once your website has been thoroughly tested and is ready to be moved to live mode, navigate to the project settings and click go live.

After going live, you will be prompted to connect a custom subdomain. This is a required step to ensure no cookie errors occur.
This subdomain is not customer-facing.
It is used internally by FrameAuth to manage cookies.
Recommended format:
auth.yoursite.com
Add the required DNS records provided in the dashboard.

You will then need to add these two records to your site's DNS records.

17
Launch Complete! 🎉
Your site is now live.
Authentication is fully enabled
Payments are processed in live mode
Access rules are enforced for all users
You can now begin onboarding real users and accepting live purchases.