How To Connect FrameAuth To Stripe Live Checkout
How to configure Stripe for live checkouts in FrameAuth to charge visitors to gain access to your digital content

Live checkouts
TUTORIAL
Live purchases enable visitors of your site to gain access to your digital products by purchasing access. Purchases can be one-off or subscription payments through the Stripe integration.
In this guide we'll go through the steps to set up Stripe live in your FrameAuth project.
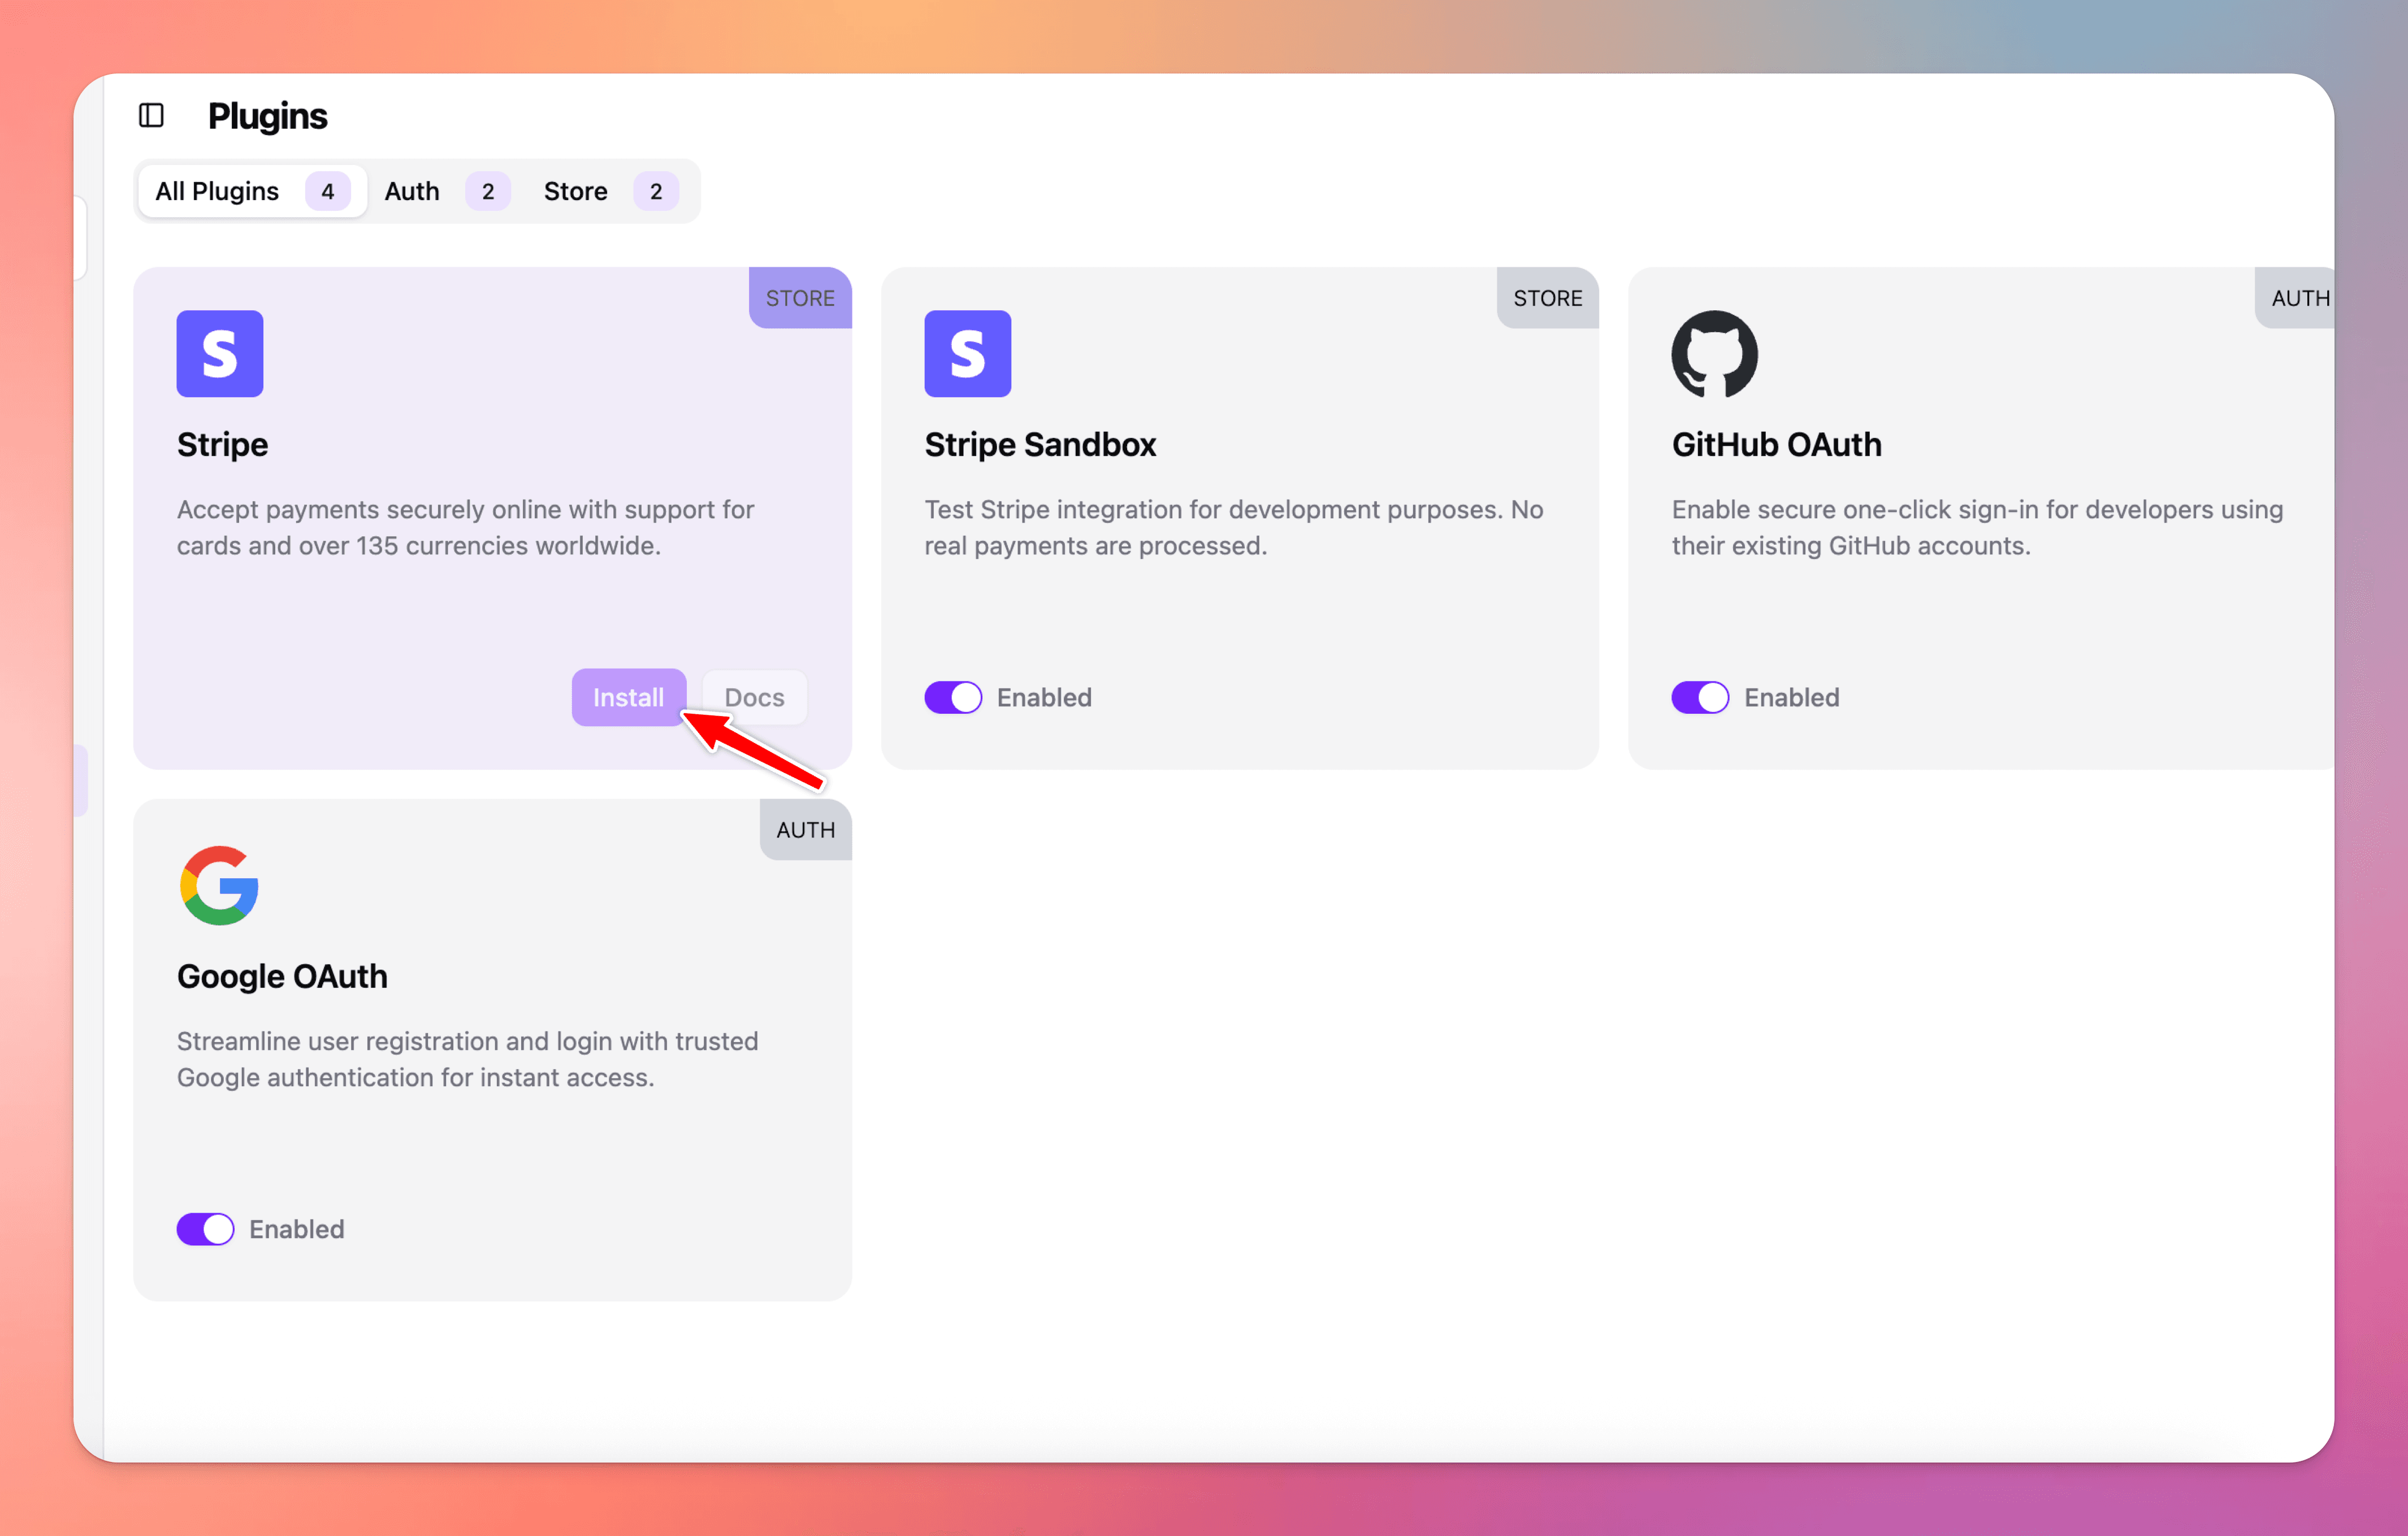
1
Install the Stripe plugin
Install the Stripe plugin to connect your store.
2
Configure Stripe subscription settings
If your Stripe integration utilizes subscriptions, configure the settings following our best practices: Configure Stripe subscriptions in FrameAuth.
3
Create a product in your Stripe store
Once you've installed the Stripe plugin and connected your store, create your product.

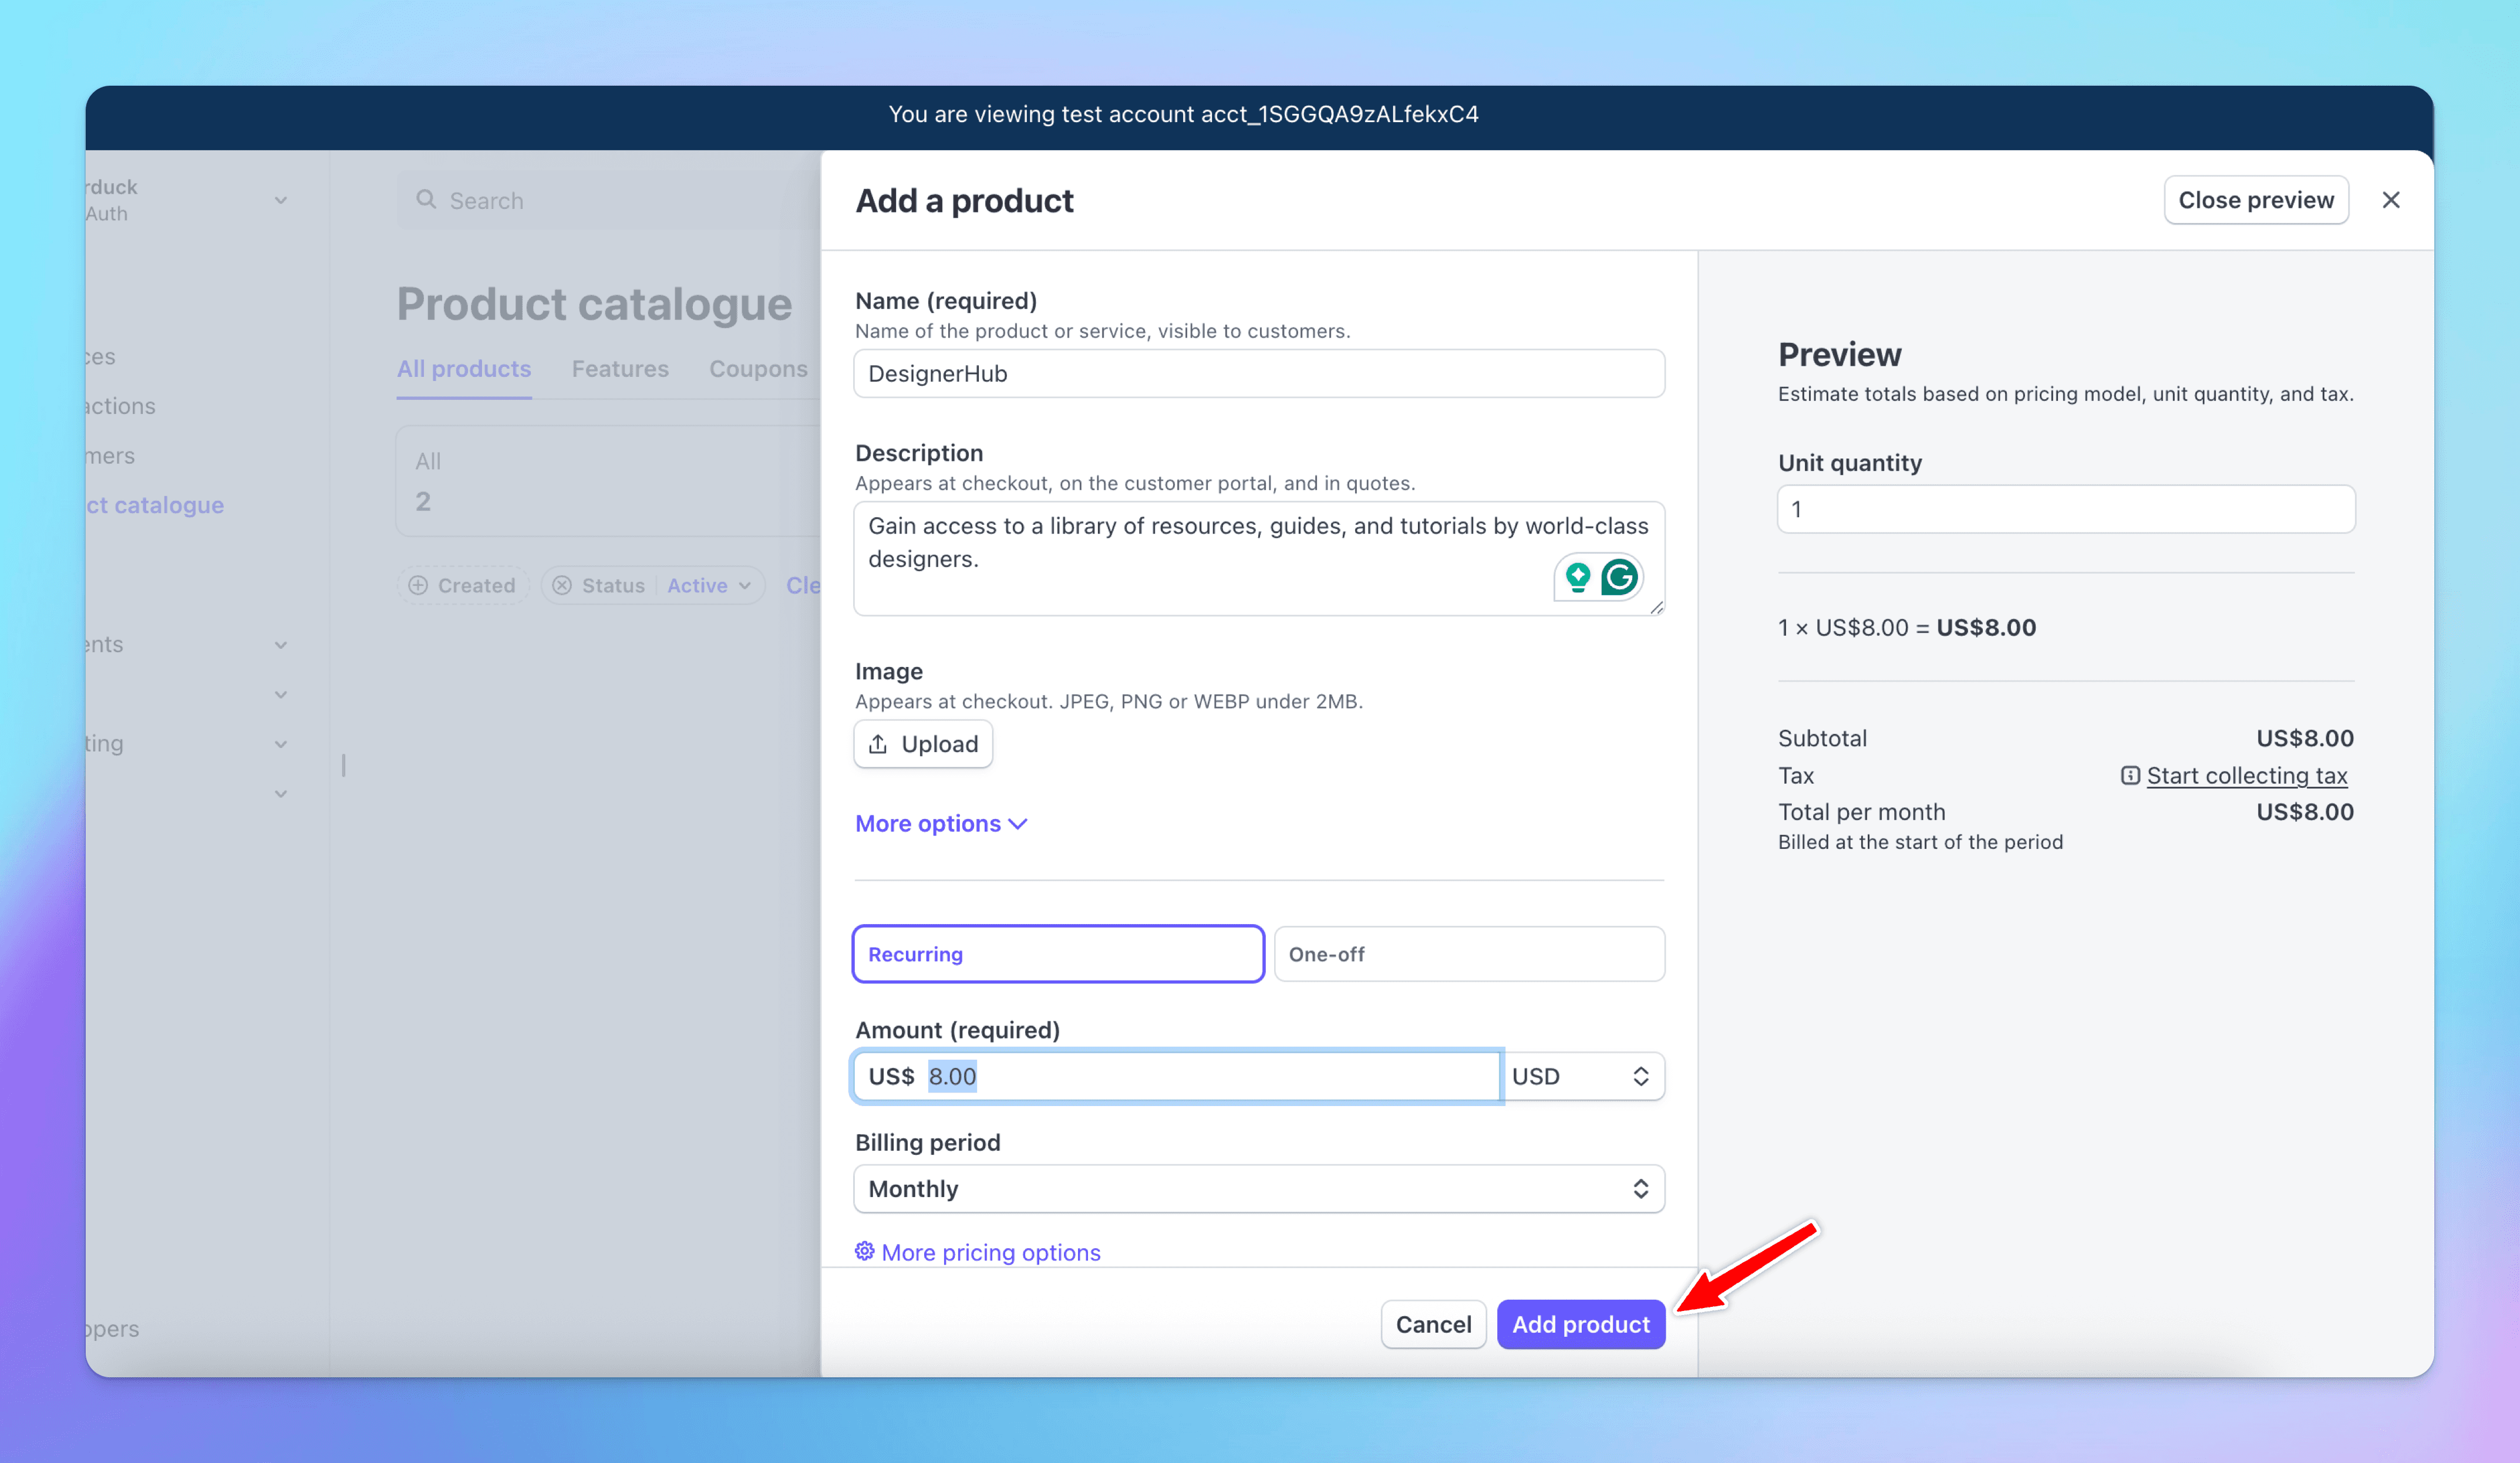
4
Add products
Add the details about your product including billing period, recurring or one-off, price, and other details.
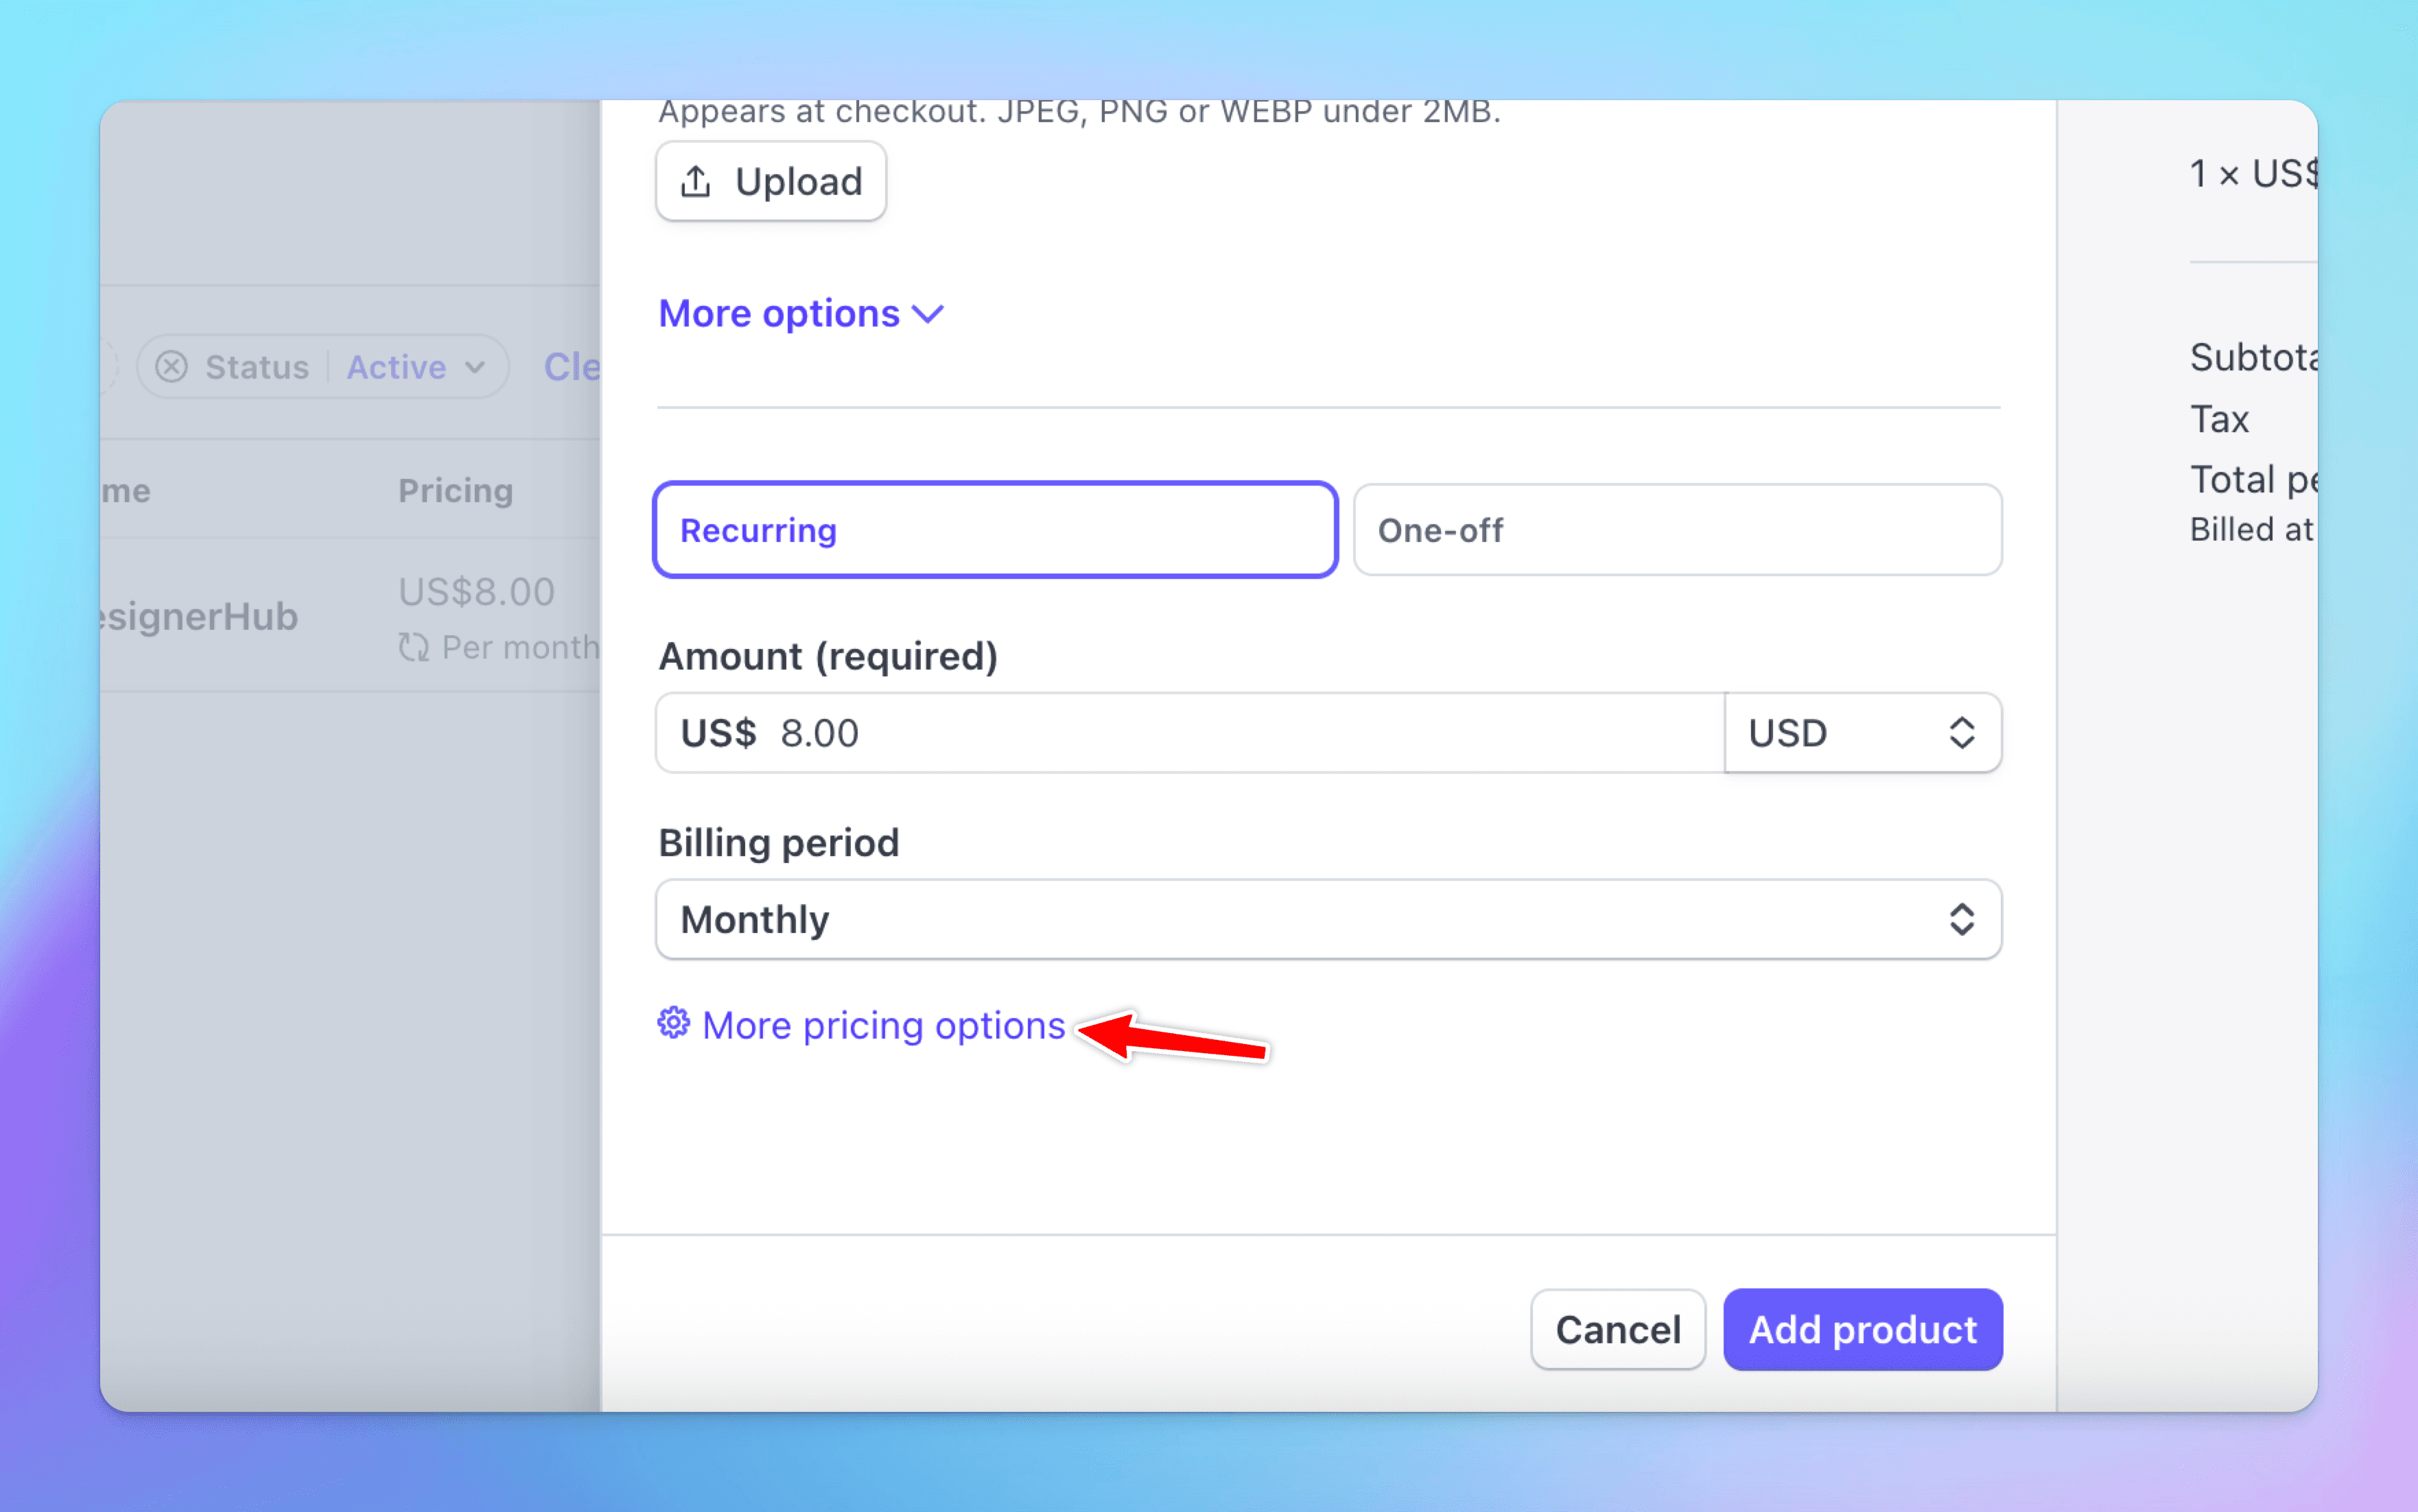
5
Click 'more pricing options'
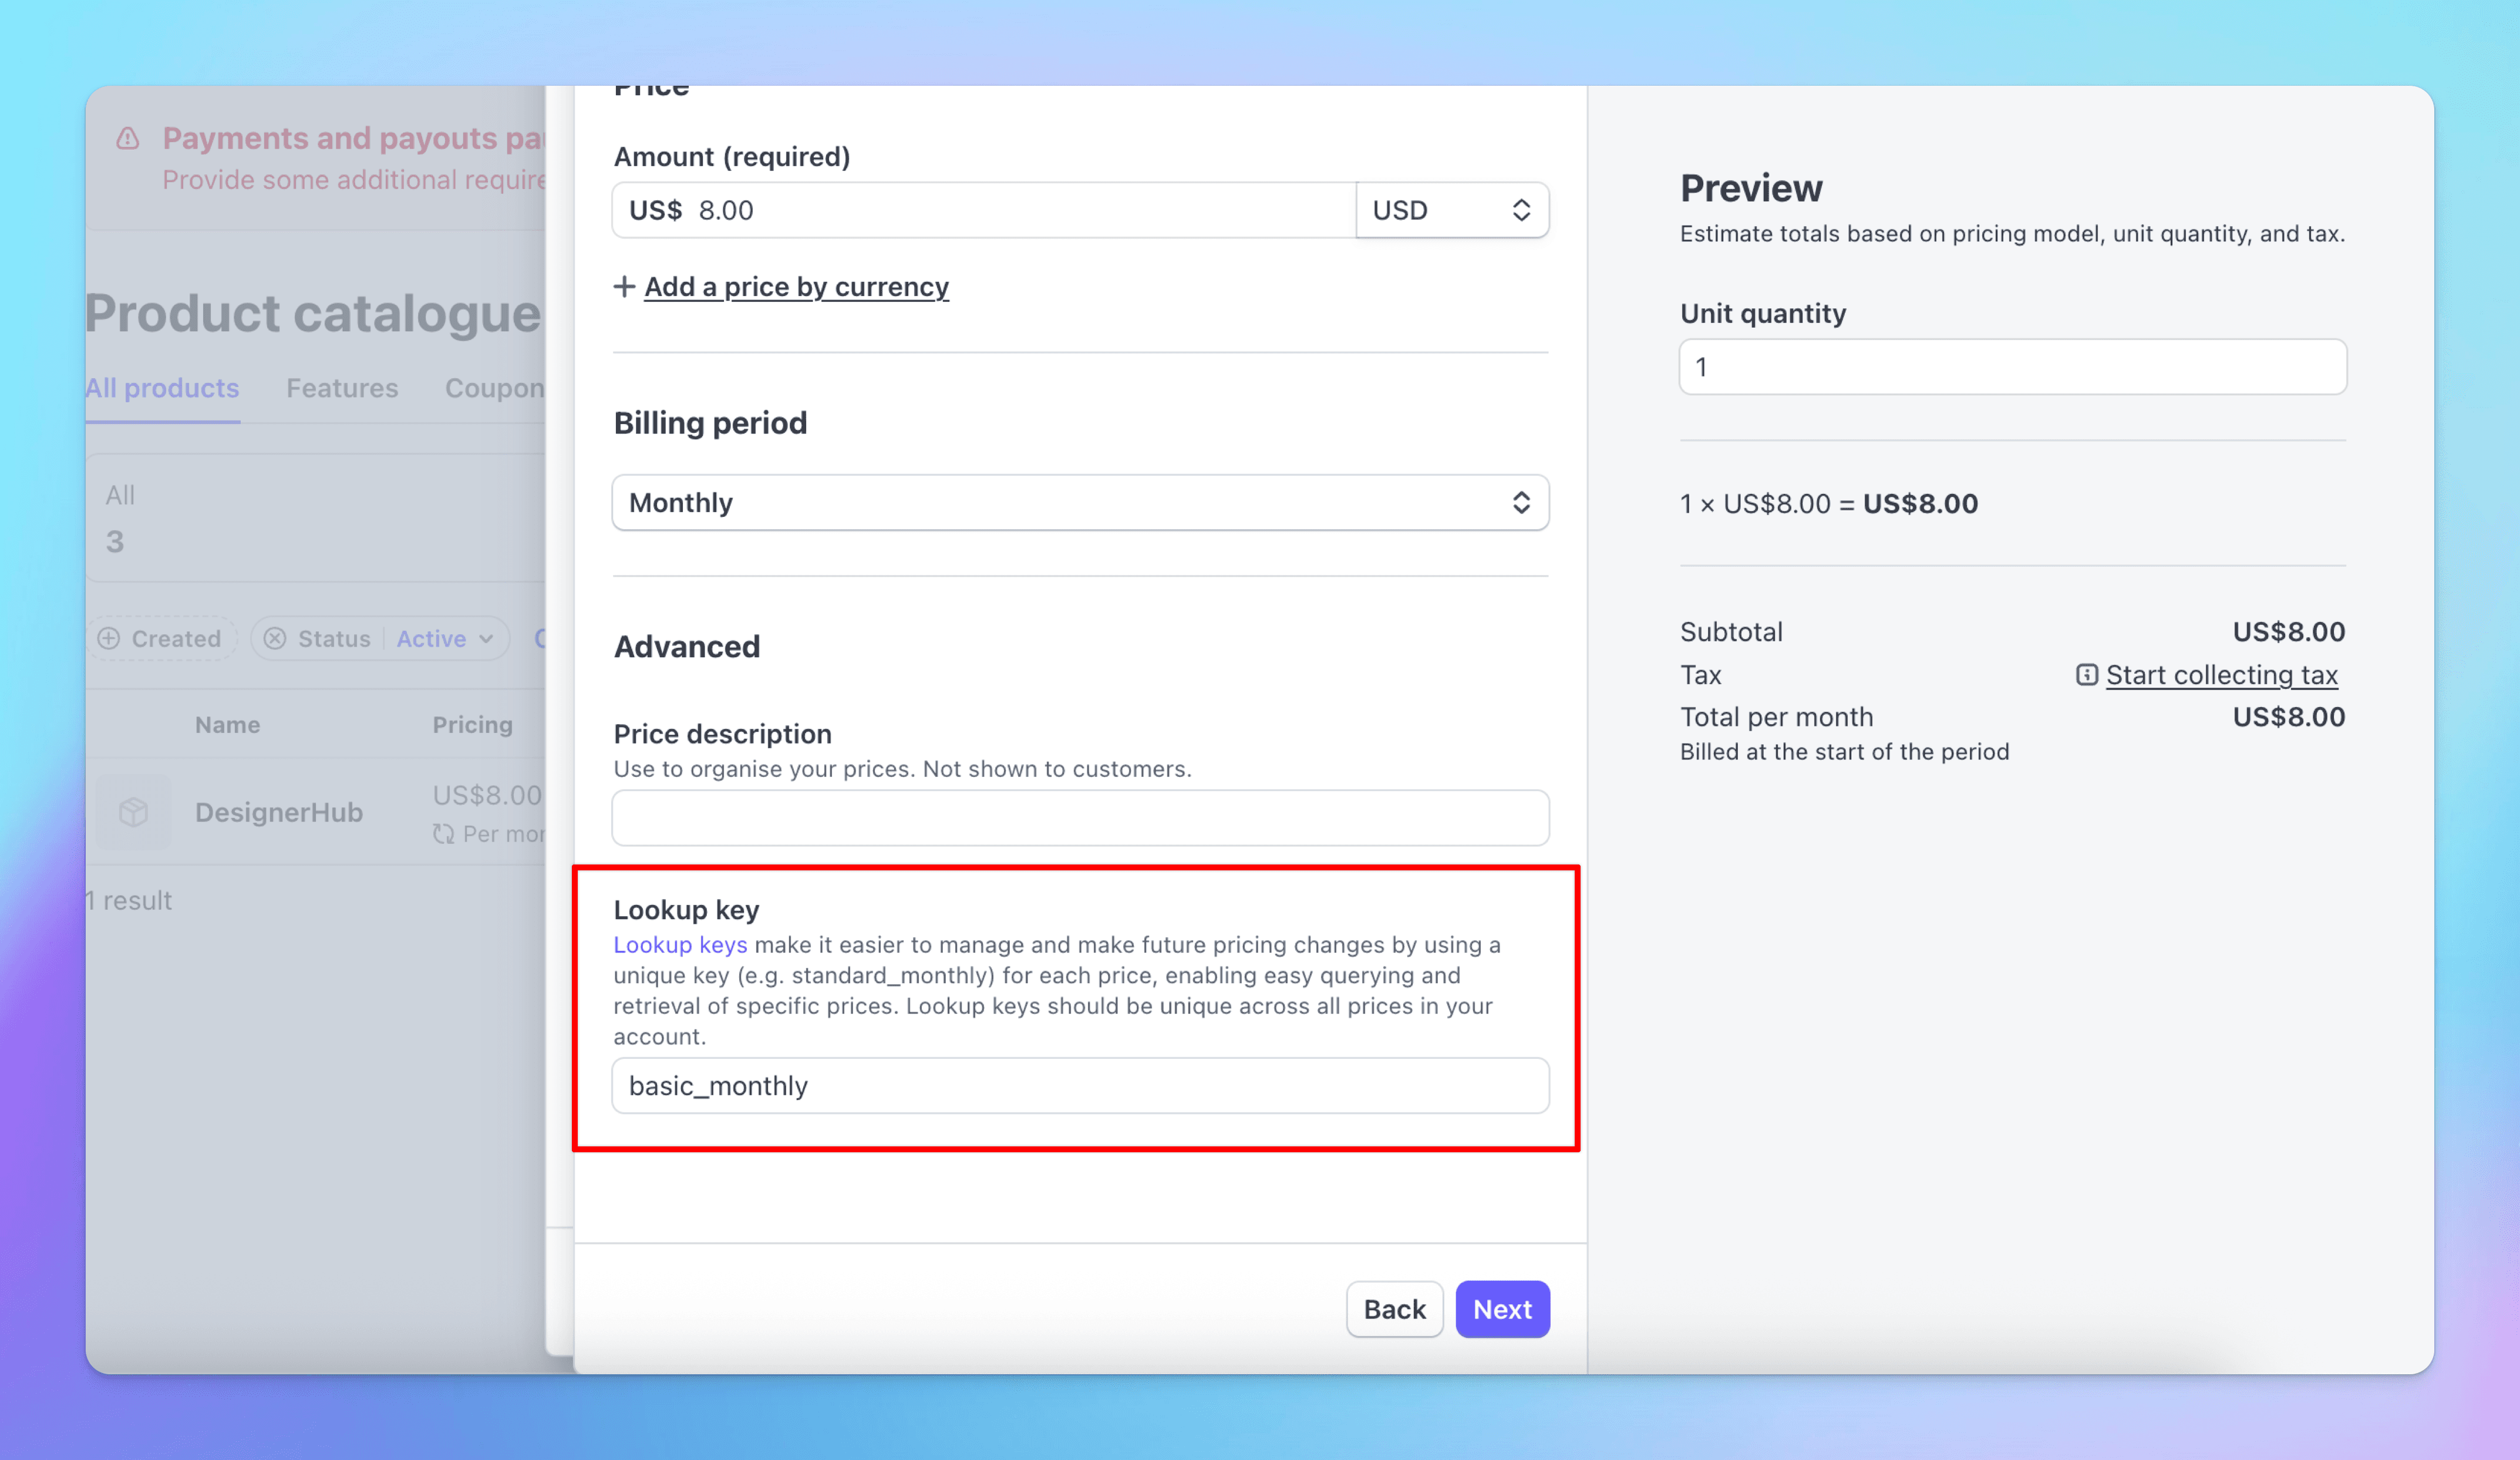
6
Set a unique lookup key
The lookup key will be used later in the Action Button component to trigger a purchase — make it something memorable. If you already have existing products, add lookup keys to them as well.
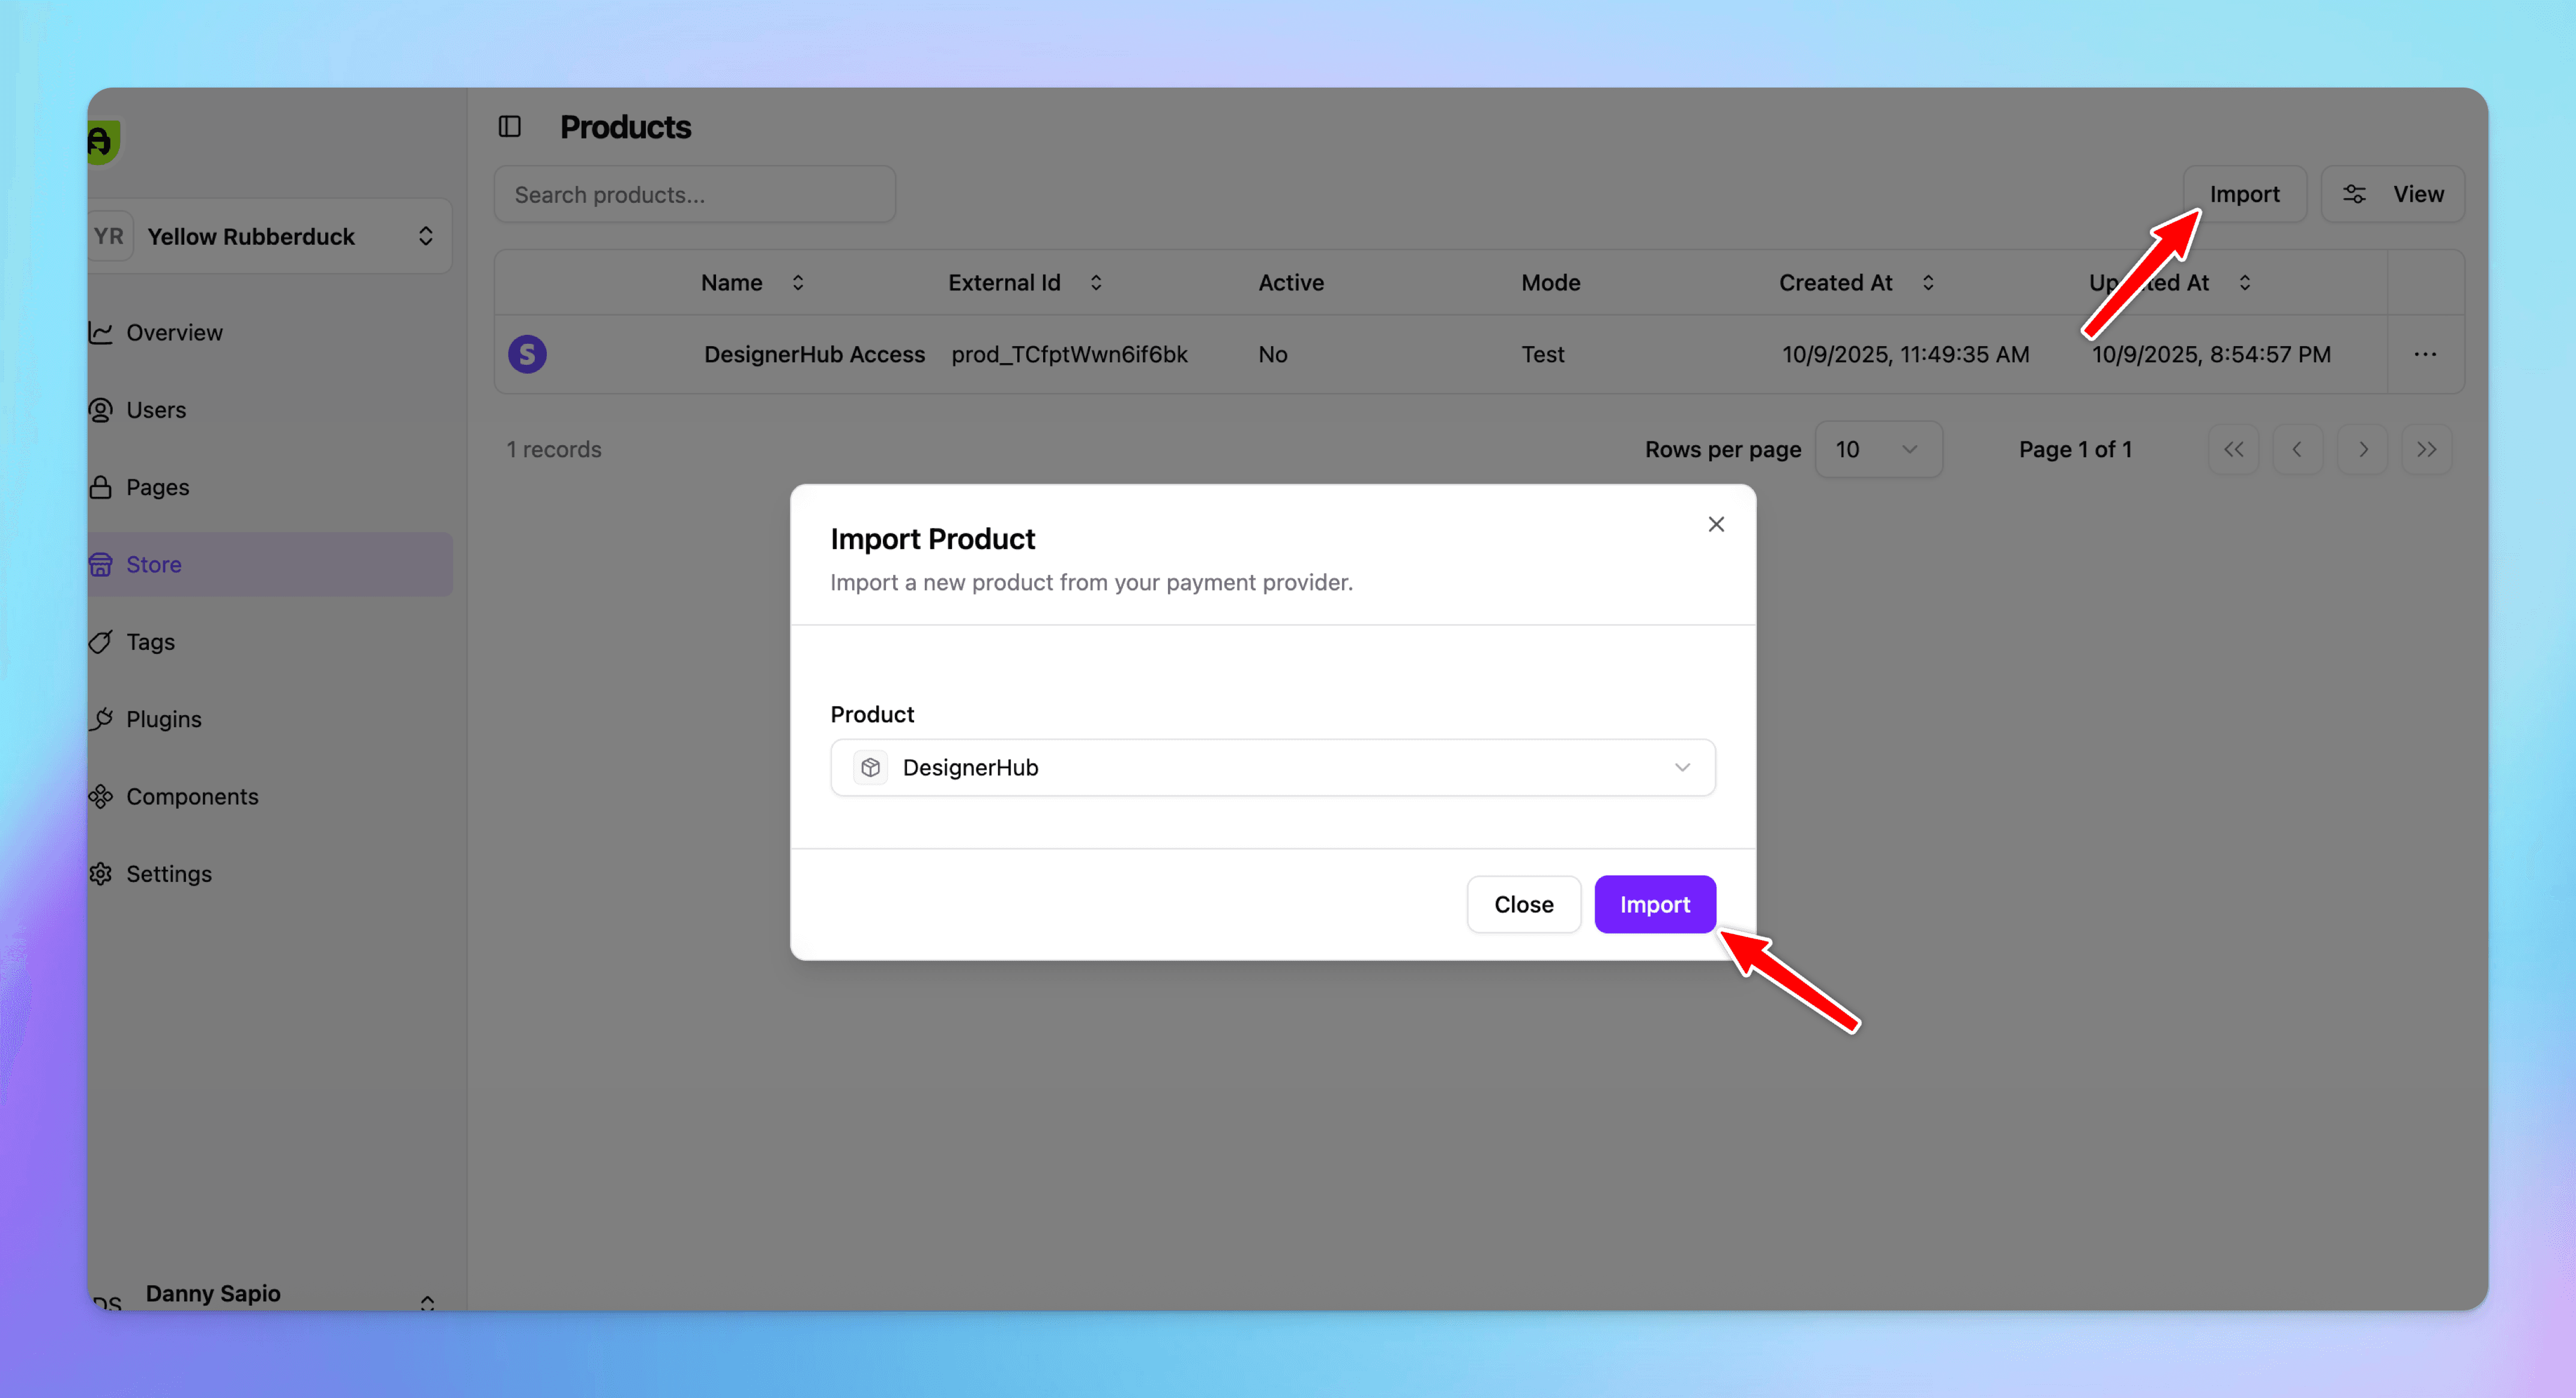
7
Import product to FrameAuth
Import each of the products you plan to sell access to through your Framer site.
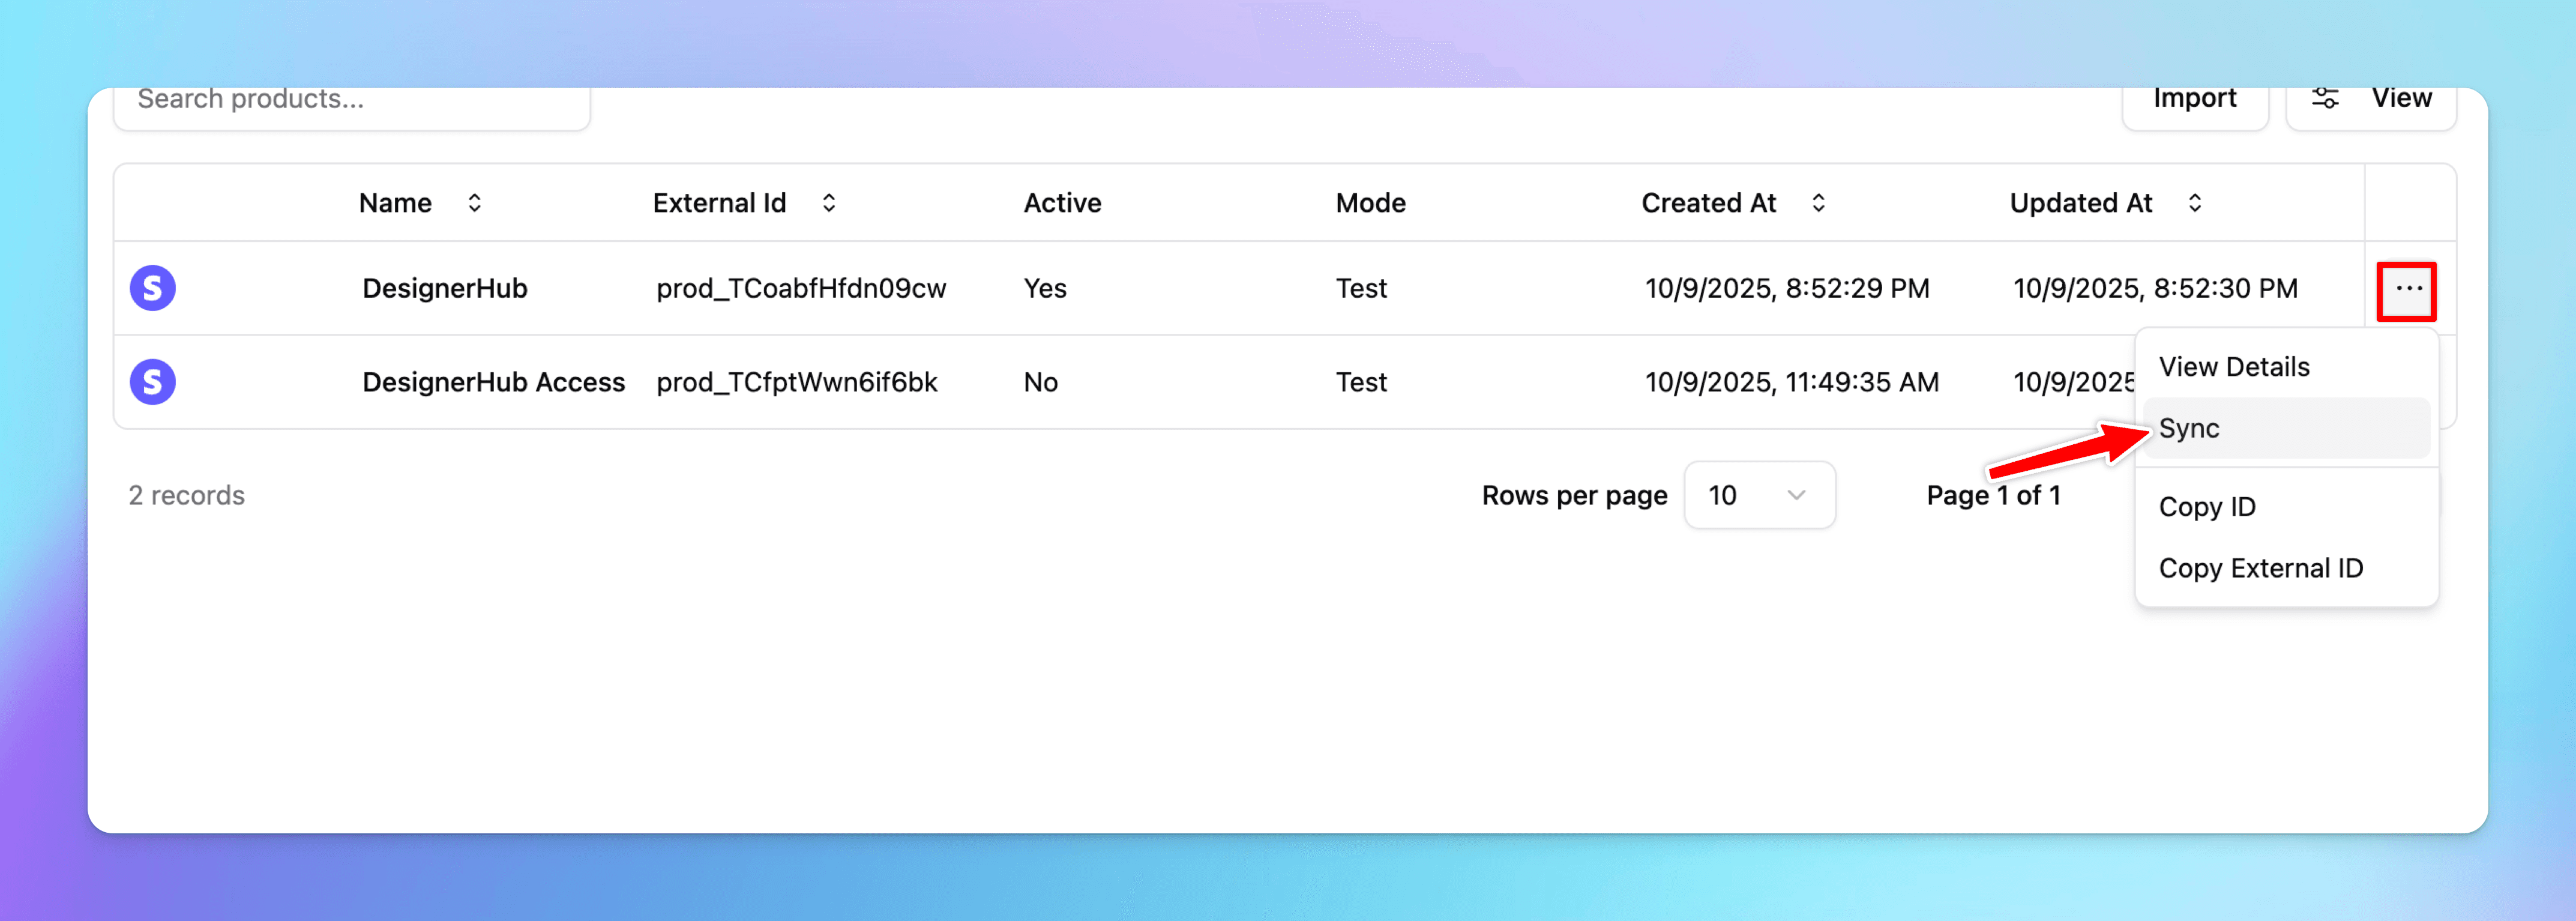
8
Reminder: If you edit or add more prices to your product, click 'sync'
9
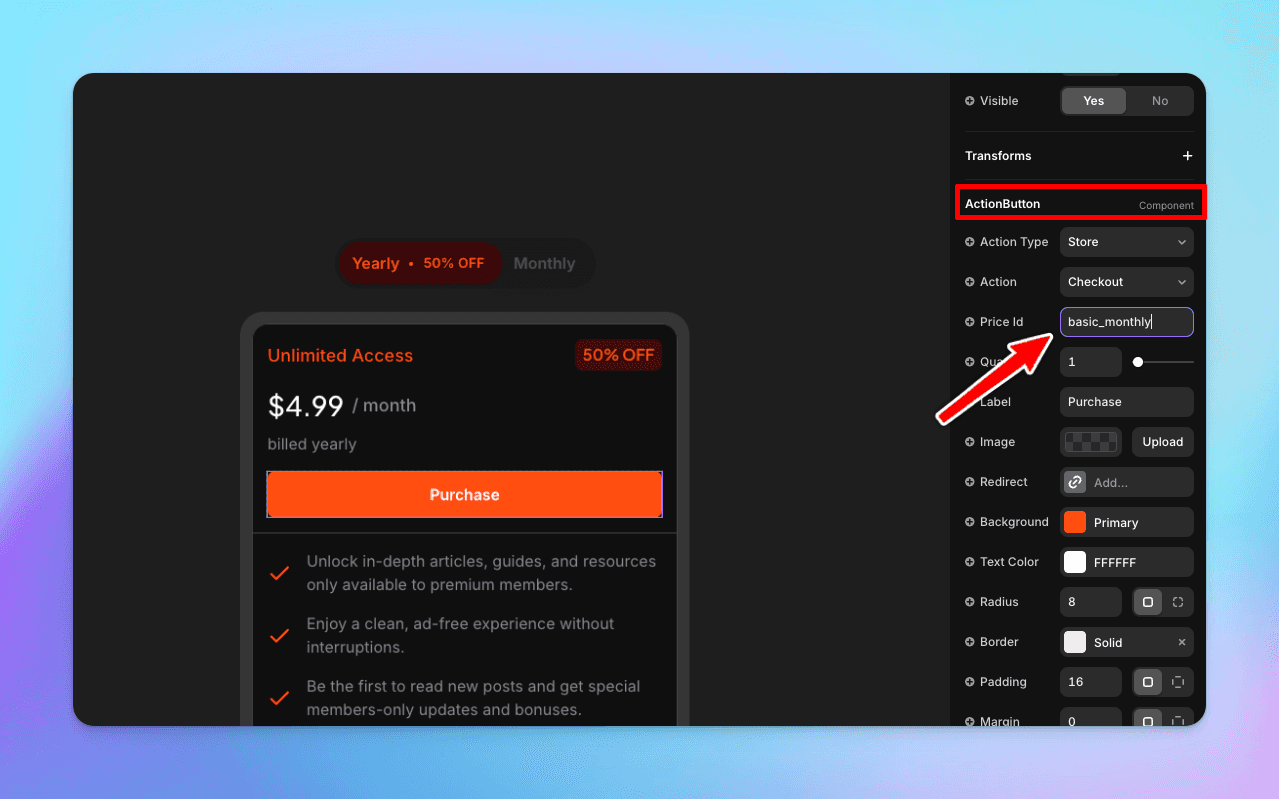
Add the action button to your project from the plugin
Use our plugin to add the ActionButton component to your canvas. The button will trigger a checkout and after a successful purchase, assign tags to the user if they exist or create a user if one doesn't exist yet for the email that was entered at checkout.
Set the action type to store and the action to checkout. Set the Lookup Key field to be the lookup key that you set in step 6.
10
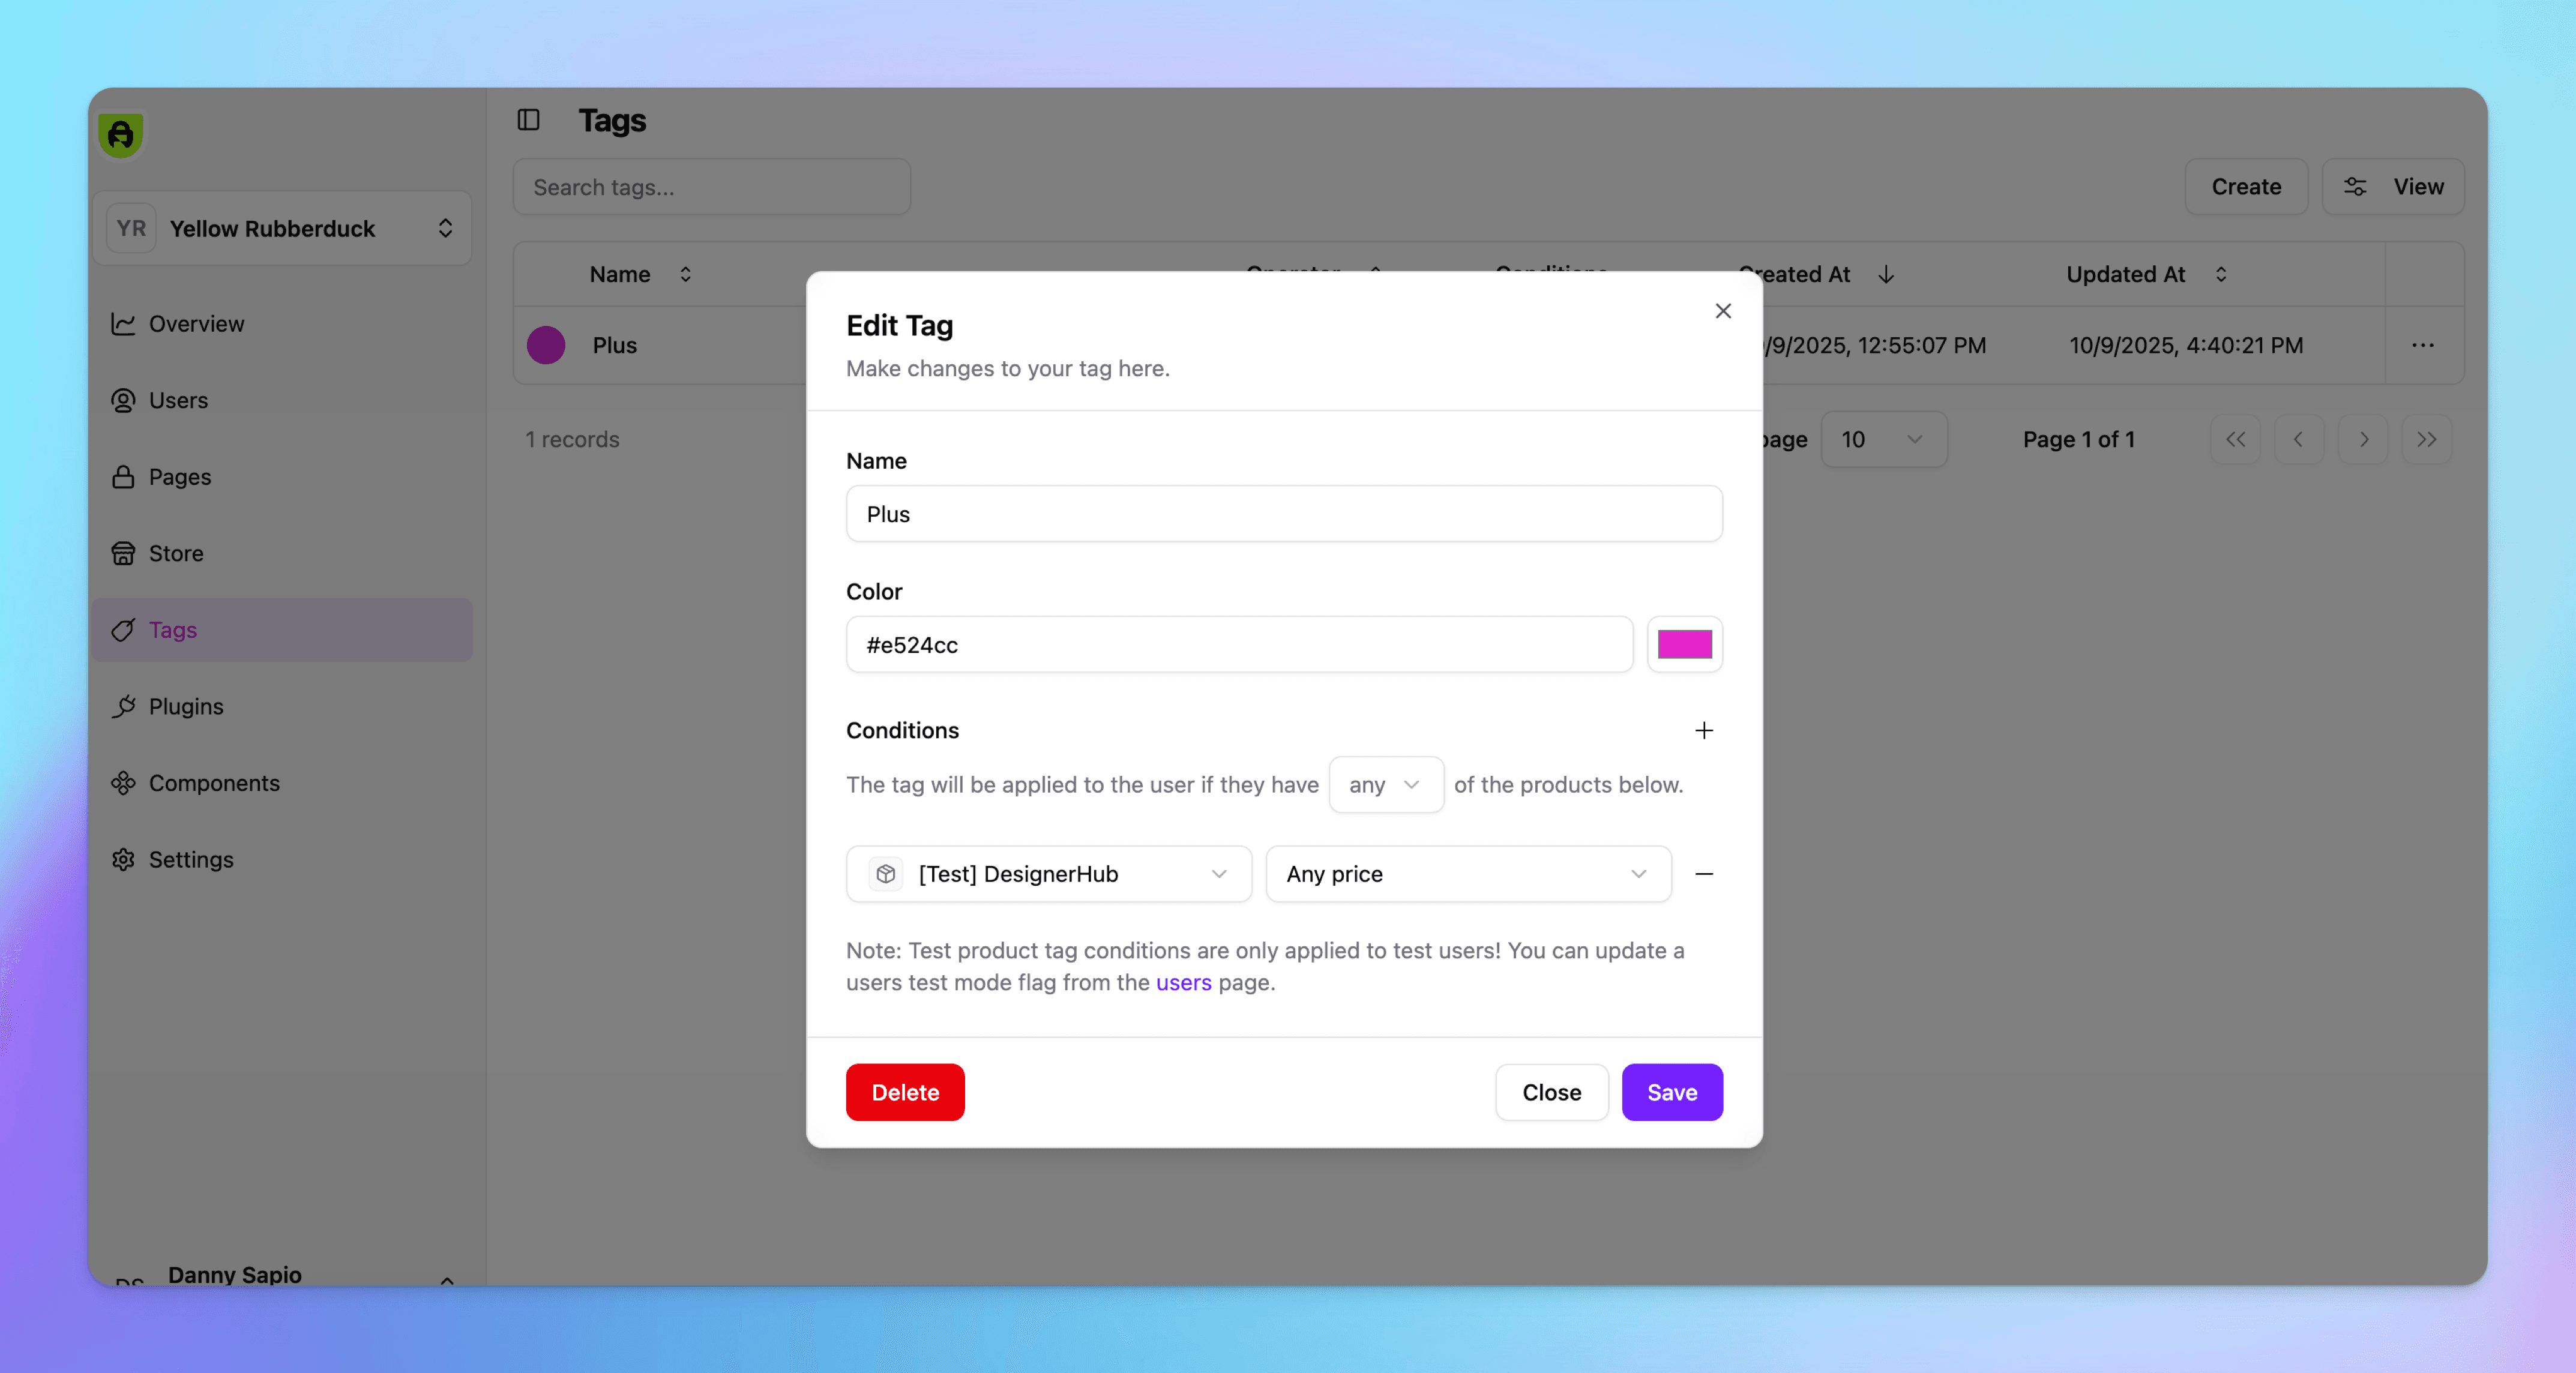
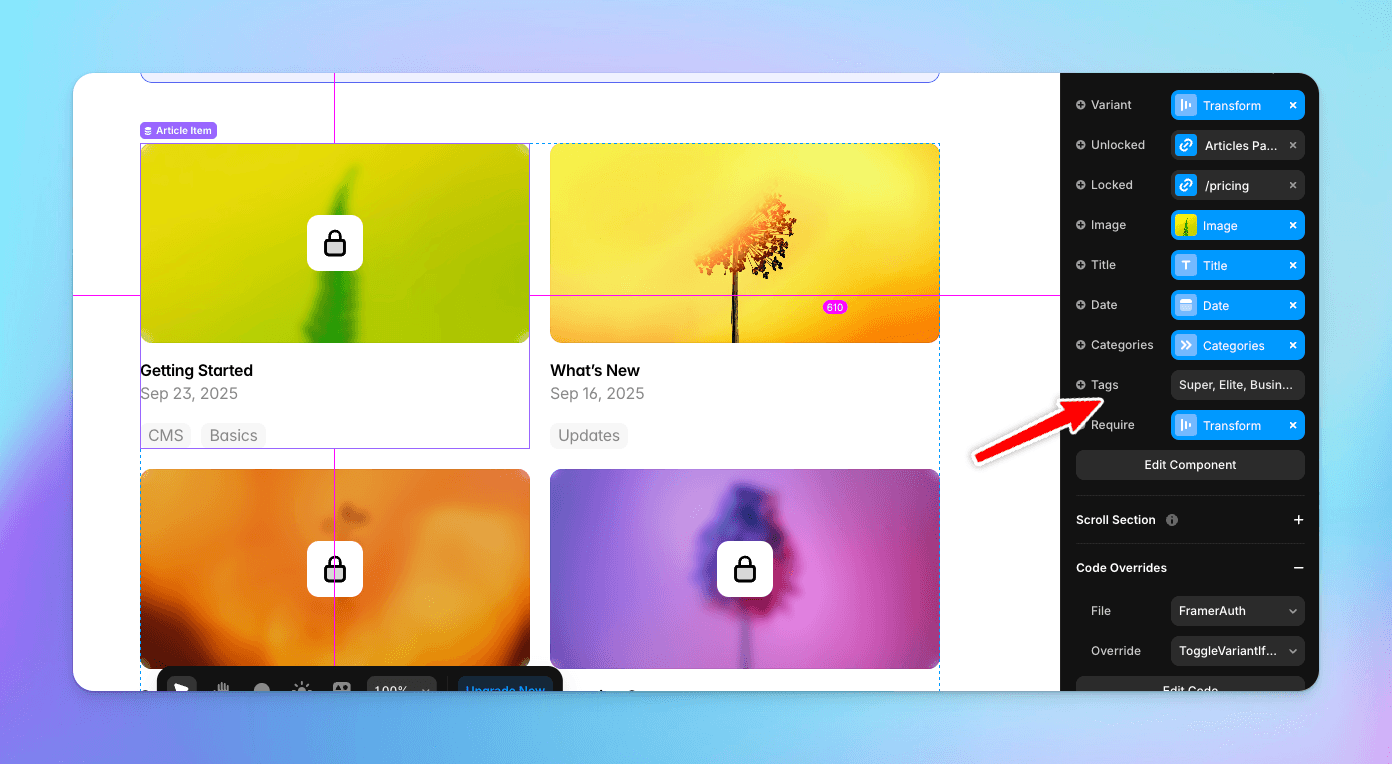
Create a tag and conditions
Purchases on their own don't unlock content on your site. Tags are the authorization logic that is used in FrameAuth to allow flexible access controls.
This tag will be granted to the user when conditions are met. When a visitor completes a purchase the tag will be applied granting access to the content that you specify. Learn more about tag controls.
11
Lock content to be accessible only to users with specific tags
It's easy to lock content and pages so that only users with specific tags have access to the content. Follow this guide to conditionally show/hide content to specific tags.
12
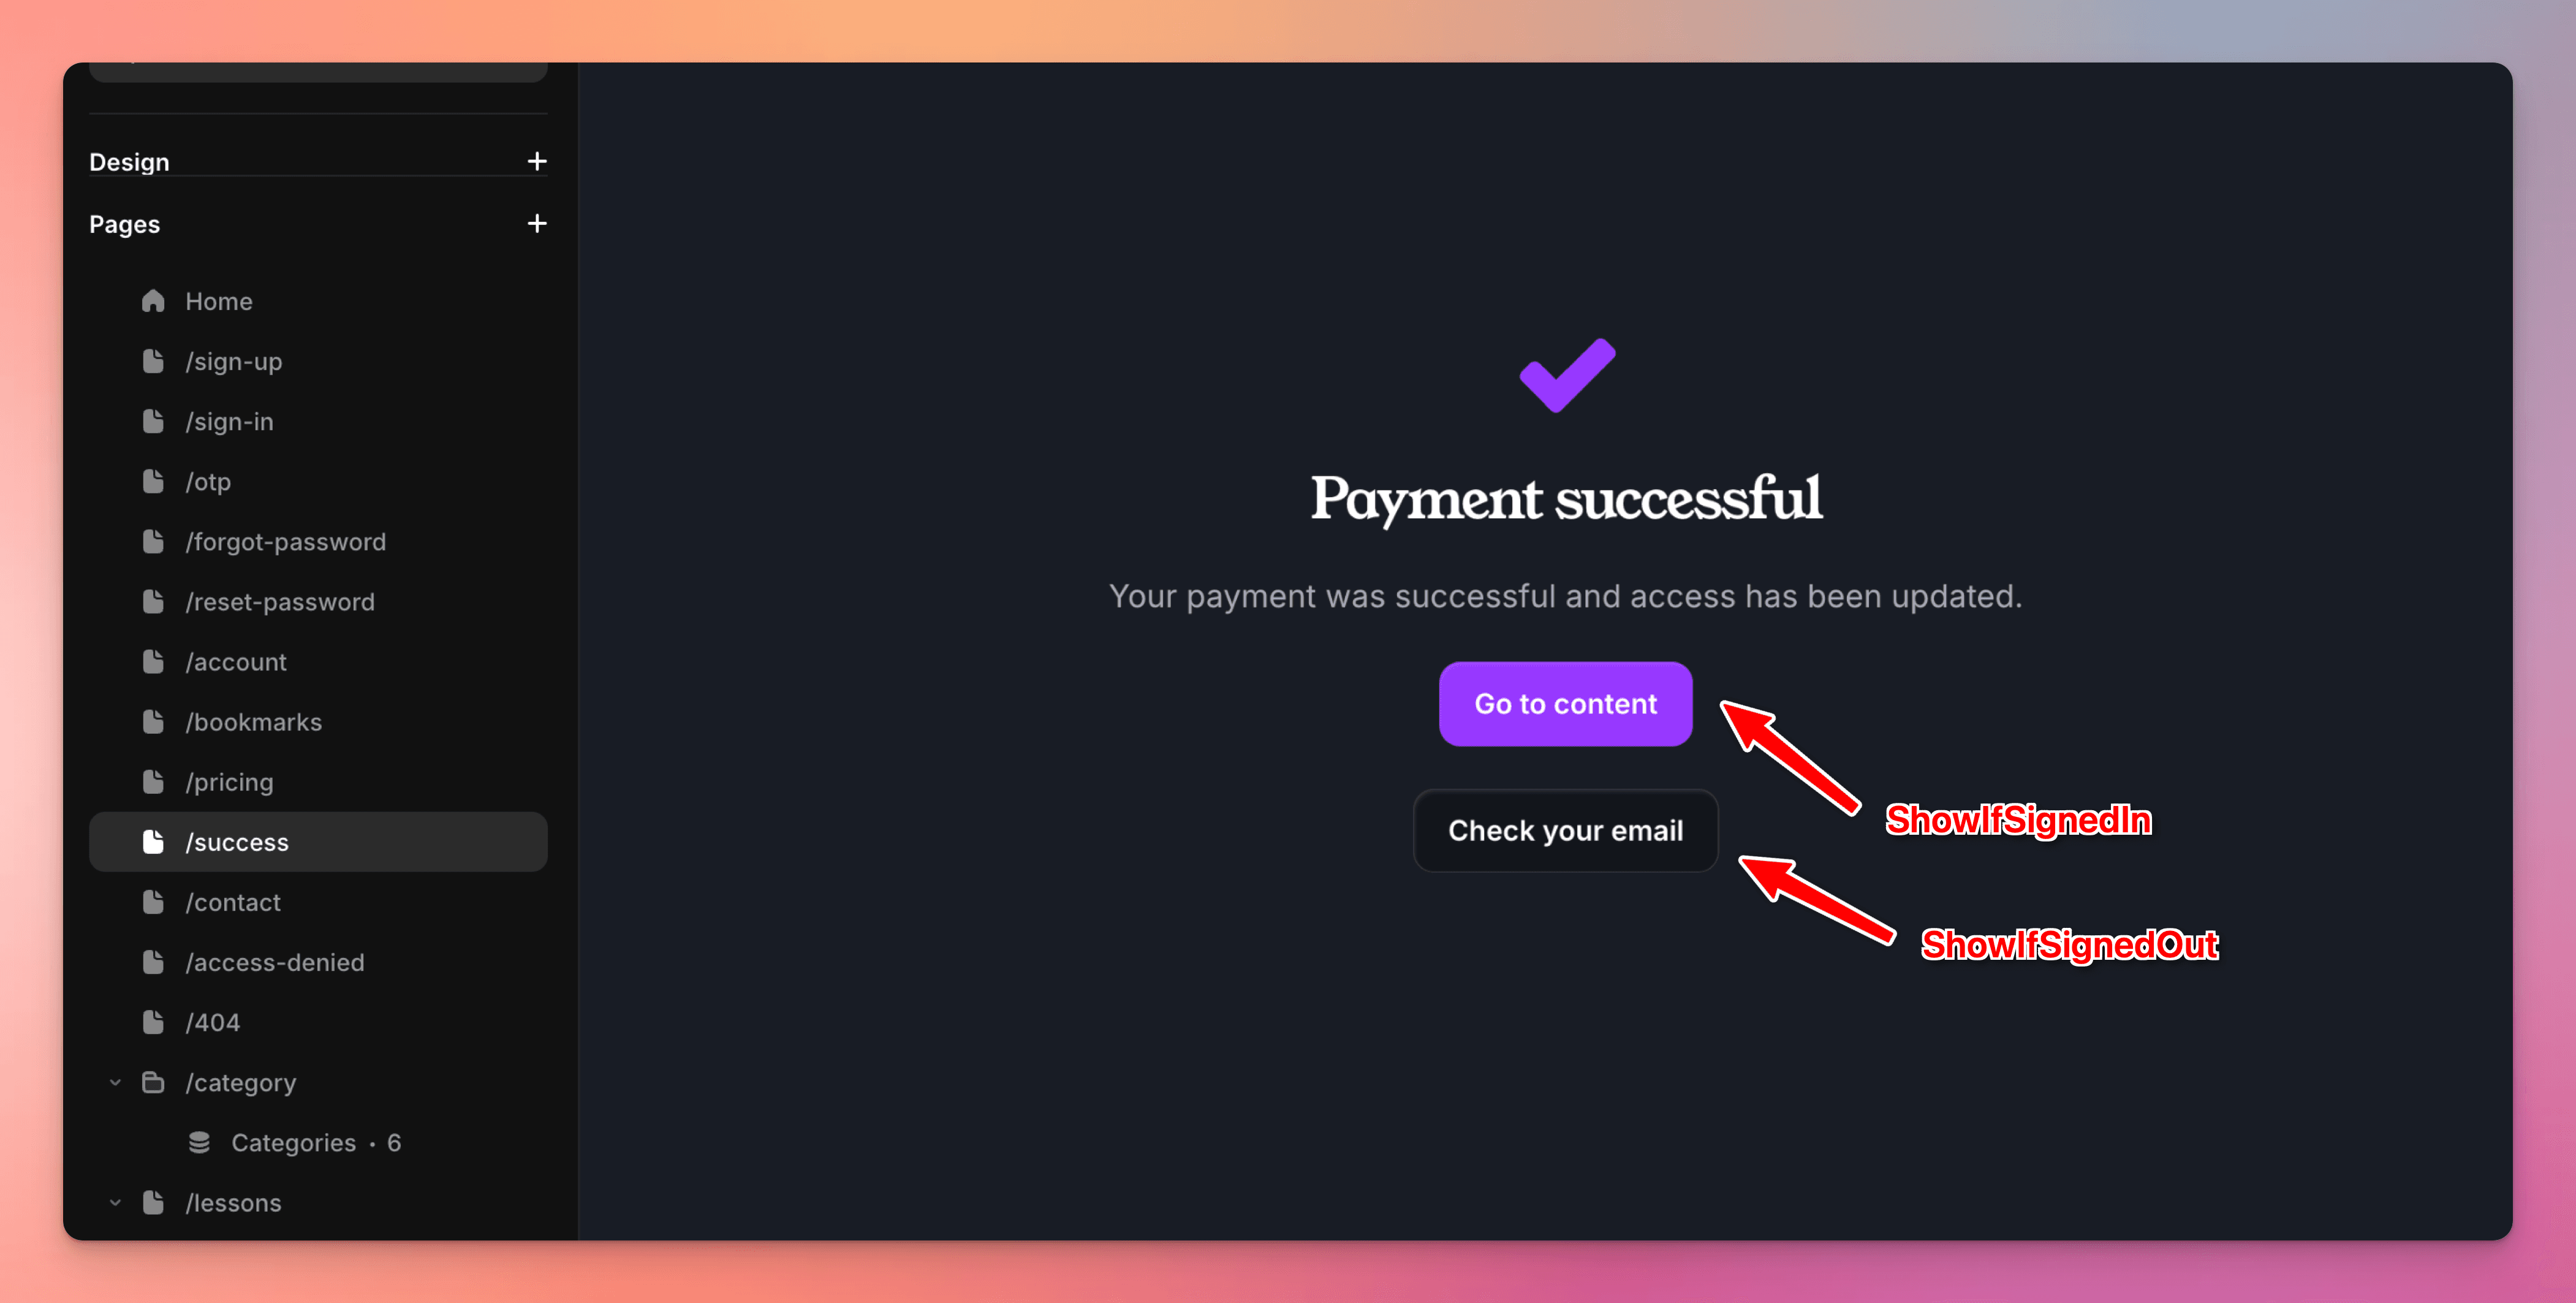
Create a /success page
With the Stripe integration visitors can purchase while being signed in or signed out. They can also purchase with or without an account already.
If the user is signed out, FrameAuth will check if a user exists for the email address of the purchaser.
If yes, a tag will be granted. If no account exists, one will be created for the user and tags will be granted.
Solve for these two cases by having a /success page that users are redirected to after purchase. A redirect can be set in the ActionButton component. This page should tell users to check their email if they are signed out and connect them to the content they purchased if they're signed in.
If the user didn't have an account before purchasing then we'll create an account for them automatically and send them an email notifying them that their account was created.
Can I launch a checkout using Stripe links?
Can I sell physical products through FrameAuth?
Thanks for following along!
By following the steps outlined in this guide, you can begin profiting from your digital creations and charge visitors on your website to access them with Stripe. If you have any questions or need support, reach us on the support page.