Beginner
How to add a download button to your Framer website
How to quickly add a functional download button to your Framer website.
Learn how to add a download button to your Framer website, allowing visitors to easily access and save files like PDFs, images, videos, or documents. This step-by-step guide covers everything from linking your file to styling the button for a seamless user experience.
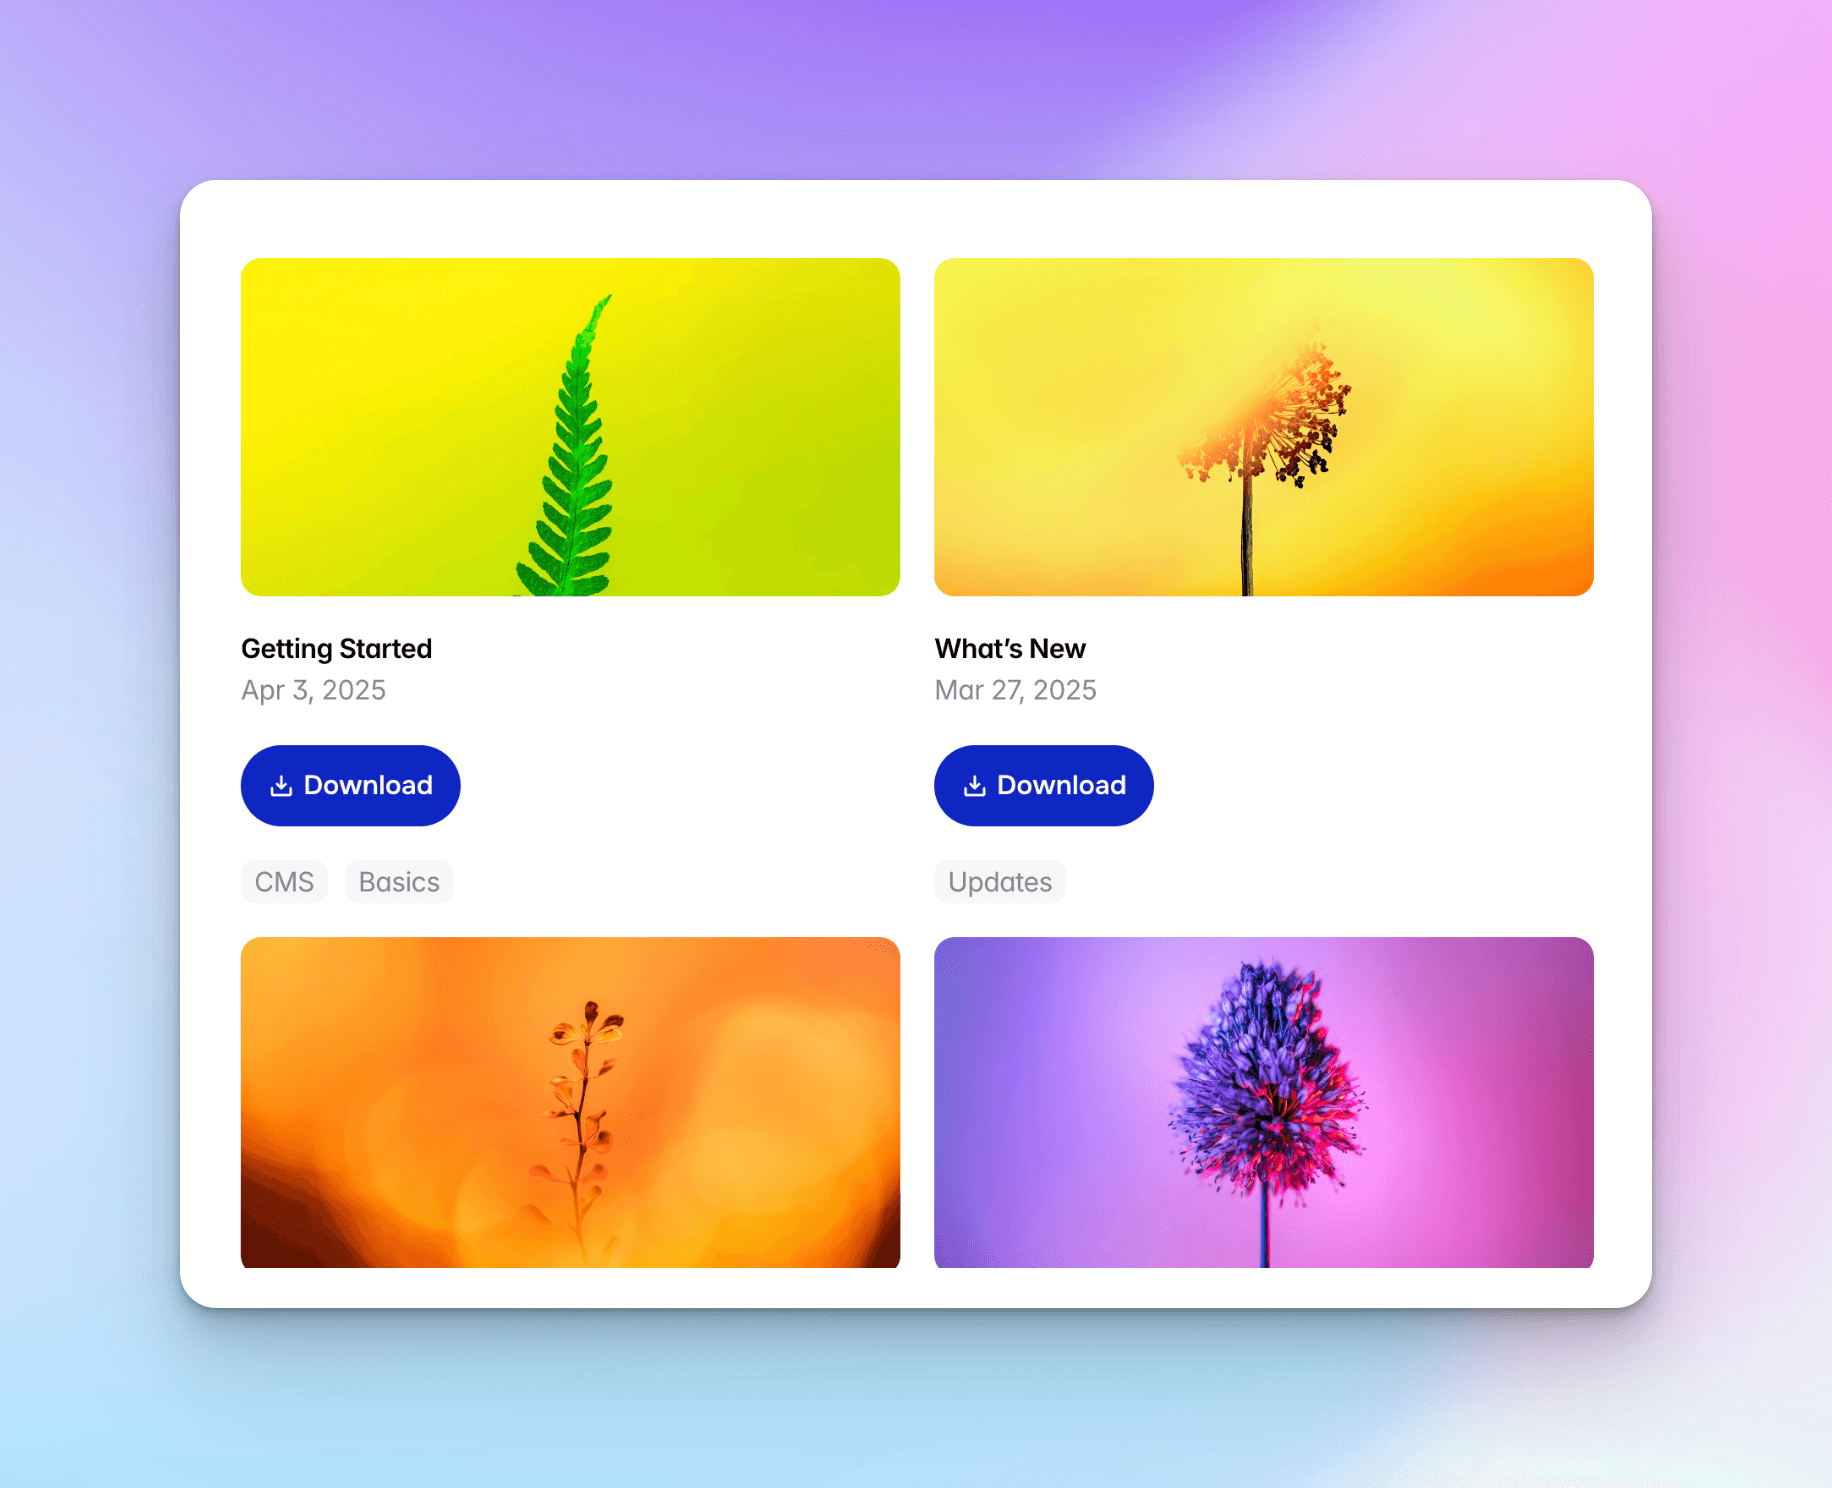
1
Add a ‘file’ field to your CMS collection
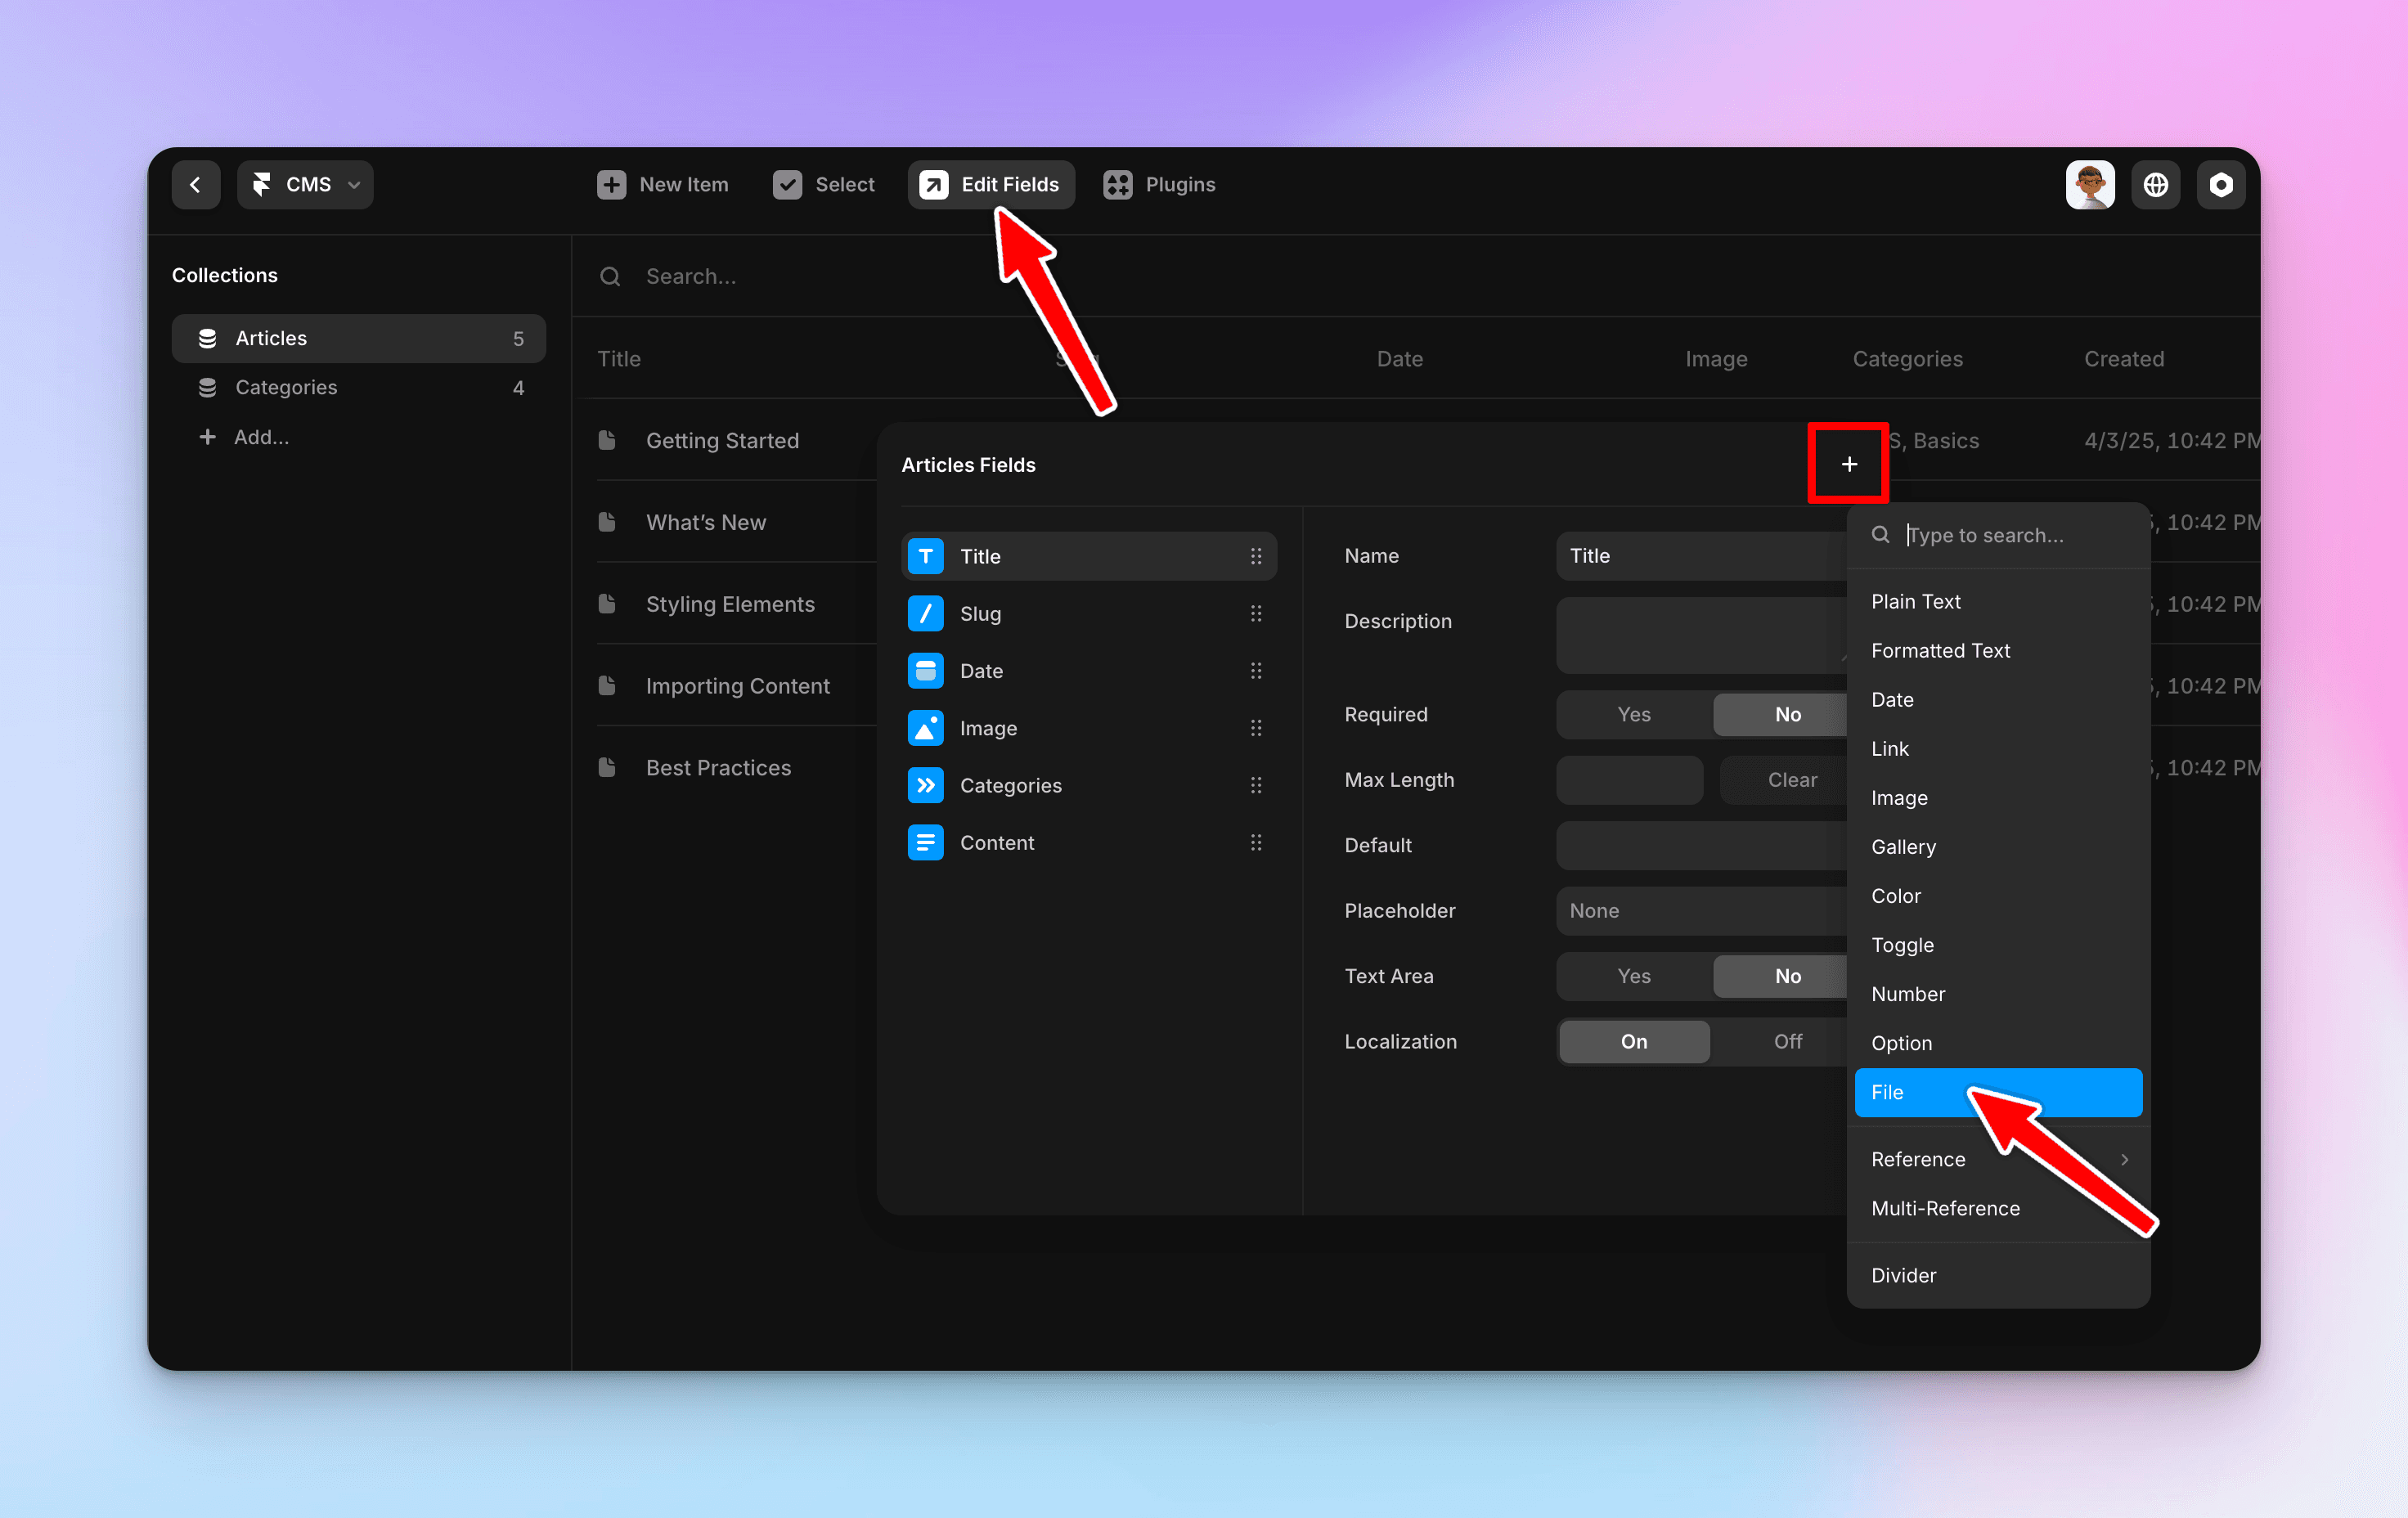
2
Add your file extensions
Specify the types of files that you will be adding. This is a required step.
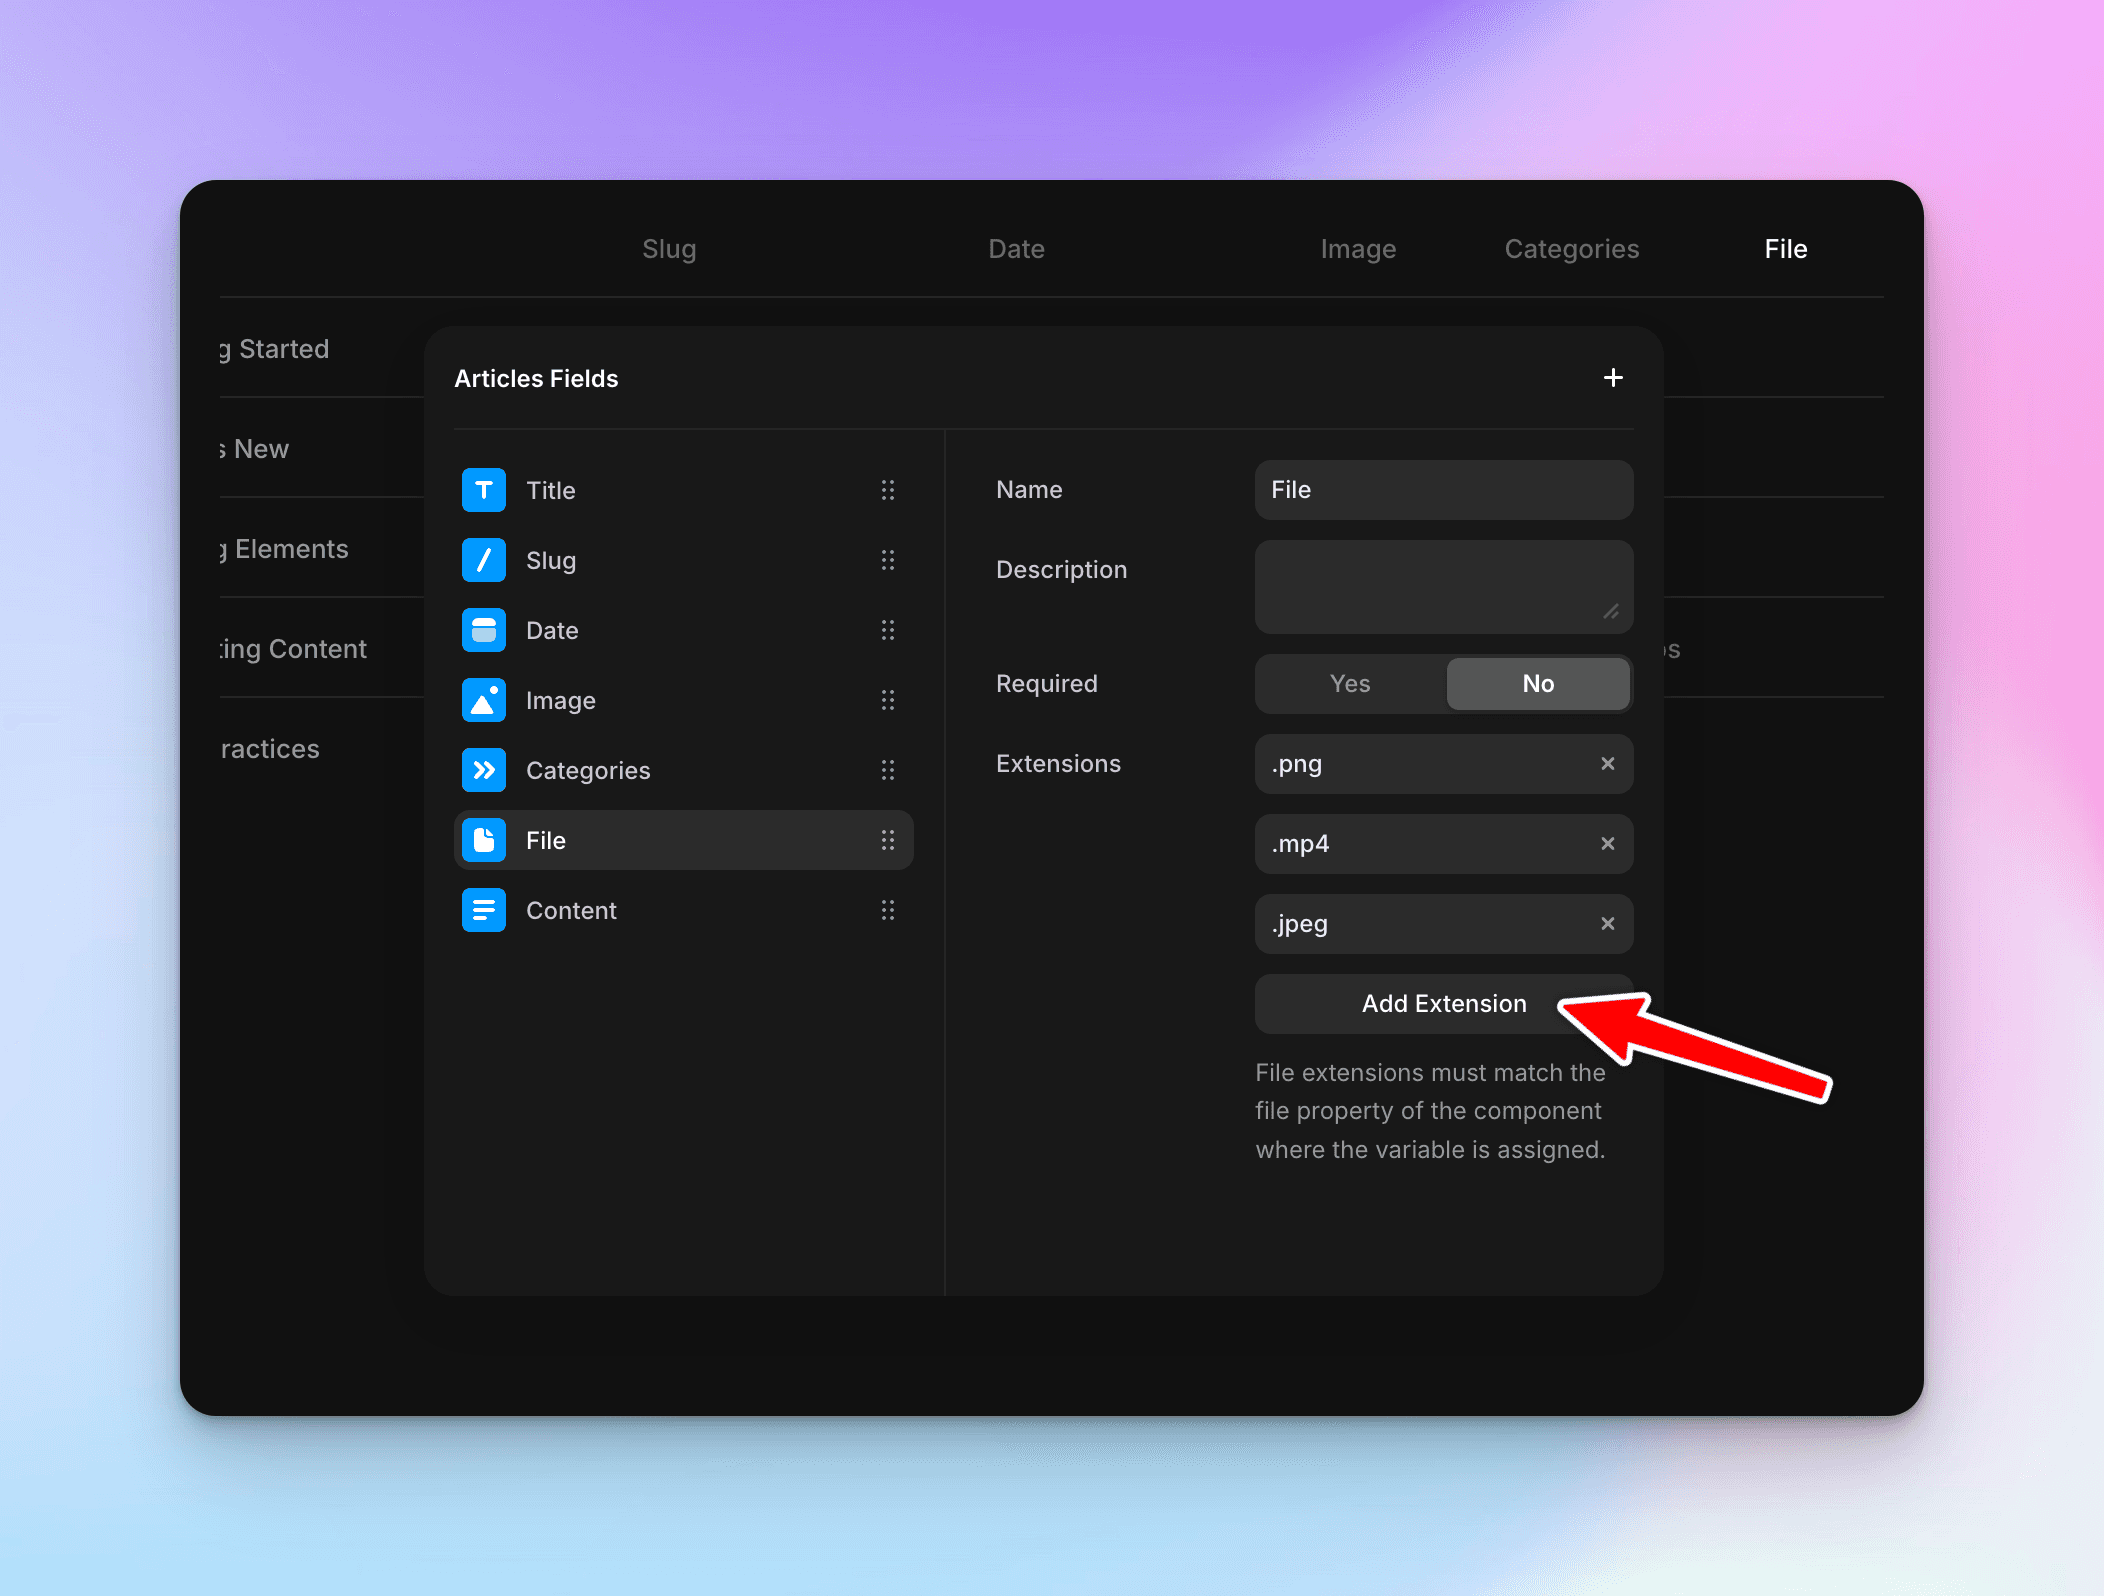
3
In your CMS entry, attach a file
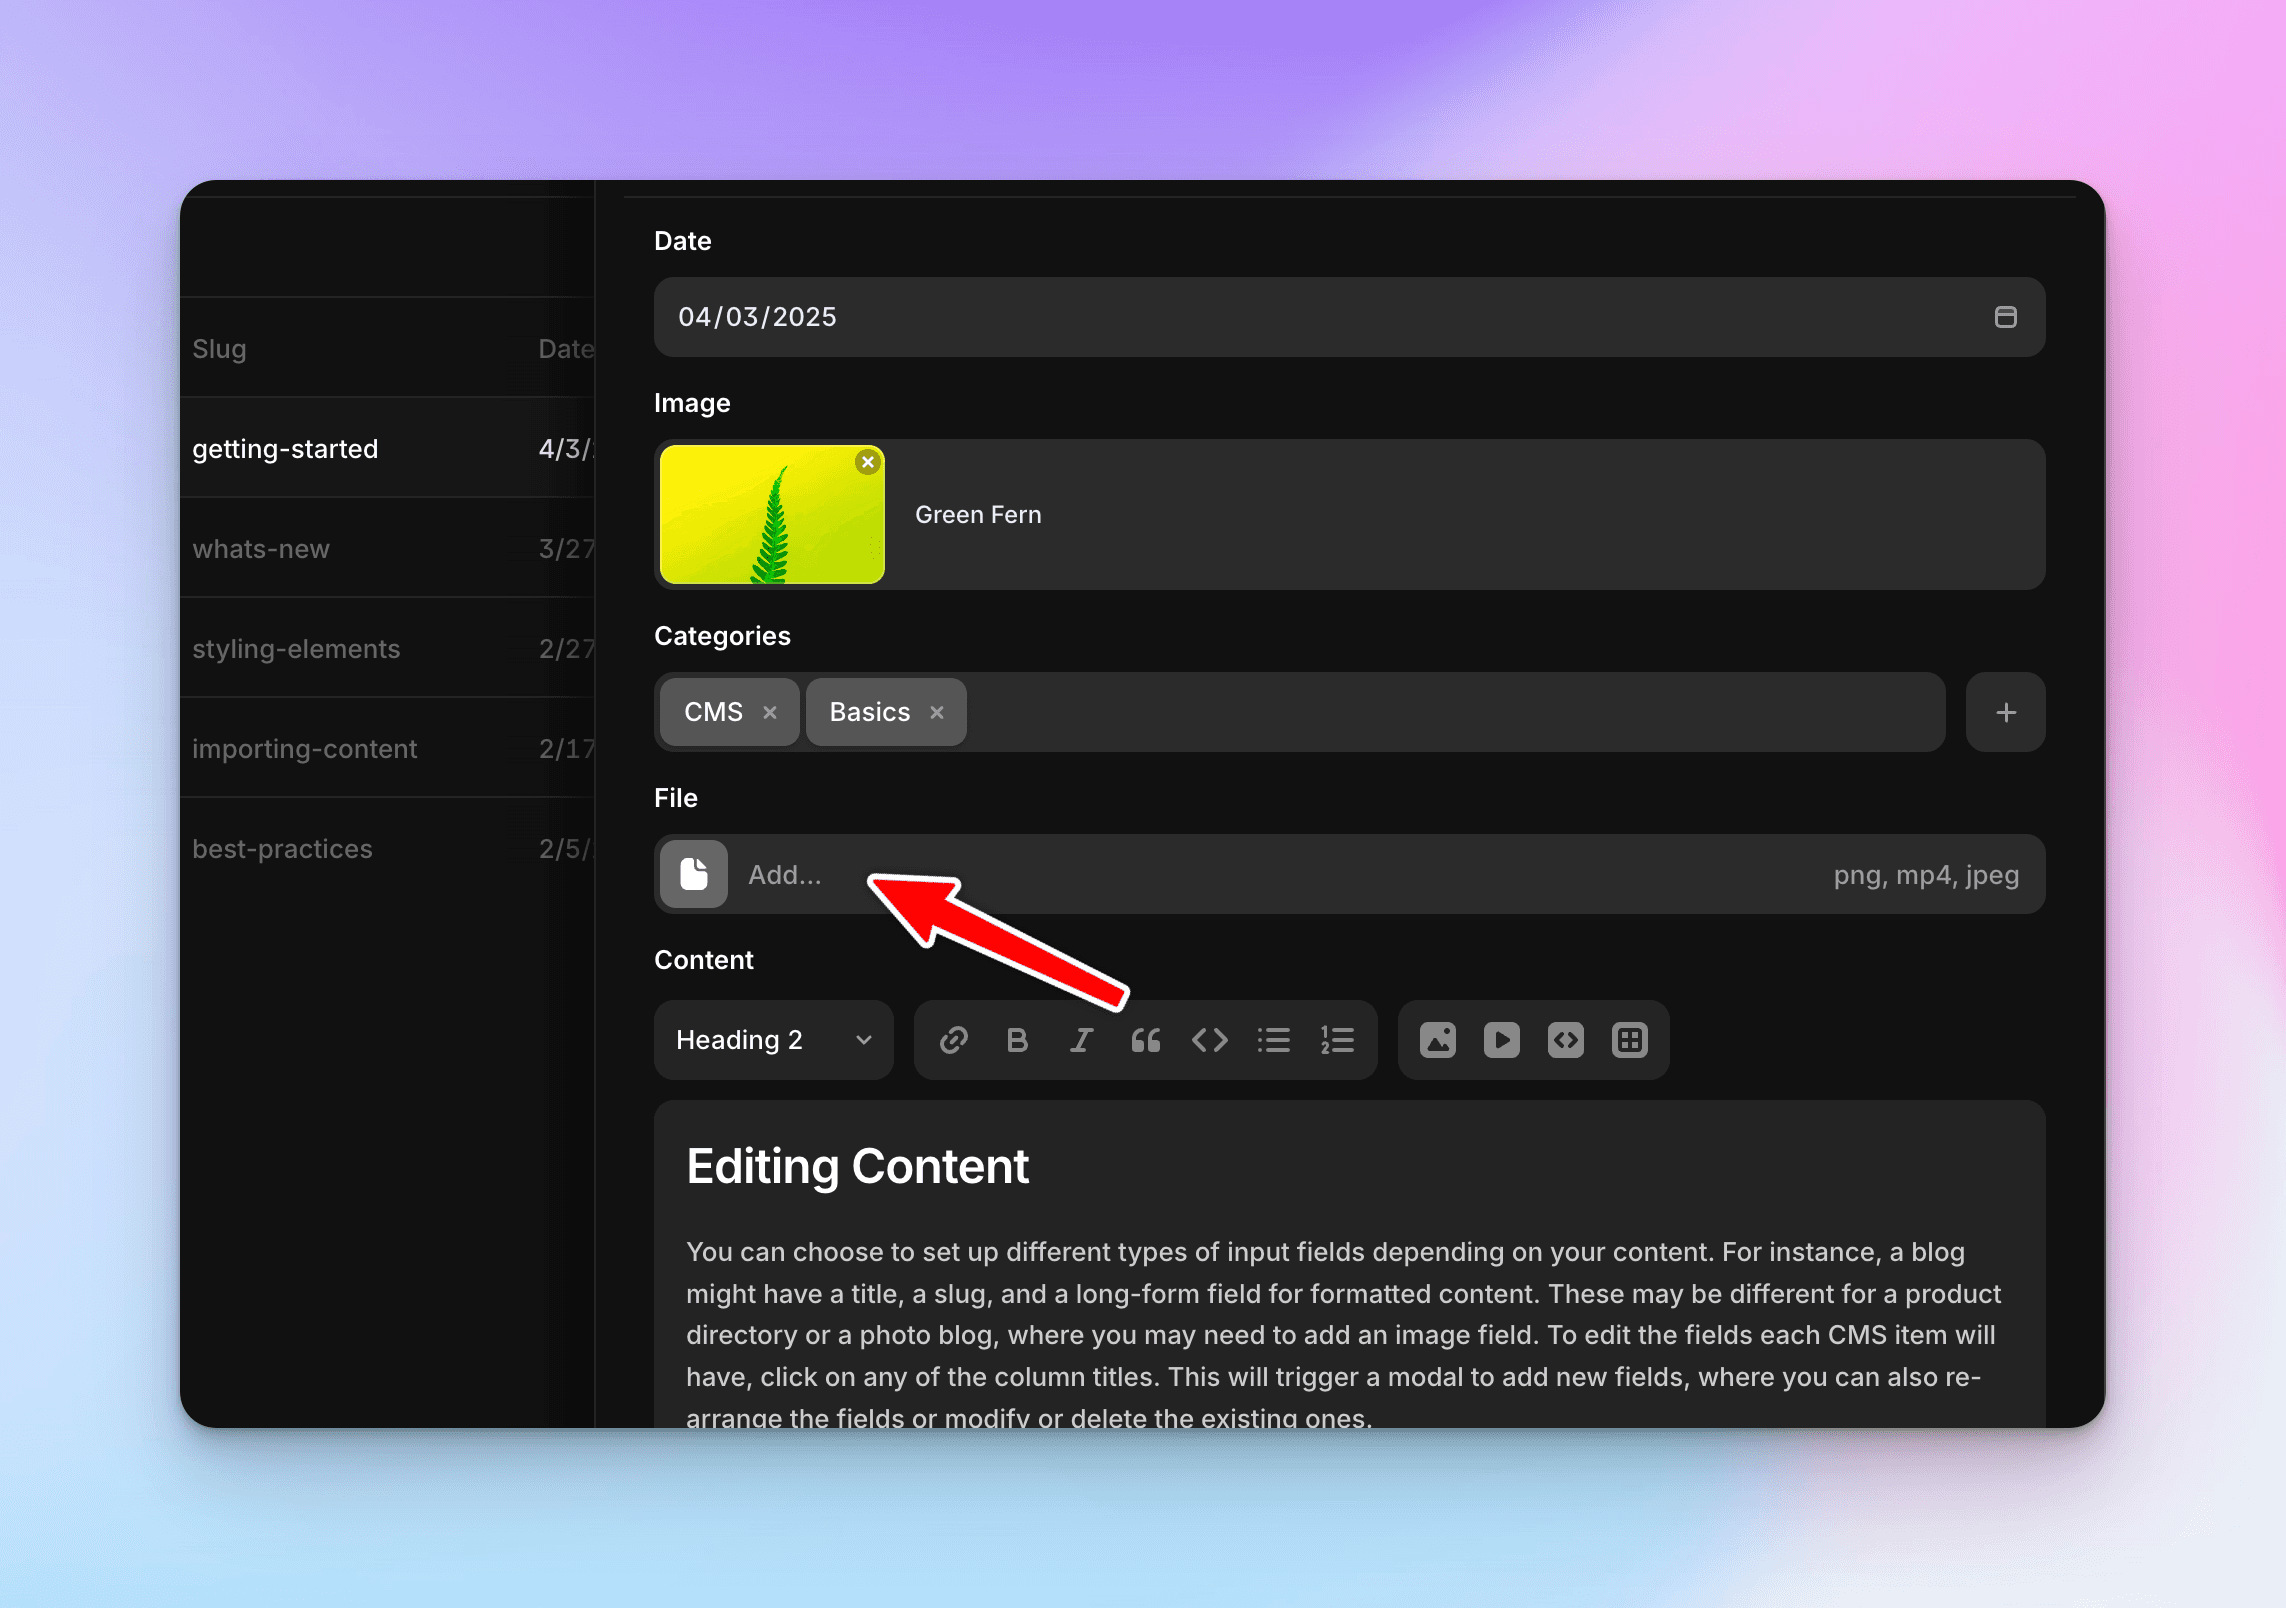
4
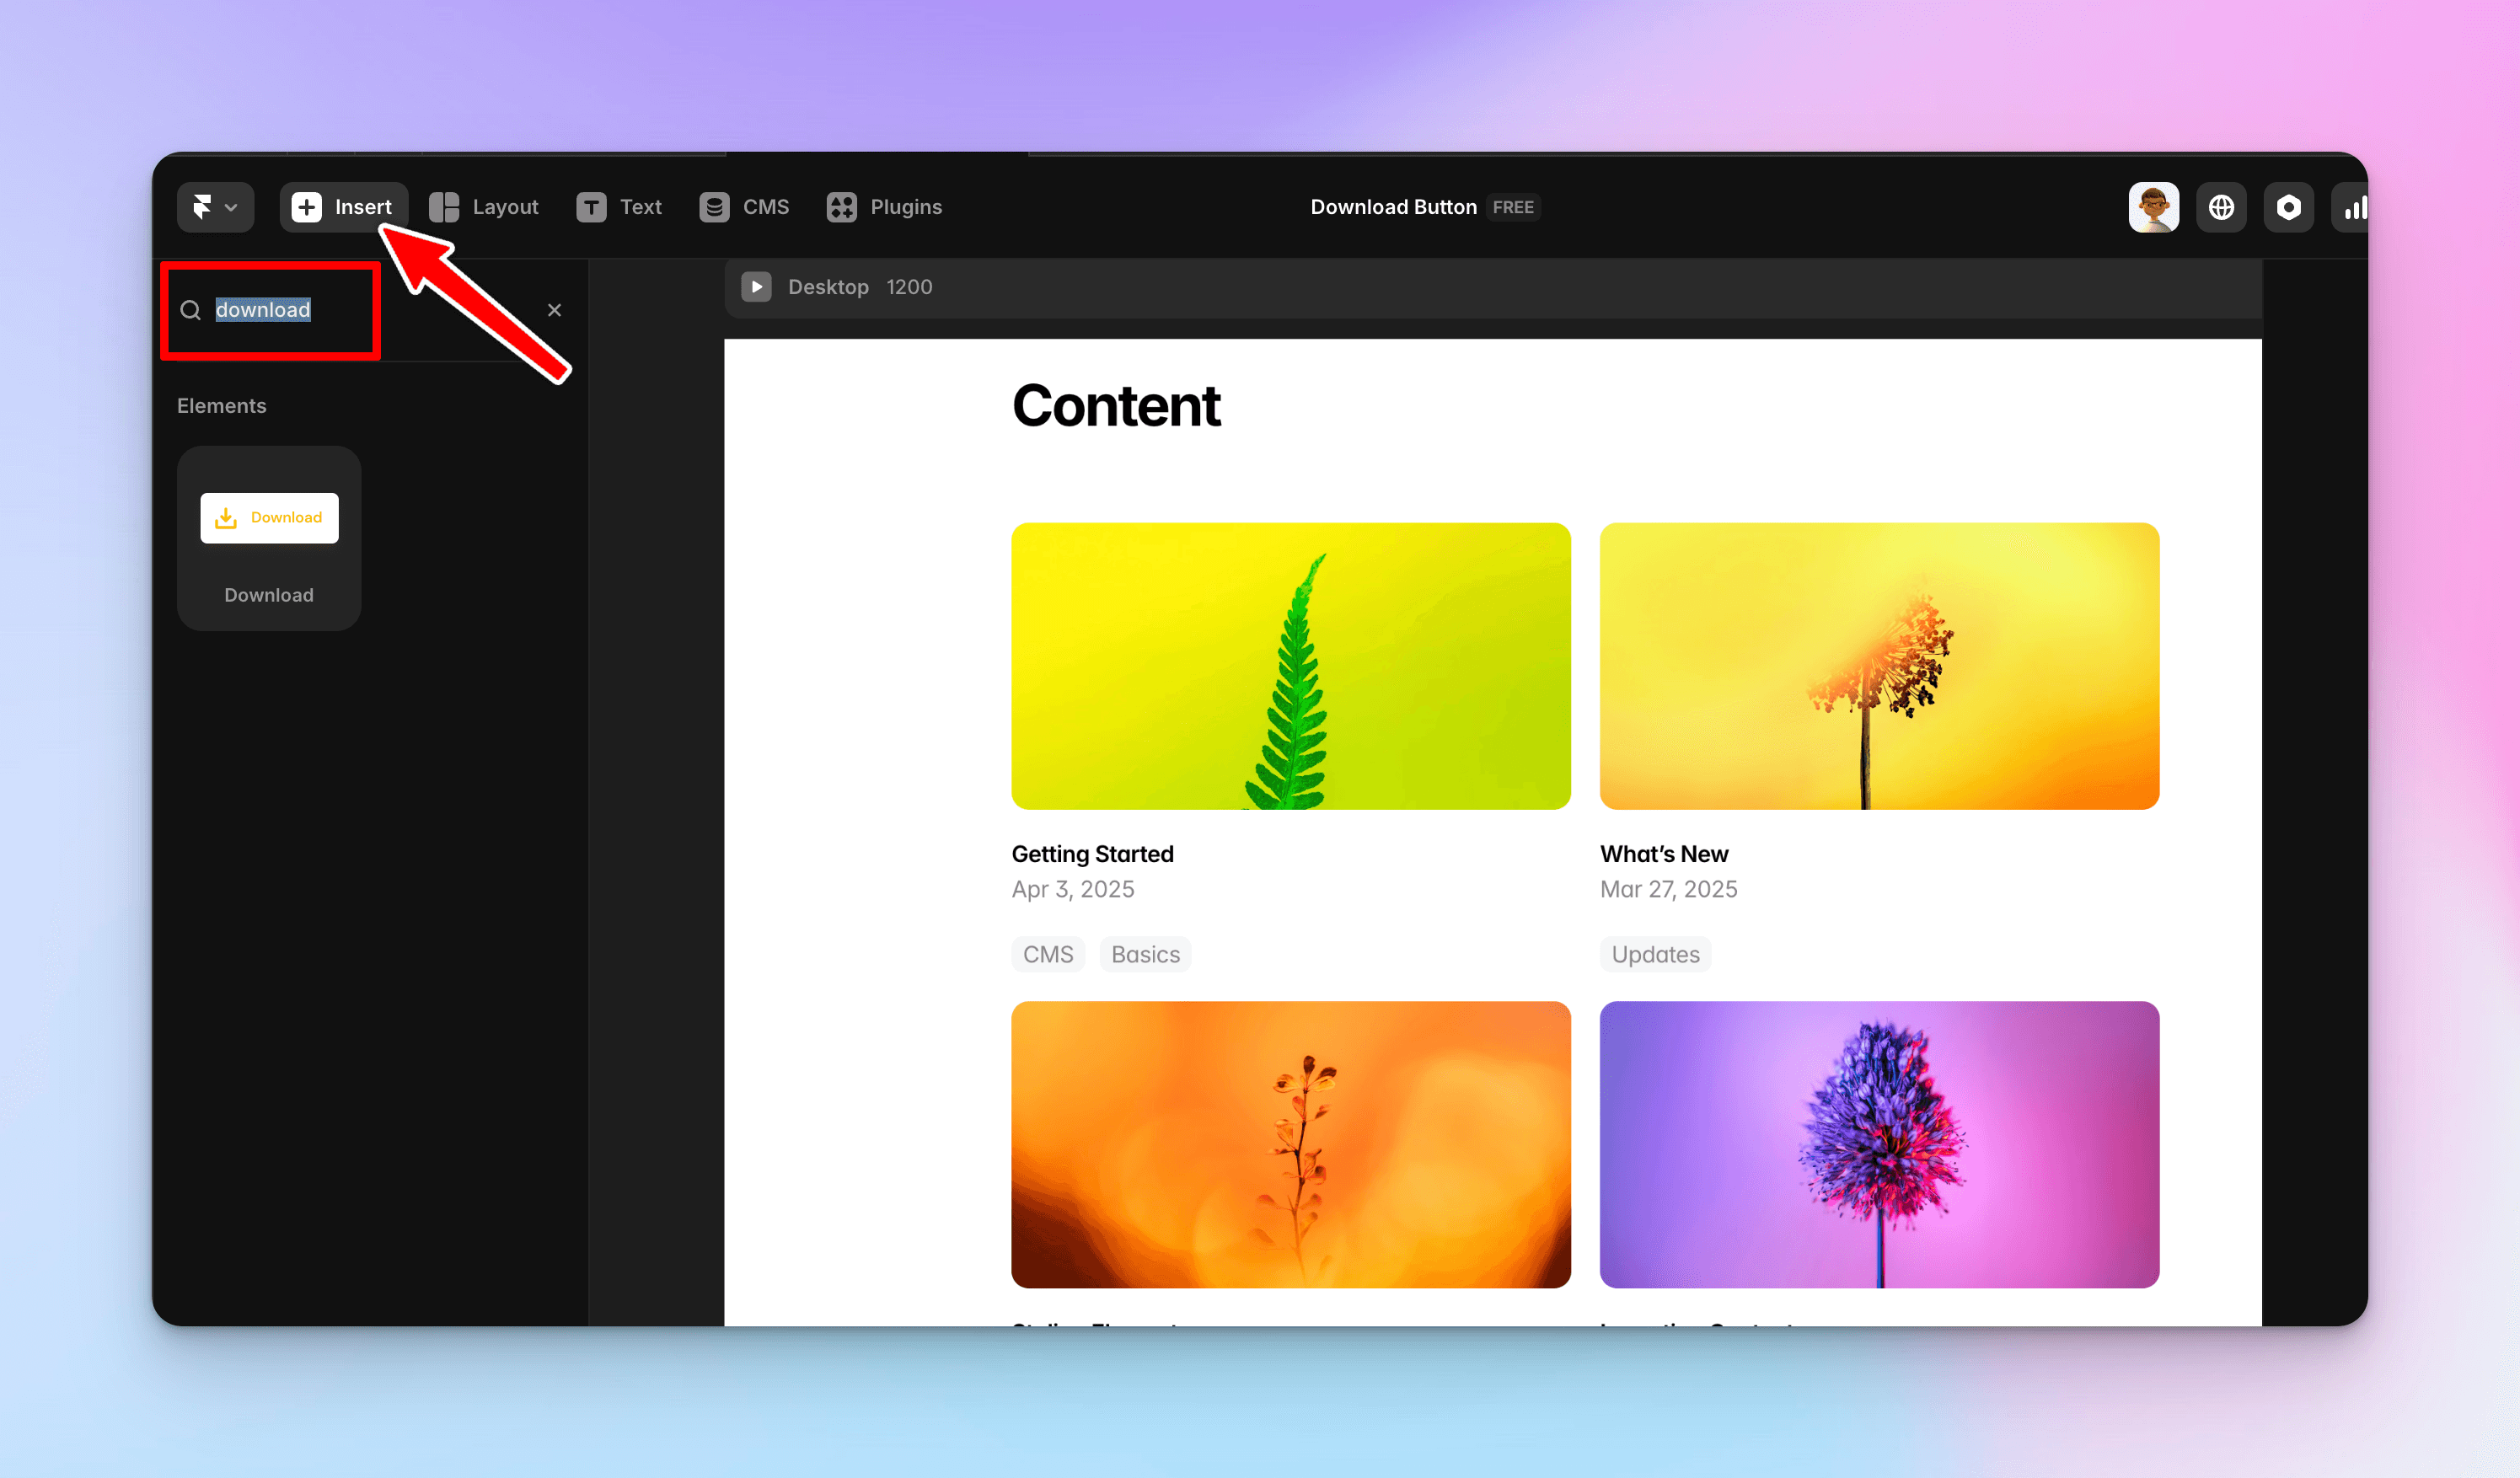
Find the ‘download’ button from the insert menu and drag onto the page
5
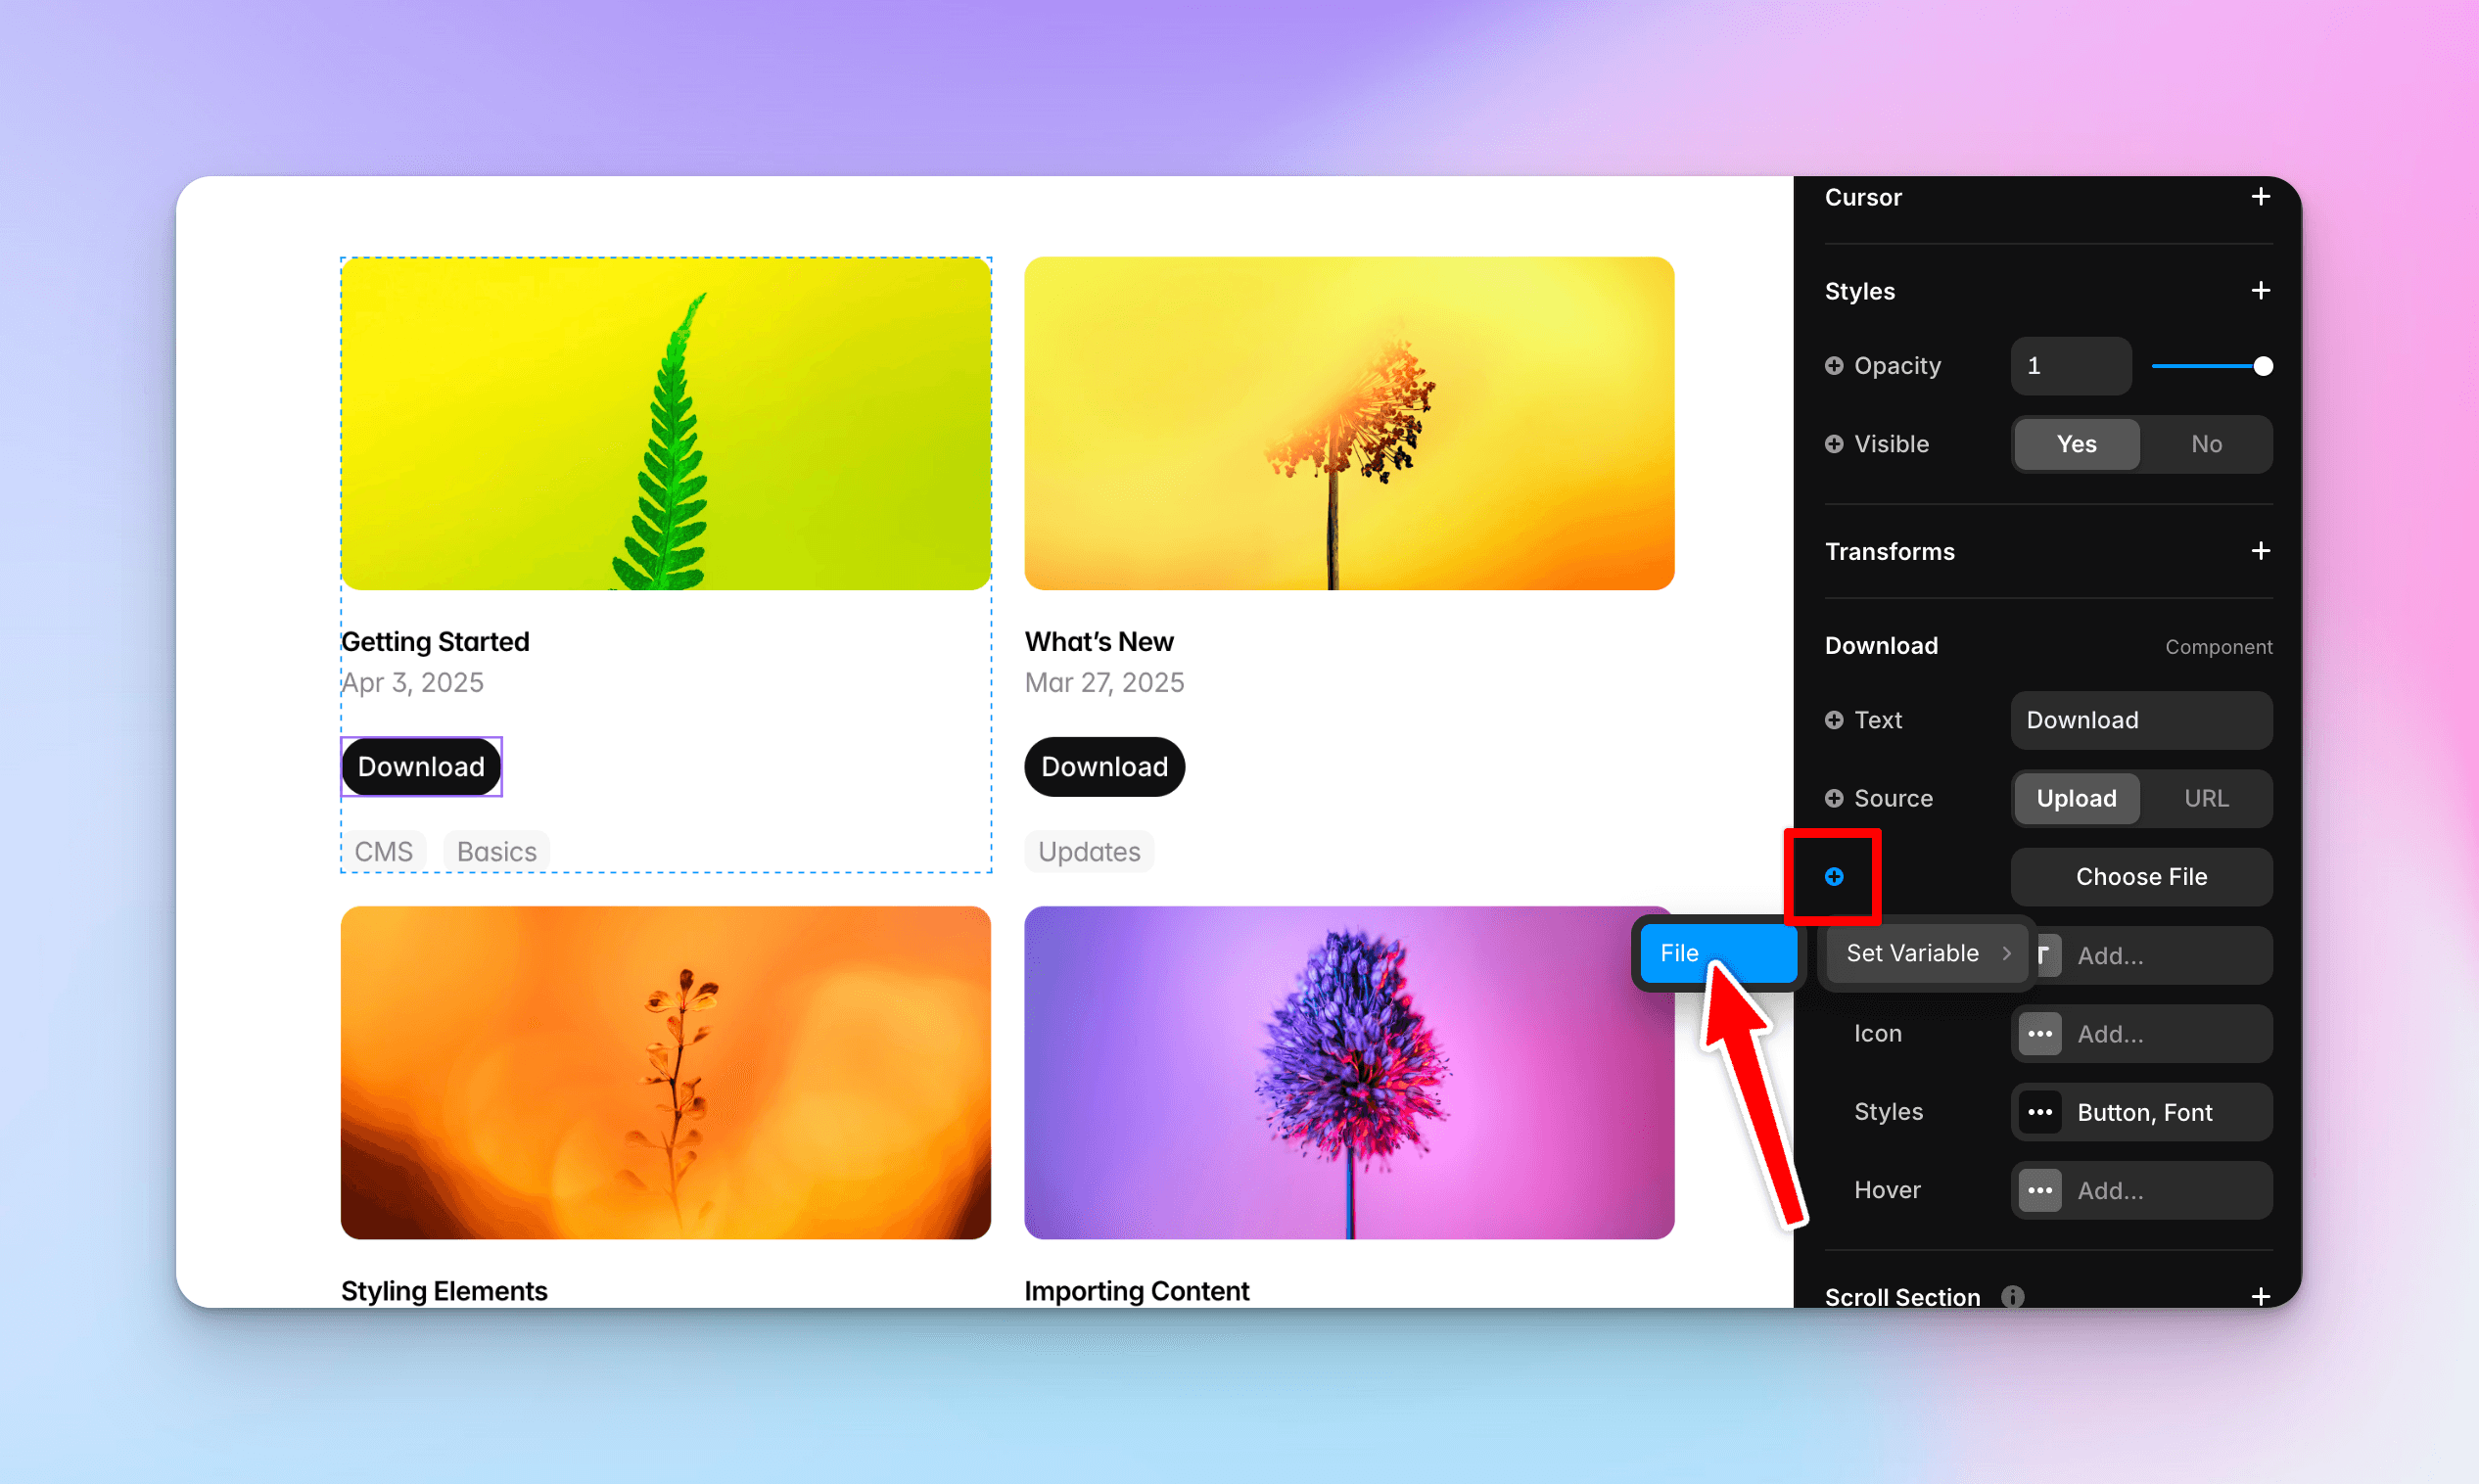
Connect the source to the ‘file’ field from the CMS
6
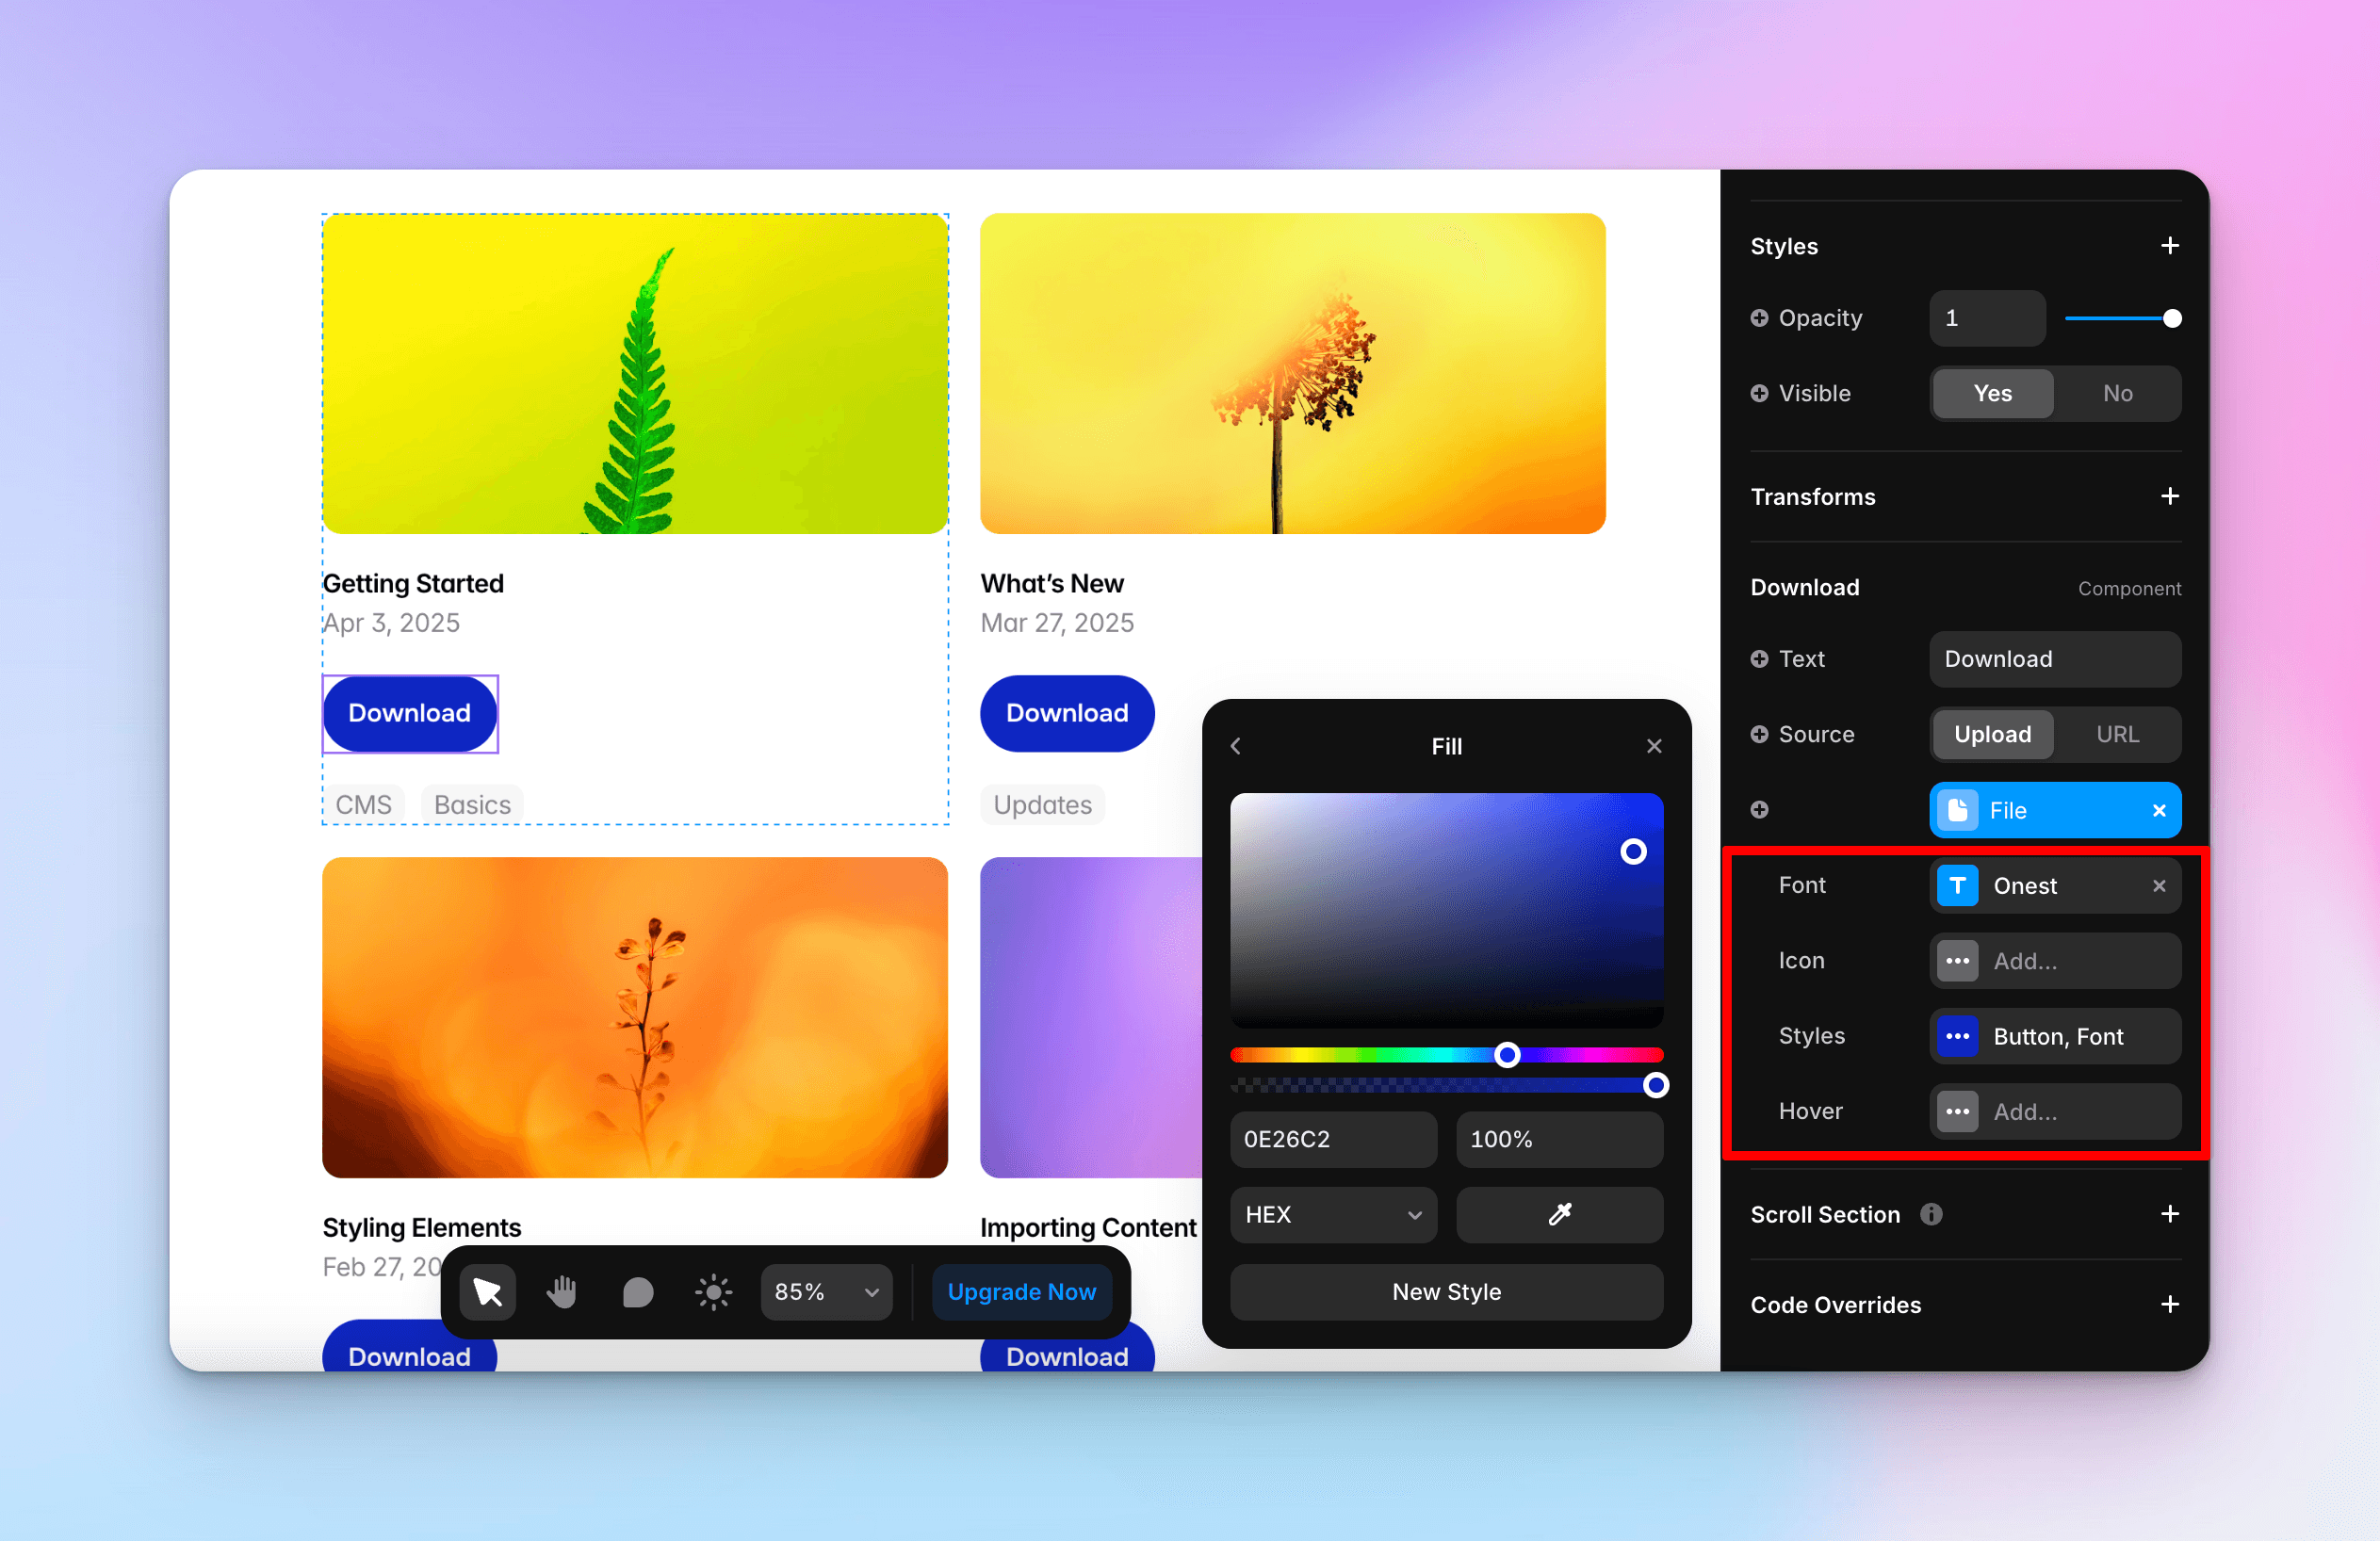
Customize the design to match your brand
Utilize the font, icon, styles, and hover controls in the download component to match your site’s style.
7
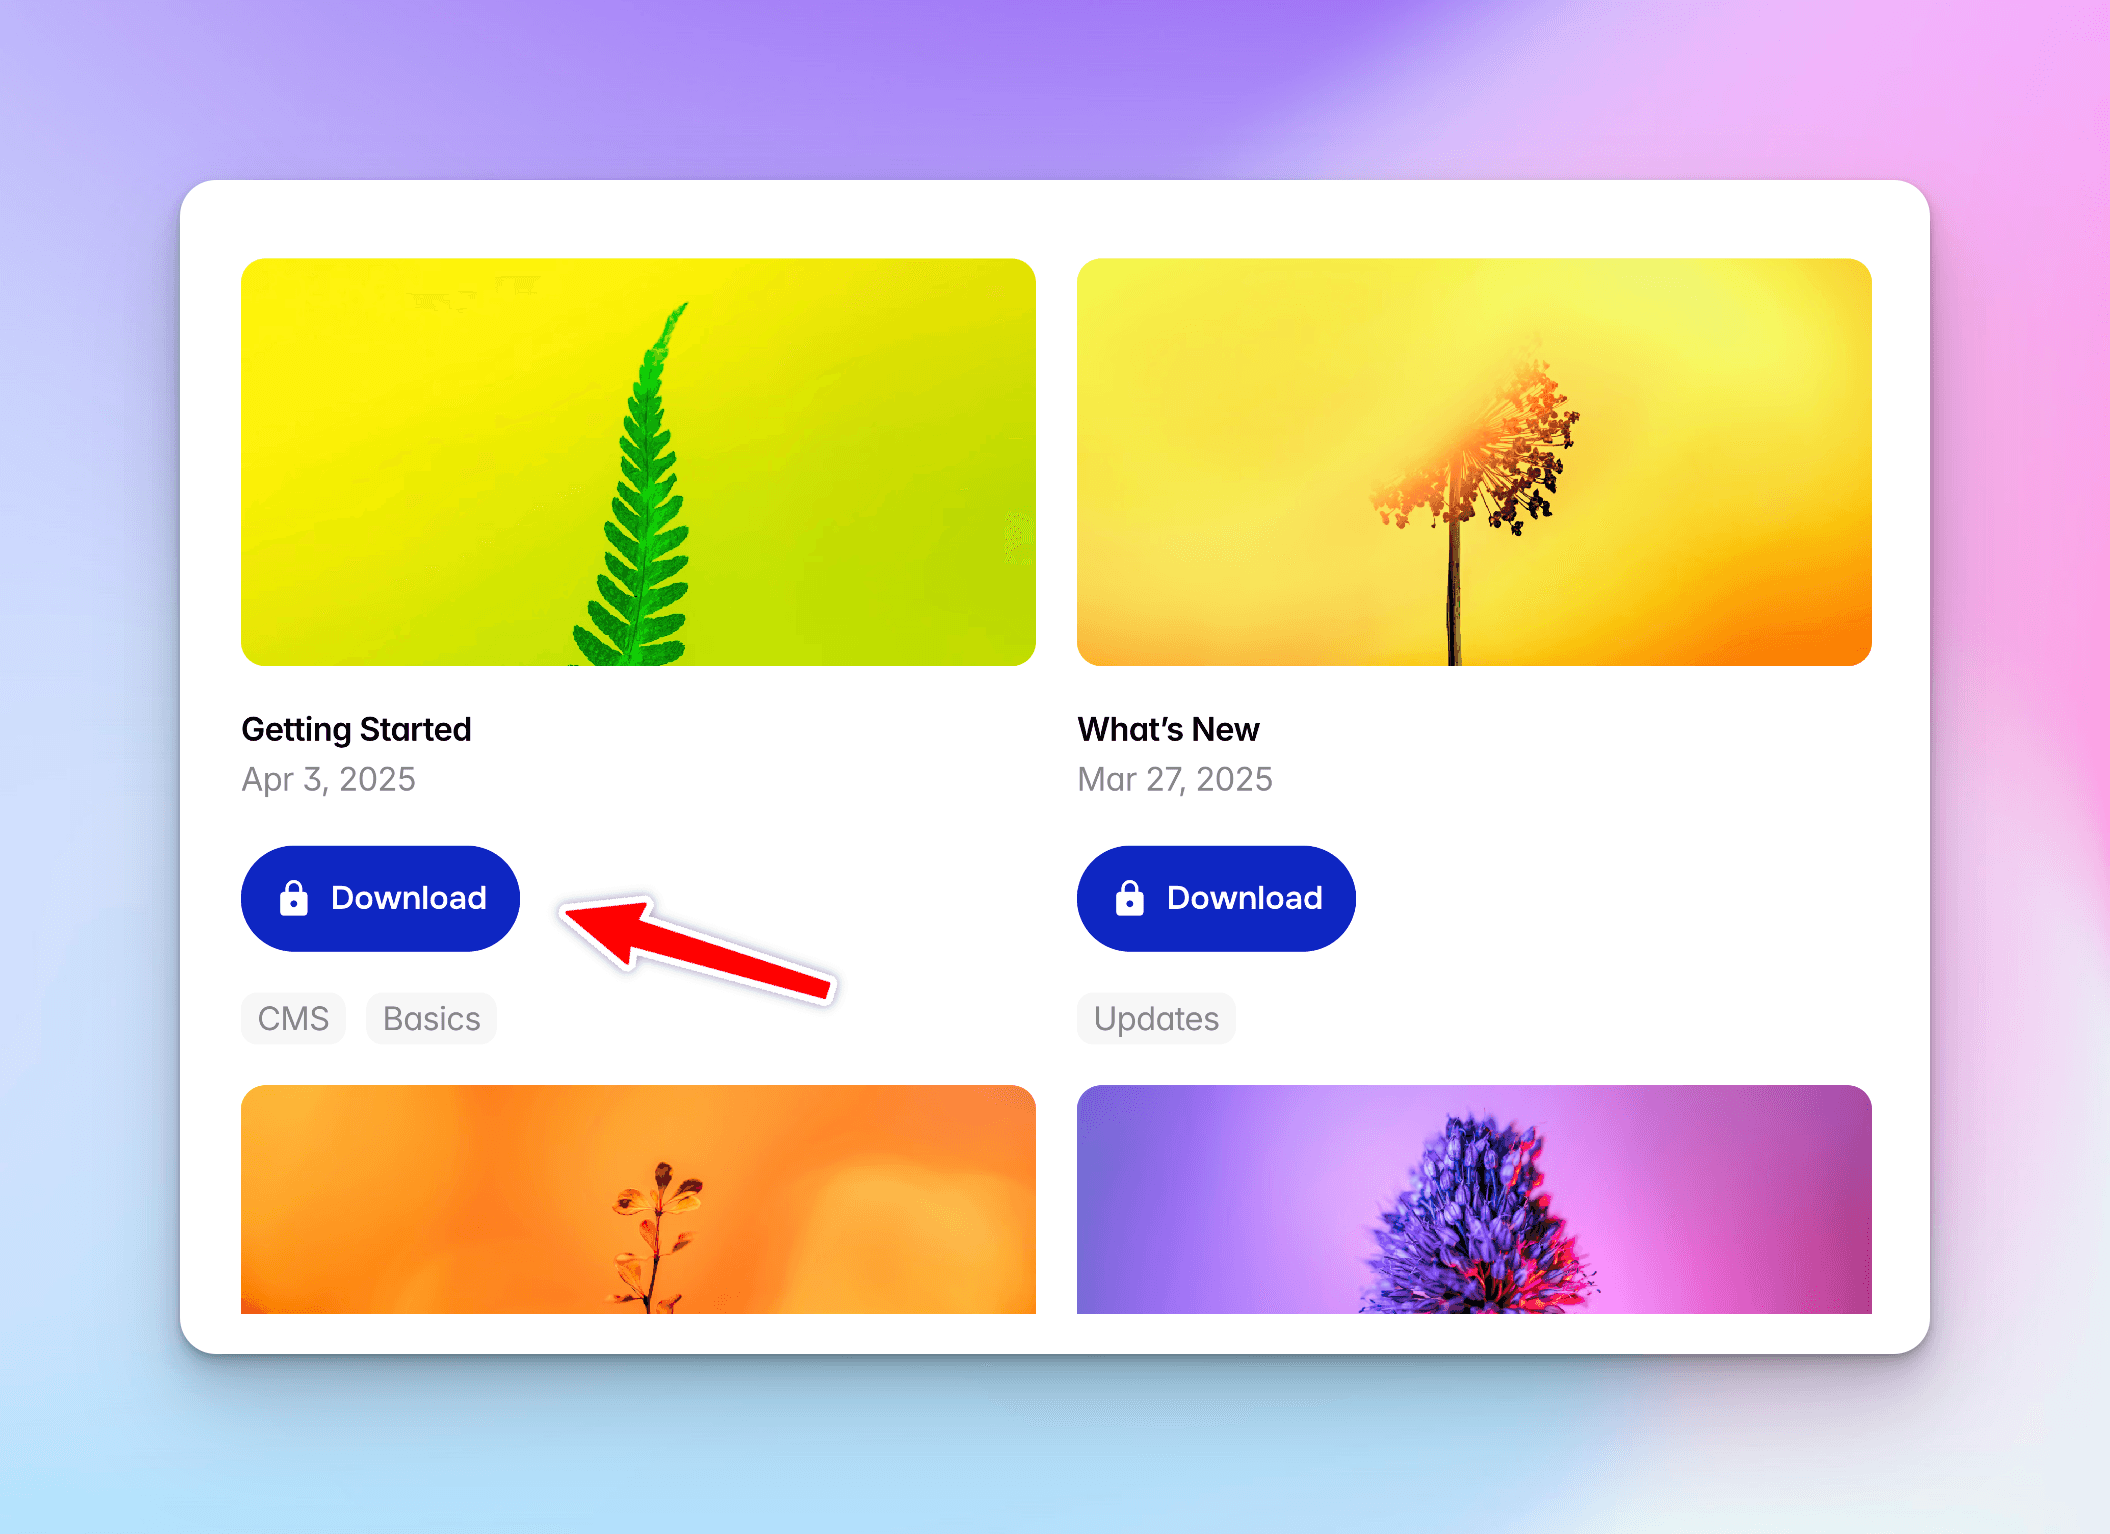
Optional: lock download button until the visitor signs up or completes a purchase
Learn how to display a locked variant on your Framer site based on user conditions—perfect for gating content behind logins, purchases, or memberships. This guide walks you through setting it up step by step.
FAQ
Can a download button be restricted to members-only?
Yes. Pair it with the locked-variant setup so access depends on sign-in, sign-up, purchase, or the condition used by your site.
Why must the CMS file field allow the correct extensions?
The collection must accept the file types you plan to attach before those files can be used by the download button.
Updated:
Need help? Talk with a human.